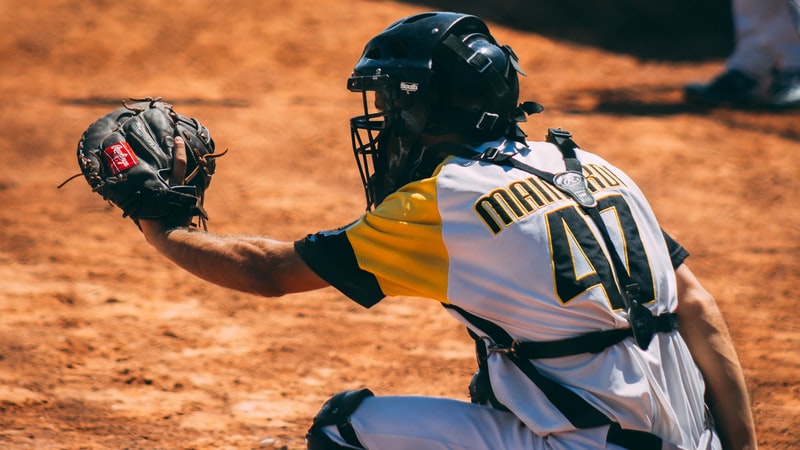
For the elite athlete, a baseball glove is more than a piece of equipment; it is an extension of the hand, a precision tool that can determine the outcome of a game-defining play.
However, even the most premium leather—such as that found in the Rawlings Heart of the Hide or Pro Preferred series—is subject to the laws of physics.
Over time, the rigors of high-velocity impact and constant use lead to leather stretching, resulting in a “floppy” glove that compromises ball security and player confidence.
This comprehensive guide serves as the gold standard for restoring the structural integrity of your Rawlings glove.
The Anatomy of Tension: Why Structural Integrity Matters
In professional baseball, the difference between a caught ball and a lead-off double is often measured in milliseconds and millimeters.
A loose glove creates “pocket lag,” where the leather does not react instantly to the ball’s impact. Furthermore, a floppy glove forces the player to compensate with excessive hand strength, leading to premature fatigue and increased injury risk.
The “Precision Lacing” Philosophy. The core of effective glove maintenance is a methodical, incremental approach. To tighten a Rawlings glove properly, one must move one hole at a time, ensuring that tension is distributed evenly across the entire structure.
This prevents the leather from warping and ensures the glove retains its intended aerodynamic and ergonomic shape.
The Professional Toolkit: Preparing for Restoration
Before beginning the tightening process, it is essential to have the correct implements. Using improper tools can mar the high-grade steerhide or kip leather that defines the Rawlings brand.
- Needle-Nose Pliers: These are non-negotiable. Pliers allow you to create the necessary leverage to pull excess slack through tight lacing holes without causing internal friction damage to the leather.
- Leather Conditioner (Minimalist Approach): While maintenance is key that on high-end models like the Heart of the Hide, you must ensure the leather is not over-oiled during the tightening process. Over-oiling can soften the fibers too much, making it impossible for the glove to hold the new tension.
- Work Surface: A clean, flat surface to ensure you can track the path of the laces without confusion.
Master the Webbing (Rawlings I-Web Focus)
The web is the most high-impact zone of the glove and often the first area to show signs of structural failure. For the popular Rawlings I-web style, the tightening process requires a specific directional strategy.
The Directional Pull Technique To fix a loose or floppy web, you should generally work from the thumb side toward the pinky side.
- Untie the primary knots at the top or sides of the webbing.
- Identify the loose area and use your pliers to create “slack” by pulling the lace from the preceding hole.
- Sequential Tensioning: Follow the lace through the web spiral, pulling it tight through each individual hole. This ensures that the tension is not just at the knot, but integrated throughout the web’s reinforcement points.
Restoring the Fingers and Palm
When a glove feels “wide,” or the fingers seem to flare outward, the structural laces across the top of the fingers have likely stretched.
Finger Alignment Strategy: To restore the “closure” of the glove, you must work from the back of the fingers toward the palm side.
- Start at the Top: Begin at the web spiral and work your way down to the base of the fingers.
- Pulling Slack: Use the pliers to pull all slack through each hole. This brings the fingers closer together, narrowing the glove’s profile and improving the “snap” when closing the hand.
- The Box Knot: Once the desired tension is achieved at the base of the fingers, redo the box knot to lock the tension in place.
Fixing the “Loose Pocket” (Heel and Palm) A common pain point for infielders is a pocket that feels “mushy.” This is often caused by loose skip laces—the hidden or semi-hidden stitches in the palm and heel.
- Identify these skip laces and use your pliers to tighten them incrementally.
- By tightening the heel and palm lacing, you reinforce the “hinge” of the glove, allowing for a more predictable and responsive break-in.
Customizing the Fit (Wrist and Heel)
A glove is only as effective as its connection to the player’s hand. If the glove feels like it might slip off during a diving play, the wrist strap requires adjustment.
The “Cross” Pattern Technique. For a more secure, professional-grade fit, many players opt to re-thread the wrist lace.
- Remove the existing knot and pull the lace out of the wrist strap holes.
- Re-thread using a “cross” pattern: This specific technique creates a more ergonomic cinch around the back of the hand, providing a tighter fit than the standard parallel lacing.
- Remove all slack before re-tying the final knot to ensure the glove remains anchored during high-intensity movements.
The Finishing Touches: Knots and Long-Term Maintenance
The final stage of tightening is securing your work. A common mistake is cutting the laces too short or using weak knots that slip under the pressure of a 90-mph fastball.
Securing the Tension
- The Square Knot: Always re-tie knots (such as the square knot) securely.
- The “Tail” Rule: Leave some extra lace (a “tail”) after the knot. This prevents the lace from slipping back through the hole over time and allows for minor adjustments later in the season without needing a full relace.
- Uniformity: Throughout the process, keep the lacing uniform. If one section is significantly tighter than another, the glove may warp or develop “dead spots” in the leather.
Expert Care for Premium Rawlings Models
As a world-class strategist, I must emphasize that high-end leather requires a nuanced approach. For Rawlings Heart of the Hide models, the leather is tanned to a specific stiffness.
Wait to Oil: One of the most critical insights to avoid over-oiling while tightening. While it may be tempting to “condition” the glove while you work, excess oil adds weight and can cause the leather fibers to slide, effectively undoing the tension you are trying to create.
Tighten first, then apply a very light layer of Rawlings-approved conditioner only to the high-wear areas of the pocket.
Enhanced FAQ: Troubleshooting Your Rawlings Glove
Q: How often should I tighten my Rawlings glove?
A: For competitive players, a “tension check” should be performed every 2–4 weeks. High-impact positions like first base and catcher may require more frequent adjustments to the web and pocket.
Q: Can I tighten my glove without pliers?
A: While possible, it is not recommended for professional-grade leather. Pliers provide the precise grip needed to pull slack through the holes without stretching the lace itself or damaging your fingers.
Q: What should I do if a lace snaps while I’m tightening it?
A: If a lace snaps, it is a sign that the leather has become brittle or has reached the end of its lifespan. In this case, partial or full relacing is required. Always use genuine Rawlings 3/16″ or 1/4″ lace to maintain the original factory specifications.
Q: My glove is still floppy after tightening. What’s wrong?
A: If the glove remains floppy after a full tightening of the web, fingers, and palm, the internal padding (the felt or plastic inserts in the thumb and pinky) may have broken down. This usually occurs after several seasons of heavy use and may require professional restoration.


