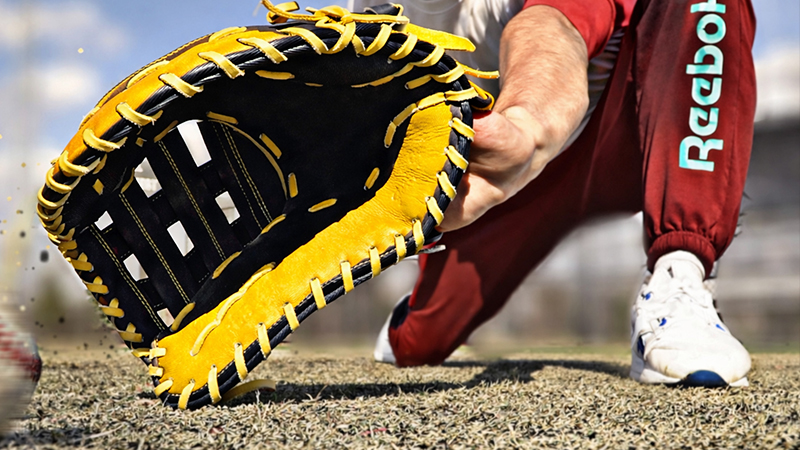
In the high-stakes world of fastpitch softball, your equipment is an extension of your body. For a first baseman, the mitt is more than just a tool; it is a vacuum for errant throws, a shield against high-velocity line drives, and the final destination for every successful out.
However, there is a recurring nightmare for players and parents alike: the “New Glove Syndrome.” You’ve invested in a premium Rawlings or Wilson mitt, but it arrives stiff, unyielding, and practically unplayable.
The transition from a “stiff-out-of-the-box” leather slab to a “game-ready” masterpiece is often misunderstood. Many turn to quick fixes that compromise the longevity of the leather, while others spend months struggling with a glove that won’t close.
Understanding the First Base Distinction: Why the Break-In Matters
Before diving into the “how,” we must address the “why.” A first base mitt is structurally distinct from a standard infielder’s or outfielder’s glove.
It lacks individual finger stalls on the exterior and features a curved, elongated shape designed for “scooping” balls out of the dirt.
The High-Volume Reality
The primary reason a first base mitt requires a specialized break-in process is the sheer volume of work it performs.
Community experts note that a first base mitt will likely see three times as many throws during a single practice as a standard fielder’s glove.
Every ball hit to the infield eventually travels to first base. This high-frequency impact means the pocket must be resilient, deep, and perfectly shaped to prevent “pop-outs”.
The Leverage Factor
Because first base mitts are larger and often made of thicker “steerhide” or “pro-stock” leather, they require significant hand strength to close when new.
A poorly broken-in mitt leads to “clanking,”—where the ball hits the palm and bounces out because the glove didn’t respond to the player’s hand movement. Achieving the right “hinge” is the difference between a saved error and a missed opportunity.
The Great Steaming Debate: Professional Convenience vs. Long-Term Integrity
When parents are in a rush—perhaps with a tournament only weeks away—the first instinct is often to head to a local sporting goods store for “glove steaming”. While this provides immediate gratification, the fastpitch community offers a stern warning.
The Case Against Steaming
Veteran players and “glove gurus” often view steaming as a short-term fix that players may eventually regret. The process uses high-temperature moisture to rapidly soften the leather fibers. However, this can also:
- Dry out the natural oils: Once the moisture evaporates, the leather can become brittle.
- Decreased Durability: The accelerated breakdown of fibers can lead to a glove that becomes “floppy” too quickly, losing its structural integrity in a single season.
- Heavy Feel: If not done correctly, the steam can saturate the internal padding, making the glove feel sluggish on the hand.
If you have already steamed the glove, do not panic. You can still salvage the process by transitioning to manual methods, but the consensus among elite players is clear: manual labor beats machine shortcuts.
The Chemistry of Conditioning: Lanolin vs. Oils
To break in a glove properly, you must soften the leather without weighing it down. A common mistake is drenching a new mitt in heavy glove oils.
The Weight Problem
Excessive oiling is a performance killer. It adds unnecessary weight to the mitt, slowing down a player’s reaction time. In a sport where milliseconds matter, a heavy glove is a liability.
The “Nursing Section” Secret
One of the most effective, community-vetted tips for leather conditioning is the use of lanolin.
- Where to find it: Interestingly, experts suggest looking in the pharmacy section for nursing mothers.
- How to apply: Focus the lanolin specifically on the “flex areas” of the glove—the points where the leather needs to bend for the glove to close.
- The Heat Hack: After applying lanolin to the flex areas and the internal palm/finger stalls, use a hair dryer to gently warm the leather. This helps the lanolin penetrate deep into the pores of the hide, softening it from the inside out without the greasy residue of traditional oils.
Manual Manipulation: Pounding, Rolling, and Shaping
Once the leather is conditioned, the physical work begins. You are essentially “training” the leather fibers to memory.
The “Catching for Pitchers” Method
There is no substitute for the real thing. The most highly recommended method for a rapid, natural break-in is having the player catch for pitchers.
- Why it works: Pitchers throw with high velocity and consistency. The repeated impact of a 60+ mph fastball into the pocket forms the leather around the ball’s exact dimensions.
- Frequency: If a player can catch for a pitcher 2-3 times a week, the glove will begin to “mold” to their hand significantly faster than through casual play.
The “Roll” Technique
Don’t just focus on the pocket; focus on the heel. The heel is the thickest part of the glove and the primary barrier to a smooth closure.
- The Motion: Turn the glove upside down with the pocket facing away from you. Grab the pinky side in one hand and the thumb side in the other.
- The Action: “Roll” the heel back and forth vigorously to loosen the base fibers. This creates a “hinge” effect, allowing the glove to snap shut with minimal effort.
DIY Tools and Creative Engineering
For those who cannot get to a ball field every day, the community has developed creative, “basement-tested” tools to simulate the break-in process.
The Plunger Mallet: A Step-by-Step Guide
While commercial glove mallets exist, you can build a high-leverage DIY version for under $10.
- Materials: A $3 plunger (wooden handle), an old softball, and spray adhesive.
- Assembly: Drill a hole halfway through the softball. Unscrew the plunger handle and spray adhesive into the hole. Screw the handle into the ball.
- Safety Feature: For “insurance,” drill a small hole in the other end of the handle and thread a shoelace through it to create a wrist loop (similar to a Wii remote) to prevent the mallet from flying out of your hand during vigorous pounding.
- The Benefit: A mallet provides significantly more leverage and force than simply throwing a ball into the glove. It allows you to target specific stiff spots while sitting on the couch watching a game.
The Dumbbell Strategy
If a mallet isn’t available, a 2lb to 3lb rubber-coated dumbbell can serve as an excellent substitute.
- The Technique: Use the weighted end of the dumbbell to pound the pocket and the hinge points.
- The Warning: Be sure to place padding underneath the glove (like a carpet or towel) to protect your floors and your wrists from the vibration. A 5lb weight may be too heavy and quickly turn the session into an exhausting workout rather than a precision shaping session.
Strategic Leverage: The “Two in the Pinky” Hack
Sometimes, the glove is simply too big or too stiff for a younger player’s hand. In these cases, you can use a professional “finger-shifting” trick to gain a mechanical advantage.
The Setup: Move the ring finger into the pinky slot, leaving the index finger sleeve empty. The Advantage: This shift puts more of the hand’s strength toward the outside edge of the glove, providing significantly more leverage to pull the mitt closed.
Once the glove is fully broken in and softened, the player can return to the traditional “one finger per stall” placement if they choose.
The Game-Ready Timeline: Setting Expectations
How long does this process actually take? If you follow a disciplined regimen of conditioning, mallet work, and high-volume catching, the timeline is surprisingly manageable.
- The “One Week” Goal: For most mid-range gloves (under $150), a dedicated week of mallet work and practice should render the glove “game-ready”.
- The “Old Faithful” Rule: Never rush a new glove into a tournament if the player isn’t confident. If the new mitt is still “clanking” balls during warm-ups, keep it for practice and use the old glove for the game.
- Storage: Between sessions, always store the glove with a ball in the pocket and a glove strap (or even a heavy rubber band) around it to maintain the shape you worked so hard to create.
Enhanced FAQ: Expert Answers to Common Concerns
1. Is the “Oven Method” safe for my first base mitt?
Some players suggest a low-heat oven treatment to soften leather. However, this is extremely risky. High heat can dry out the laces and cause the leather to crack. Stick to the hair dryer and lanolin method for controlled, safe warming.
2. Can I use a baseball mallet for a softball first base mitt?
Yes, but a softball-specific mallet (or the DIY version using an actual softball) is better. The larger diameter of the softball ensures the pocket is formed to the correct size for the 12-inch ball used in fastpitch.
3. My daughter is a “lefty” at first base. Does the break-in change?
The physical process is the same, but remember that first base is one of the few positions where being a lefty is a distinct advantage for “reach” and “angles”. Ensure you are breaking in the “scoop” area specifically for the angles of a left-handed catch.
4. What if the glove gets too floppy?
This is often a result of over-steaming or over-oiling. To prevent this, focus your conditioning only on the hinges and the palm, leaving the “fingers” of the mitt relatively stiff to provide structure for high-velocity catches.
Conclusion: The Path to Gold Glove Performance
Breaking in a first base mitt is a rite of passage for any serious fastpitch player. While the temptation of “steaming” and “quick oils” is ever-present, equipment setup lies in patience, manual work, and the right chemistry.
By utilizing lanolin for conditioning, building a DIY mallet for leverage, and putting in the volume of catch required to mold the leather, you ensure that “New Glove Syndrome” never costs your team an out.
A well-broken-in mitt isn’t just a piece of leather—it’s the confidence a player needs to stretch, scoop, and secure the win.