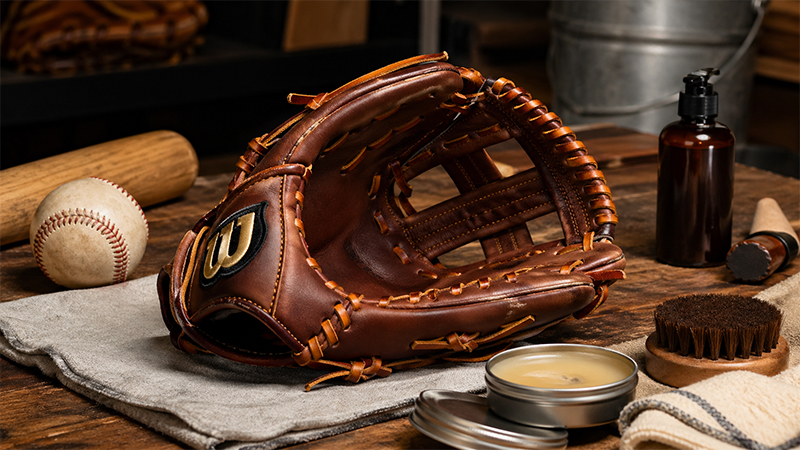
Investing in a Wilson A2000 is a rite of passage for serious baseball players. Renowned for its Pro-Stock leather and iconic designs like the DP15 and 1786, the A2000 is built to last half a decade or more if treated with respect.
However, the very quality that makes it durable—its legendary stiffness—can be frustrating for players and parents alike.
This comprehensive guide distills world-class techniques from professional glove technicians and experienced players to help you move from “stiff-as-a-board” to “game-ready” without compromising the integrity of your leather.
Understanding Your Canvas: A2000 vs. A2K vs. SuperSkin
Before you strike your first blow with a mallet, you must understand the materials you are working with. The break-in process varies significantly based on the model.
Classic Pro-Stock Leather vs. SuperSkin
- All-Leather Models: These are the traditionalists’ choice. They offer maximum longevity and a “pure” feel, but they are notoriously difficult to break in. Some players find that even after a year of oiling and mallet work, a classic A2000 can still feel stiff.
- SuperSkin (SS): This synthetic material is twice as strong as leather but half the weight. SuperSkin models are significantly easier to break in because the material is naturally more flexible than cowhide. This makes SS an excellent choice for younger players or those needing a quicker turnaround.
A2000 vs. A2K
The A2K is often considered the “elite” sibling of the A2000. It features hand-picked leather that is triple-sorted for consistency.
While an A2000 is a beautiful, top-tier glove, the A2K’s leather selection typically results in a slightly smoother break-in process, though both require significant effort to reach peak performance.
The DP15 Factor
If you are breaking in a DP15 (Dustin Pedroia model), be aware that it features a tighter wrist and smaller finger stalls.
This is designed for players with smaller hands or those who prefer a snug fit. Because the stalls are tighter, you must be careful during the break-in to ensure the glove’s interior shapes correctly to your hand without creating “palm bubbles”.
The “Water Method”: The Modern Professional’s Secret
For years, many purists avoided water. However, elite glove technicians now recognize that controlled moisture is the most efficient way to break down stiff leather fibers.
The Step-by-Step Water Break-In
- Preparation: Plan exactly how you want the glove to close (e.g., thumb-to-ring-finger or thumb-to-pinky). Stretch the laces in the fingers and web.
- The Dunk: Fill a 5-gallon bucket with room temperature or warm water. Avoid scalding hot water, as it can damage the leather’s natural oils. Submerge the glove completely for approximately 20 seconds.
- The Mechanical Break-In: While wet, the leather is 10 times more responsive to manipulation. Use a heavy mallet or a 5-10 lb dumbbell to beat the hinges, the pocket, and the heel.
- Forming the Hinges: Focus on the “break points” at the base of the thumb and the base of the pinky.
- Drying: This is the most critical stage. Dry the glove in a well-ventilated indoor space for 2 to 4 days. Never use a hair dryer or oven, as this will ruin the Pro-Stock leather.
- Post-Dry Conditioning: Once bone-dry, the leather may feel “crusty.” Apply a light layer of conditioner (like Sarna) to restore the oils.
The “Form & Friction” Method: The Aso Standard
If you prefer a non-immersion method, the traditional mallet and catch approach remains the gold standard for maintaining leather density.
Establishing Your Break Points
To get the glove ready for catch, you must establish “hinges” so it closes naturally.
- Thumb Side: Use a thick mallet to hit the break point at the base of the thumb. Push the leather down and in rather than just bouncing the mallet off it.
- Pinky Side: Repeat the process for the pinky side to create a “squaring off” of the heel, which allows for an easier closure.
- The Pocket: Place a baseball in the pocket and use the mallet to perform “rollovers,” pushing down into a towel or pad to simulate the impact of a 90mph fastball.
Forming the “Flares” and “Rolls”
Wilson A2000s are designed to hold specific shapes.
- The Flare: Many middle infielders prefer a “flared” thumb and pinky, which creates a wider surface area for quick ball transfers.
- The Roll: Roll the middle three fingers inward to create a deep, secure funnel for the ball.
Advanced Leather Care: Do’s and Don’ts
An A2000 is an investment. Mismanagement during the break-in can “kill” the leather, turning a $300 tool into a floppy, lifeless piece of hide.
The Steam Warning
Do not steam your A2000. While many retailers offer steaming as a “quick fix,” it can compromise the longevity of the leather and cause the laces to become brittle.
Pro-level leather is meant to be broken in through mechanical force and play, not chemical or heat-induced softening.
Conditioning Strategy
- Timing: Condition the glove either right out of the box or after a heavy water/mallet session.
- Products: Use lanolin-based creams or specialized products like Sarna Conditioner. Avoid heavy oils that add unnecessary weight to the glove.
- SuperSkin Care: Note that SuperSkin does not require conditioner, as it is a synthetic material. Only apply conditioner to the leather palm and lacing of SS models.
Color Considerations
- Black Leather: Be aware that the dye in some black A2000s can bleed onto your hands during the break-in process.
- Pitching Regulations: If you pitch, avoid gloves with white piping, white laces, or multi-colored logos, as these can be deemed distracting by umpires.
Enhanced FAQ: Expert Answers for A2000 Owners
Is the “JustGloves” prep or professional break-in worth it?
If you are a parent with a limited timeline, professional services like those from Ball Glove King can be a lifesaver, getting a glove “game-ready” in days.
However, for a glove intended to last 5+ years, doing it yourself ensures the pocket is custom-molded to your hand.
How do I avoid “palm bubbles”?
Palm bubbles occur when the leather layers separate because the glove is forced to close before the hinges are set. To avoid this, always focus on the hinges (thumb and pinky) before trying to squeeze the middle of the glove.
How long does it really take to break in an A2000?
Using the water method, you can have a glove ready for light catch in 4-5 days. Using the traditional “just play catch” method, it can take months of consistent use to feel truly comfortable.
Should I use shaving cream?
Old-school players have used shaving cream with lanolin since the 1960s with great success. It is a safe, mild way to soften leather if you don’t have access to specialized conditioners.
Final Verdict: The Professional Path
The Wilson A2000 is not just a glove; it’s an extension of the player. Whether you choose the aggressive efficiency of the Water Method or the patient precision of the Mallet and Catch method, the goal remains the same: a glove that closes effortlessly and retains its shape for years.
Key Takeaways:
- Start with a plan: Know your closure style (Traditional vs. 2-in-the-pinky) before you begin.
- Don’t skip the mallet: Mechanical breakdown is essential for Pro-Stock leather.
- Respect the leather: Avoid steam and excessive heat.
- Finish with catch: The last 20% of any break-in must happen on the field.