
A safe baseball field needs bases that are set in the right spots. The base anchors must also stay firm in the ground.
Weather, soil movement, and poor setup can cause base anchors to shift over time. Field crews should check each anchor before the season starts. They should make sure each sleeve is strong, straight, and in the right place.
A broken, bent, split, or rusty anchor can be a safety risk. A loose base may move when a player runs or slides into it. This can lead to falls or injuries.
The location of each base is also very important. A base set in the wrong spot can affect the game. It can also make field care harder.
This guide shows you how to install baseball base anchors the right way. You will learn how to measure the field, dig the holes, keep the anchors straight, set them in place, and care for them over time.
1: Pre-Installation Inspection & Tool Selection
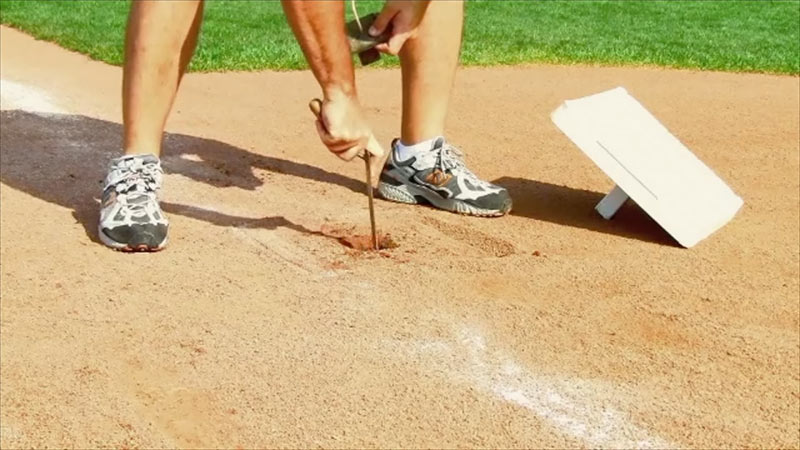
Before you start to dig, gather the right tools. You should also check the rules for your field. Good tools help you get the base spots right. A poor tape can stretch and cause errors.
Check Base Anchors Each Year
Base anchors take a lot of force during games. Rain, dirt, and ground shifts can also harm them. Cold weather can cause more issues. When the soil freezes and thaws, the ground may move. This can push a concrete block or base sleeve out of place.
Metal sleeves can also rust or crack. Dirt may fill the sleeve and make it hard to use.
Check each anchor before the season starts. Look for rust, cracks, loose parts, or signs that the anchor has moved. Early checks can help keep players safe and prevent costly repairs.
Use a Steel Measuring Tape
Use a strong steel tape to mark the field. Do not use a tape that can stretch. A small change in the tape can lead to a large error over a long space. This may put a base in the wrong spot.
A coated steel tape is a good choice. It stays firm when pulled and helps you get a more exact mark.
Check the Rules for Your Field
Baseball field sizes can change by age and level of play. Base paths and pitch spots are not the same for every league. Some fields use 60-foot base paths. Others may use 70-foot or 80-foot paths.
Check the rules for your league before you mark the field. This is key on fields used by more than one age group. Make sure you know the right base path size and pitch distance before you set your lines.
Tools You Will Need
Gather these tools before you start:
- Coated steel tape, at least 100 to 300 feet long
- Strong string line and pins
- Small level
- Digging bar and shovel
- Hand tamp
- 15-inch by 15-inch concrete anchor block forms or concrete mix
- Crushed stone or firm field clay for the base layer
- Water to help pack the soil
Having all tools ready will make the job faster and help you place each base anchor in the right spot.
2: Precision Field Layout & Measurement Protocol
Correct base spots start with straight string lines. The lines must run from home plate to each foul pole.
Set the Foul String Lines
Tie a strong string at the back point of home plate. Run it down the foul line to the foul pole. The string should line up with the outer foul edge of the pole. Do not line it up with the center of the pole.
For the first-base line, place the string on the right edge of the foul pole. For the third-base line, place it on the left edge. Pull the string tight. Snap the line a few times to remove any slack. Make sure it stays straight from home plate to the pole.
Set First and Third Base
First and third base sit in fair ground. Their outer edges should touch the string line. Measure from the back point of home plate to the back outer corner of each base.
- First Base: Measure down the first-base line to the set distance, such as 60 feet. Mark the back corner. Keep the right edge of the base against the string.
- Third Base: Measure down the third-base line to the set distance. Mark the back corner. Keep the left edge of the base against the string.
- Multi-Use Fields: Some fields are used for youth ball and softball. These fields may need a double first base. If so, install the extra anchor sleeve next to the main base spot.
Find the Spot for Second Base
Second base is set in a different way. Its center point is used for the main mark.
Follow these steps:
- Run one steel tape from the back outer corner of first base.
- Run a second tape from the back outer corner of third base.
- Cross the two tapes at the set distance. For a 60-foot field, each tape should read 60 feet at the cross point.
- Mark this point as the center of second base.
- Check the mark from home plate. Measure from the back point of home plate, through the mound, to the center of second base. On a 60-foot field, this may be 84 feet 10¼ inches.
- Check all key measurements once more. This helps make sure the field is square.
Take your time with these marks. A small error at this stage can put the bases out of line.
3: Excavation & Sub-Base Preparation
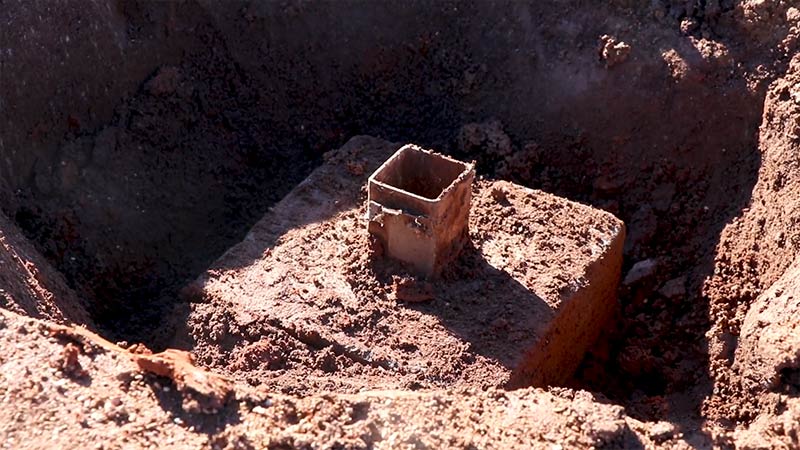
Once you mark the right spot for each base, you can start digging.
Dig the Anchor Hole
Dig a square hole at the marked spot. The hole can be about 12 x 12 inches wide. Some base anchors may need a hole up to 2 feet wide. Dig about 8 to 9 inches deep. This gives you room for the anchor and the firm base under it.
Move all loose dirt away from the hole as you dig. Do not leave piles of dirt near the work area. Loose soil can make it hard to check if the ground and anchor are level.
Make a Firm Base
The anchor needs a firm base so it does not sink or shift over time. Add about 1 to 1.5 inches of crushed stone or packed field clay to the bottom of the hole.
Spread the material so it is flat. Then pack it down well with a hand tamp. The base should feel hard, flat, and firm before you set the anchor in place.
4: Anchor Setting, Plumbing, Concrete Pouring, and Backfilling
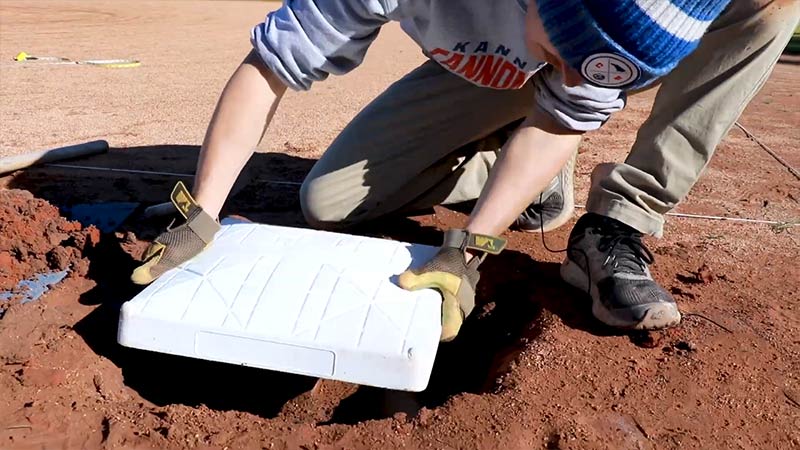
Setting the metal anchor sleeve takes care. You need to check the depth, keep it straight, and pack the soil well.
Set the Anchor Below Ground Level
Place the anchor sleeve in the center of the hole. The top of the metal sleeve should sit 0.5 to 1 inch below the ground. About 3/4 inch below the ground is a good target.
This helps protect the sleeve during field care. A nail drag or other field tool can catch a sleeve that sits too high. It may damage the sleeve or bend the tool.
Keep the Anchor Straight
Use a small level to check each side of the anchor sleeve. The sleeve should be straight up and down on all sides.
A tilted sleeve will make the base sit at an angle. One side of the base may stick up. Another side may sink too far into the dirt.
If the sleeve is not straight, add or move the stone or clay under it. Check it again with the level. Keep making small changes until the sleeve is straight.
Allow a Small Amount of Movement
A good anchor sleeve may let the base post turn a little. This small amount of movement is normal.
It helps keep dirt and clay from locking the post inside the sleeve. It also makes the base easier to take out after a game.
The post should not move too much. Too much movement may mean the anchor is loose or poorly made.
Add the Concrete and Pack the Soil
Pour concrete around the anchor. A 15-inch by 15-inch square form can be used for the concrete block. Keep the sleeve in the center. Make sure no dirt or other material gets inside it.
Let the concrete fully set. Then fill the space around the block with soil.
Add some water as you put the soil back into the hole. Damp soil is much easier to pack than dry soil. The water helps the soil settle and hold tight around the concrete block.
Add the damp soil in small layers. Pack each layer down well with a tamping bar. Keep adding and packing soil until the hole is filled and level with the rest of the field. Good packing helps keep the anchor from moving or sinking over time.
5: Quality Control and Preventative Field Care
Check the work often as you set each base anchor. Do not wait until the whole job is done.
Check the Measurements Often
Check the base distance and string line each time you move or adjust an anchor. Check them again after you pack soil around it.
Soil can push the anchor to one side. It can also make the sleeve lean. These small shifts may change the base spot.
Keep checking the distance, line, and level as you work. This helps each base stay in the right spot and meet league rules.
Check and Protect Anchors After the Season
Check each base anchor when the season ends. Look for rust, cracks, or other signs of damage. Cold weather can also move an anchor. Freezing and thawing soil may push the sleeve up or move it to one side.
Place a rubber plug or cap in each open sleeve. Keep it in place when the field is not in use. The plug helps keep out dirt, mud, and water. This can help the anchor stay clean and last longer.
Summary and Next Steps
Executing precise base anchor installation requires quality measuring tools, rigorous attention to layout geometry, and proper sub-base soil compaction.
By incorporating annual base audits, utilizing non-stretch steel tapes, setting anchors below grade, and ensuring vertical plumb, field operations teams protect athlete safety while delivering championship-quality playing surfaces.