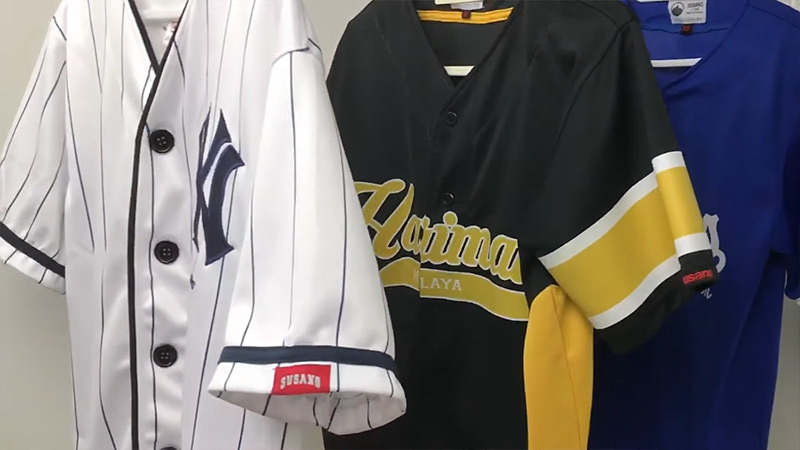
Whether you are customizing a brand-new blank jersey for game day, commemorating a championship season, or restoring a vintage classic with a memorial emblem, adding a patch transforms standard sportswear into a personalized piece of athletic gear.
However, baseball jerseys are unique garments. Unlike heavy cotton hoodies or stiff canvas jackets, modern baseball uniforms are constructed from performance-grade synthetic fabrics—typically high-performance polyester mesh, double-knit blends, or moisture-wicking spandex.
These flexible, high-tech textiles require a specialized touch. If you rely on a standard iron-on method alone, the constant stretching, sweating, and rigorous laundering of an athletic season can cause the adhesive to fail, leaving your favorite emblem peeling in the dugout.
Achieving a clean, professional-grade result requires combining the precision of heat application with the structural security of traditional sewing.
This comprehensive guide details the exact process for positioning, adhering, and stitching a patch onto a baseball jersey so it looks like it came straight from the stadium clubhouse.
Understanding Your Materials and Tools
Before heating your iron, take a moment to assemble the proper toolkit. Using the wrong temperature or inadequate protective barriers can permanently scorch synthetic athletic fabrics, ruining the jersey.
Essential Equipment Checklist
- The Jersey and Patch: Ensure your jersey is clean and dry. Check the back of your patch to confirm it has a heat-seal (iron-on) plastic backing.
- An Iron with Variable Temperature Control: You will need a dry iron capable of reaching a cotton setting (approximately 400°F) with the steam feature completely disabled.
- A Pressing Cloth: A thin piece of cotton fabric, parchment paper, or a clean white tea towel. Never apply a hot iron directly to a synthetic jersey or the face of an embroidered patch.
- Internal Barrier: A piece of heavy cardboard or a small wooden block cut to fit inside the sleeve or torso.
- Measuring Tape or Ruler: For precise placement.
- Sewing Supplies: A matching polyester thread (nylon or heavy-duty polyester works best for sports gear) and a sharp sewing needle, or a sewing machine equipped with a zigzag or whipstitch function.
Step 1: Positioning and Preparation
Precision during the layout phase separates a custom piece of apparel from a haphazard DIY project. Take your time measuring and aligning the patch before introducing any heat.
   [ Shoulder Seam ]
          |
    ( 1 to 3 Inches )  <-- Standard Sleeve Placement Zone
          |
       [ PATCH ]
1. Determining Placement
The placement of your patch depends entirely on its design and purpose, but traditional baseball uniform standards dictate specific locations:
Sleeve Emblems (Team Logos, Flags, Memorials): Position the patch on the upper outer sleeve. Measure down approximately 1 to 3 inches below the shoulder seam to ensure it sits comfortably on the arm without curling into the armpit or riding too high into the shoulder articulation.
Chest Emblems (Numbers, Anniversary Patches): Center the patch slightly above the left breast pocket area, roughly aligned with the midpoint of the team script or button placket.
2. Cleaning and Flattening the Garment
Wash and thoroughly dry your jersey before application. Fabric softeners should be avoided during this wash, as chemical residues can compromise the bond of the heat-activated adhesive.
Once dry, lay the jersey flat on an ironing board or a hard, heat-safe flat surface. Iron the target area briefly to eliminate any wrinkles or moisture trapped in the fibers.
3. Protecting the Interior Fabric
Modern baseball jerseys feature a dual-layer mesh or technical weave designed for breathability. If the heat-seal adhesive melts too aggressively, it can bleed through the fabric layers and fuse the front of the jersey to the back.
Slide a piece of clean cardboard inside the sleeve or torso directly beneath where the patch will sit. This acts as a thermal barrier and catches any stray adhesive bleed-through.
Step 2: The Heat-On Application
The heat-seal step acts as your temporary positioning mechanism and primary initial bond. It locks the patch firmly in place so it cannot shift while you sew the final reinforcement stitches.
Step-by-Step Thermal Bonding
- Configure the Iron: Set your iron to the cotton or high setting (roughly 400°F). Crucial Rule: Empty any water from the iron and turn the steam setting completely off. Moisture creates steam pockets that prevent the thermal adhesive from curing properly.
- Layer and Protect: Position your patch shiny adhesive-side down onto the prepared area of the jersey. Cover the entire patch completely with your thin pressing cloth, parchment paper, or light cotton towel.
- Apply Firm, Direct Pressure: Place the hot iron directly on top of the covered patch. Hold the iron straight down with steady, downward body weight for 30 seconds. Do not slide the iron back and forth, as this can nudge the patch out of alignment and stretch the hot synthetic fabric.
- Flip and Secure the Backing: Carefully lift the iron and pressing cloth. Turn the jersey completely inside out, exposing the backside of the fabric directly behind the patch. Press the hot iron directly against the interior fabric for another 30 seconds to activate the adhesive from the reverse side.
- Cooling Period: Remove the iron and leave the cardboard inside the garment. Allow the patch and jersey to cool completely undisturbed for at least one minute. Do not pull, stretch, or test the edges while the adhesive is still warm.
Step 3: Sewing for Permanent Security
While the iron-on adhesive creates a clean look, it is not a permanent solution for athletic wear. Synthetic baseball jerseys stretch, twist, and flex intensely during batting practice, base running, and sliding. Furthermore, industrial washing machines and sports detergents will eventually break down thermal glue.
To make your customization truly game-day proof, stitching the border is mandatory.
1. Selecting the Right Thread
Choose a high-tensile polyester thread that precisely matches the outer merrowed border color of your patch. Polyester thread offers superior UV resistance, colorfastness, and elasticity compared to standard cotton thread, allowing it to flex naturally with the jersey fabric.
2. Stitching Technique
By Hand: If you are sewing the patch by hand, use a tight whipstitch or blanket stitch. Pass your needle down through the jersey and up through the outer edge of the patch border, keeping your stitches close together (about 1/8 inch apart) and pulling the thread taut without bunching the fabric.
By Machine: If using a sewing machine, fit a fine needle suited for technical fabrics. Select a tight, narrow zigzag stitch or a specialized overcast stitch. Adjust your machine so that the swing of the needle alternates between catching the outer edge of the patch border and the jersey fabric just outside it.
Slowly guide the patch all the way around its perimeter, pivoting carefully at the corners. This locks every fiber of the border down, ensuring the patch will never lift, fray, or peel—no matter how many times it goes through the wash.
Troubleshooting Common Issues
The patch is lifting at the corners
This usually indicates uneven pressure or insufficient heat during the iron-on phase. Re-apply the pressing cloth, hold the iron firmly on the lifting corner for 20 seconds, and immediately secure it with a few anchor stitches.
The jersey fabric puckered
Synthetic fabrics warp easily under high heat. If the fabric gathered around the patch, gently mist the area with water, press it flat with the iron through your protective cloth, and let it cool under a heavy book to flatten the fibers.
Adhesive residue on the iron
If any glue leaked past the edges and touched your iron, let the iron cool completely and wipe the soleplate with a damp cloth and a mild non-abrasive cleaner.
Conclusion
Customizing a baseball jersey is a rewarding project that bridges craftsmanship and fandom.
By taking the time to precisely measure your placement, protect the delicate synthetic fabric with a thermal barrier, anchor the emblem with a controlled heat press, and reinforce the perimeter with tight stitching, you achieve a professional finish that withstands the elements of the game.
Your newly customized jersey is now ready for the grandstands, the field, or your personal collection display.