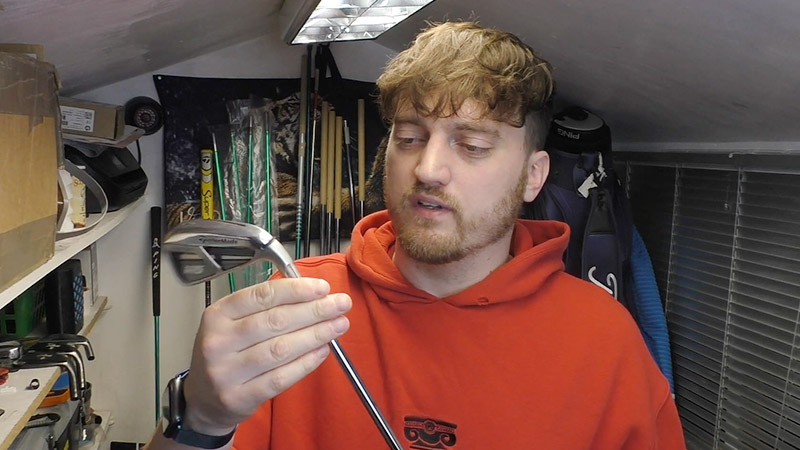
Golf, a game of precision and technique, relies on the perfect marriage of technology and skill. Behind every well-executed swing is a meticulously assembled golf club, where every component plays a vital role.
In this pursuit of excellence, the often-overlooked hero is the glue. Yes, the adhesive that secures your club head to the shaft is a fundamental element in your golf gear. But what glue is used for golf club heads?
This blog post aims to answer that question and unravel the mystery surrounding this small yet pivotal component of your clubs.
As we delve into the world of golf club assembly, we will explore the various types of glue commonly employed, their strengths, and why choosing the right adhesive can be the difference between an average and an exceptional golf club.
So, whether you’re a seasoned golfer or just starting your journey, let’s embark on this adhesive adventure to understand what holds your golf club together.
What Glue Is Used for Golf Club Heads?
The glue used for golf club heads is typically epoxy adhesive. Epoxy is the preferred choice for this purpose due to its exceptional bonding strength, durability, and resistance to environmental factors.
Golf club heads are subjected to immense forces and torque during play, and the bond between the club head and shaft must be reliable to ensure safety and performance.
Epoxy adhesives come in various formulations, but those designed for golf club assembly are often two-part epoxies, requiring the mixing of a resin and a hardener.
This mixing process initiates a chemical reaction that results in a strong and long-lasting bond. Epoxy offers a secure connection, ensuring that the club head remains attached to the shaft even under the stresses of a powerful swing.
Professional club fitters and manufacturers commonly use epoxy, making it the industry standard for golf club head assembly.
When selecting epoxy for your golf club project, be sure to choose a high-quality adhesive and follow the manufacturer’s instructions for the best results.
The Role of Glue in Golf Club Assembly
The role of glue in golf club assembly is pivotal and often underestimated by many golfers. It plays a crucial role in determining the overall performance and safety of a golf club. Here’s why the right glue is essential:
Bond Strength
Glue is responsible for securing the club head to the shaft. A strong and durable bond is crucial to withstand the forces exerted during a golf swing.
A weak bond can result in club head detachment, which poses safety risks and negatively impacts performance.
Vibration Dampening
The right glue can help dampen vibrations that travel from the club head to the golfer’s hands. This is essential for feel and control during a swing. Properly chosen glue can enhance the golfer’s connection to the club.
Club Performance
The type of glue used can influence the club’s overall performance. A secure bond ensures that energy is efficiently transferred from the golfer to the ball.
Any inconsistency or weak bond can affect the trajectory, distance, and accuracy of the shot.
Durability
Golf clubs are exposed to various environmental conditions, including temperature changes and moisture. The right glue is resistant to these factors, ensuring the bond remains intact over time.
Glue in golf club assembly is not just a trivial detail; it’s a critical component that can make the difference between a reliable, high-performing golf club and one that falls short in both performance and safety.
Golfers and club fitters should pay close attention to the choice and application of glue during assembly to ensure the best possible results.
Types of Glue for Golf Club Heads
Various types of glue are used in golf club assembly to secure club heads to shafts, each with its unique characteristics and applications. The primary types of glue for golf club heads include:
Epoxy Resin
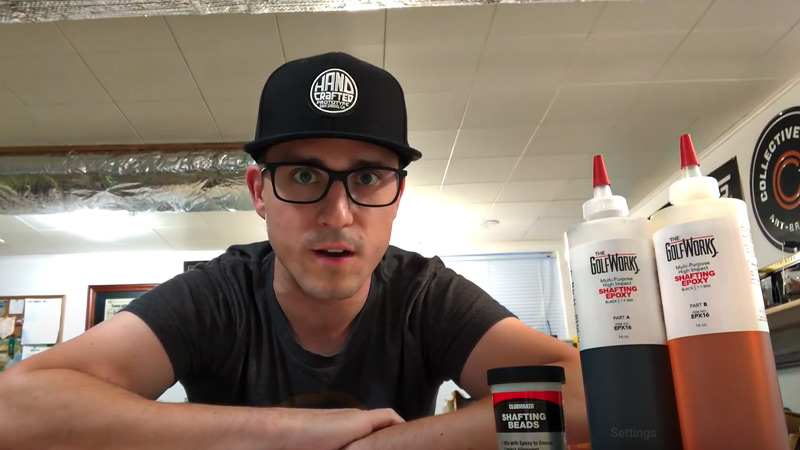
Epoxy is the most common and widely recommended glue for golf club heads. It is known for its exceptional bonding strength and durability. Epoxy comes in two parts, a resin and a hardener, which must be mixed before application.
This chemical reaction creates a strong and lasting bond. Epoxy is ideal for securing the club head to the shaft and is resistant to the stresses and forces experienced during a golf swing.
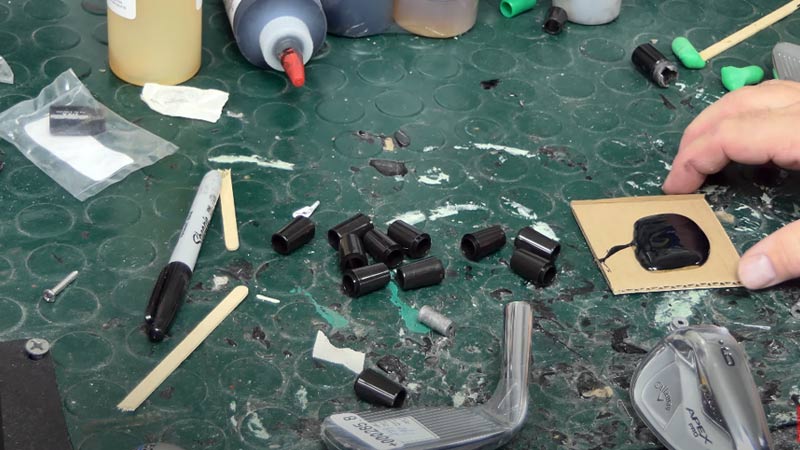
Shafting Beads
Shafting beads are small golf club adhesive pellets or beads applied to the inside of the hosel (the club head’s socket) and the tip of the shaft. When the club head is attached, the beads melt, creating a bond.
This method is less common than epoxy but can offer some advantages, such as vibration dampening and ease of disassembly.
Double-Sided Tape
Double-sided tape is often used for regripping golf clubs. While not the primary adhesive for securing club heads, it can be used in combination with other glues to temporarily secure the head during assembly.
Grip Solvent
Although not a glue for club heads, grip solvent is an important adhesive for regripping golf clubs. It helps activate the adhesive on double-sided tape and provides lubrication, making it easier to slide the grip onto the shaft.
When selecting a glue for golf club heads, epoxy is the most preferred and trusted option due to its proven strength and reliability.
However, it’s important to choose the type of golf club adhesive that suits your specific needs and project, whether it’s club assembly, regripping, or other club-related tasks.
Gorilla Epoxy for Golf Clubs
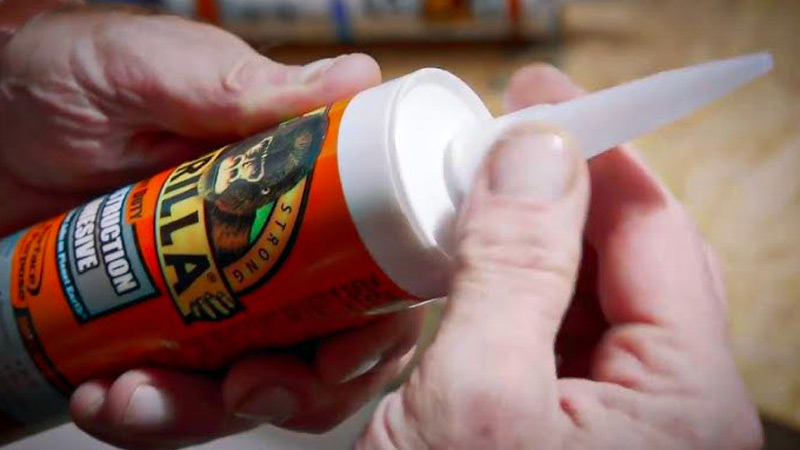
Gorilla Epoxy is a well-known brand of epoxy adhesive, and it is commonly used for various bonding applications, including golf club assembly. Here are some points to consider when using Gorilla Epoxy for golf clubs:
Strength and Durability
Gorilla Epoxy is known for its strong and durable bond. When applied correctly, it can provide a secure connection between the golf club head and shaft. This is crucial for ensuring the club’s performance and safety during a swing.
Mixing
Gorilla Epoxy, like many epoxy adhesives, typically comes in a dual-syringe dispenser, where the resin and hardener are mixed as you apply the adhesive.
Follow the manufacturer’s instructions carefully to ensure a proper mix. Consistently mix the two components to activate the epoxy’s bonding properties.
Curing Time
Epoxy adhesives, including Gorilla Epoxy, require a curing or drying time for the bond to reach its full strength.
Be patient and allow the recommended curing time as specified in the product instructions. Rushing this step can compromise the bond’s integrity.
Surface Preparation
Properly clean and prepare the surfaces that will be bonded with Gorilla Epoxy. Any residue or contamination can weaken the bond. Follow the manufacturer’s recommendations for surface preparation.
Safety
When using Gorilla Epoxy or any adhesive, follow the safety precautions provided in the product’s safety data sheet. This includes proper ventilation and avoiding skin contact or inhalation of fumes.
Professional Advice
If you’re unsure about using Gorilla Epoxy for golf club assembly, seek advice from a professional club fitter or repair specialist. They can provide valuable insights and guidance based on their experience.
Gorilla Epoxy is a reputable choice for golf club assembly due to its strength and reliability.
However, it’s essential to follow the manufacturer’s instructions and best practices for proper application to ensure a secure bond that will withstand the stresses of a golf swing.
How to Glue Golf Head to Shaft?
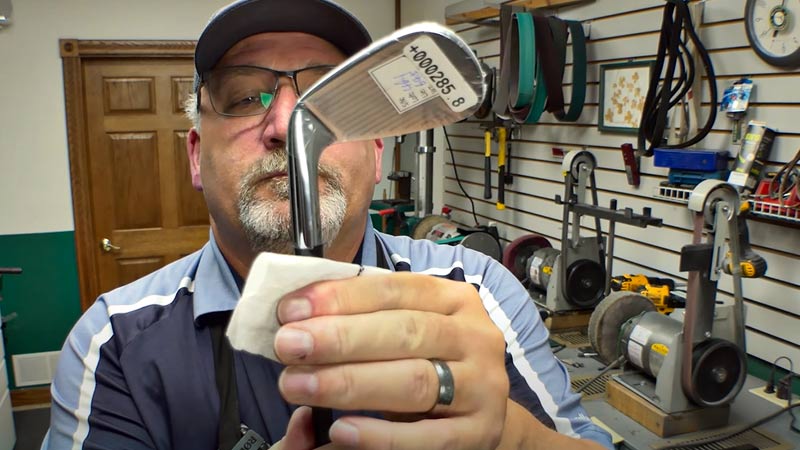
Gluing a golf club head to the shaft is a precise process that requires attention to detail. Here’s a step-by-step guide on how to golf club head glue to the shaft:
Materials You’ll Need:
- Golf club head
- Golf shaft
- Epoxy adhesive
- Mixing cups and stir sticks (if epoxy doesn’t come in a dual-syringe dispenser)
- Paper towels or rags for cleanup
- A vice or club holder
- A shaft extension plug (optional)
Step 1: Prepare Your Workspace
Ensure you have a clean, well-ventilated workspace. Place the golf club head in a vice or a club holder to keep it steady during the gluing process.
Step 2: Clean the Surfaces
Clean the inside of the hosel (the socket on the club head) and the tip of the shaft thoroughly. Any residue, dirt, or old golf club glue can affect the bond.
Step 3: Mix the Epoxy
If your epoxy comes in a dual-syringe dispenser, follow the manufacturer’s instructions to mix the epoxy. If not, mix the resin and hardener in separate cups in the recommended proportions. Stir them thoroughly.
Step 4: Apply Epoxy to the Hosel
Use a small brush or a stick to apply a thin, even layer of epoxy to the inside of the hosel. Be careful not to overapply, as excess epoxy can seep out and create a mess.
Step 5: Insert the Shaft
Carefully insert the tip of the shaft into the hosel. Rotate the shaft slightly to distribute the epoxy evenly. Ensure that the shaft is fully seated in the hosel.
Step 6: Check Alignment
Ensure the club head and shaft are correctly aligned. You may have alignment marks or graphics to guide you.
Step 7: Clean Excess Epoxy
Use a paper towel or rag to wipe away any excess epoxy that may have squeezed out during the insertion process. This will help maintain a clean and professional appearance.
Step 8: Cure the Epoxy
Allow the epoxy to cure as per the manufacturer’s recommendations. Typically, it will take several hours to set, and a full cure might take 24 hours or more. Ensure the club head remains steady during this time.
Step 9: Optional: Remove Any Excess Epoxy
Once the epoxy is fully cured, you can use a utility knife or a debonding tool to carefully remove any excess epoxy around the hosel and shaft.
Step 10: Regrip (if necessary)
If you removed the old grip or are installing a new one, follow the instructions for regripping, including using grip solvent and double-sided tape if applicable.
Remember, precision and patience are key when gluing a golf head to a shaft. Following these steps and the manufacturer’s guidelines for the epoxy you’re using will help ensure a strong and secure bond for your golf club.
FAQs
What kind of glue do you use for golf clubs?
For golf club assembly and repair, epoxy is the most commonly used glue. It provides a strong and durable bond, making it ideal for securing golf club heads to shafts and for regripping.
What glue to use for golf club head?
When assembling or repairing golf club heads, epoxy is the recommended glue. Epoxy offers excellent adhesion, ensuring a secure bond between the club head and the shaft, which is essential for performance and safety.
What is the best glue for golf club heads?
Epoxy is widely regarded as the best glue for golf club heads. It offers a strong, long-lasting bond, ensures club performance, and is trusted by professional club fitters and manufacturers for its reliability and durability.
Can I use regular household glue for golf club assembly or repair?
No, it’s not recommended to use regular household golf club head glue assembly or repair.
Golf clubs experience significant forces and stresses during play, and regular household glues are unlikely to provide the strength and durability required. It’s best to use specialized epoxy designed for golf club applications.
How do I remove old glue when regripping a golf club?
To remove old glue during regripping, you can use solvents like acetone or a heat gun. Apply the solvent to soften the adhesive or gently heat the grip with the heat gun, then carefully peel off the old grip.
Wrapping Up
In the world of golf club assembly, the golf club glue that binds your club head to the shaft is an unsung hero. It may not be as visible as a driver’s sleek design or a putter’s precision, but it plays a crucial role in your performance on the course.
The right glue ensures that your club remains intact, delivering power, precision, and reliability in every swing.
As you’ve learned in this blog post, epoxy is the go-to choice for its unmatched strength and durability. Whether you’re a professional club fitter or a DIY enthusiast, selecting the right adhesive is non-negotiable.
It’s the silent partner in your golf journey, contributing to your success in ways you might not have realized.
So, the next time you step onto the green, remember the humble glue that makes your golf club a formidable tool in your quest for the perfect swing.


