When it comes to improving your golf game, customization is key, and one essential aspect is adjusting the length of your golf club shafts.
Shortening a graphite golf club shaft is a common modification that can greatly impact your swing and overall performance on the course.
Whether you’re a seasoned golfer or a novice looking to optimize your gear, this blog post will provide you with a comprehensive guide on the art of shortening graphite golf club shafts.
You’ll learn the step-by-step process, tools required, and essential tips to ensure a successful modification.
With the right knowledge and tools at your disposal, you can fine-tune your golf clubs to match your unique playing style, ultimately gaining an edge on the green. So, stay focused.
How to Shorten a Graphite Golf Club Shaft?
Shortening a graphite golf club shaft can be done to adjust the club to your desired length or improve its performance. Here are some steps to shorten a graphite golf club shaft:
Measure and Mark the Desired Length
Start by determining the length you want to shorten the club shaft to. It’s important to measure carefully, as even a small difference in length can impact your swing and the club’s performance.
Use a measuring tape or a golf club ruler to measure from the grip end to the point where you want to cut the shaft. Mark this point with a piece of masking tape or a sharpie.
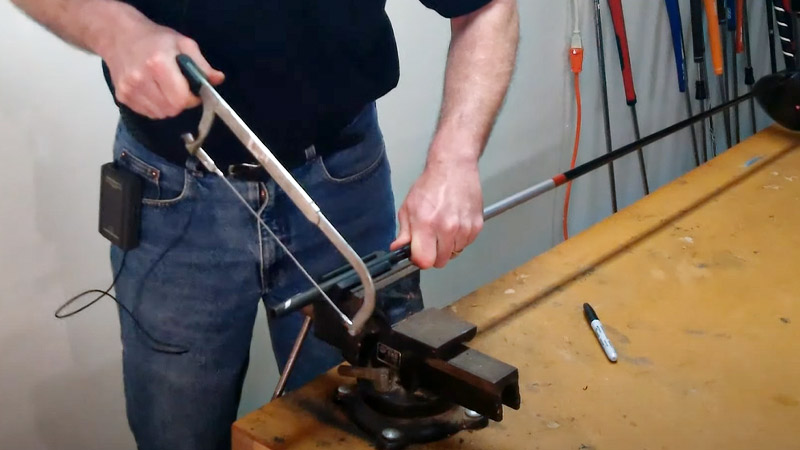
Secure the Shaft and Cut Carefully
Once you have marked the desired length, secure the club shaft in a vise to prevent it from moving during the cutting process. Use a fine-toothed hacksaw specifically designed for cutting golf club shafts.
Slowly and carefully cut the shaft at the marked point, ensuring a straight and clean cut. Be cautious not to splinter the graphite material during the cutting process.
Re-grip and Adjust the Swing Weight
After cutting the shaft, you will need to re-grip the club. Remove the old grip carefully and replace it with a new one, making sure it’s aligned correctly. When you shorten the shaft, the swing weight of the club may change.
To restore the proper swing weight, you can add lead tape to the clubhead, just below the grip, or experiment with different weighting options until it feels comfortable and balanced during your swing.
It’s essential to exercise caution when shortening graphite shafts, as they are more delicate than steel shafts.
Tools Needed for Cutting Graphite Shaft
Cutting a graphite golf club shaft requires specific tools to ensure a clean and safe modification.
Here are the essential tools needed for cutting a graphite shaft:
Hacksaw with a Fine-Toothed Blade
A hacksaw is the primary tool for cutting a graphite shaft. It’s crucial to use a hacksaw with a fine-toothed blade specifically designed for cutting golf club shafts.
This type of blade helps minimize splintering and ensures a clean cut. Avoid using a standard hacksaw blade, as it may cause damage to the graphite material.
Vise or Shaft Clamp
To securely hold the club shaft in place during the cutting process, you will need a vise or a specialized shaft clamp.
This helps prevent the shaft from moving or vibrating while you cut, which is essential for achieving a straight and precise cut.
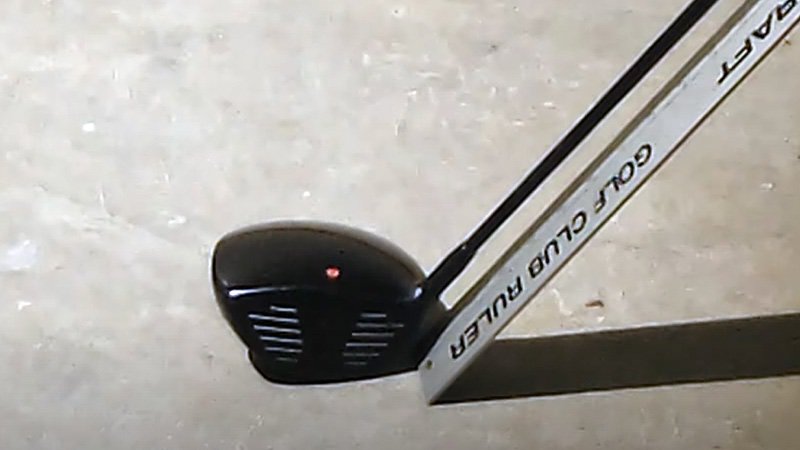
Measuring Tape or Golf Club Ruler
Accurate measurement is crucial when shortening a golf club shaft. A measuring tape or a golf club ruler is used to determine the desired length and mark the point where you want to cut the shaft.
Make sure your measurements are precise to avoid any mistakes.
Masking Tape or Sharpie Marker
Use masking tape or a Sharpie marker to mark the exact point on the shaft where you intend to make the cut.
This mark will guide you during the cutting process, ensuring that you shorten the shaft to your desired length without any guesswork.
Grip Removal and Installation Tools
When you shorten a club shaft, you will need to remove the old grip without damaging it and install a new grip at the desired length.
Grip removal tools, such as grip solvent and a grip vise clamp, are necessary for this part of the process.
Additionally, a rubber shaft holder can help protect the graphite shaft from damage during re-gripping.
Remember to exercise caution and follow safety guidelines while using these tools to avoid accidents or damage to the club shaft.
How to Cut Graphite Shaft: Step-by-Step Guide
Cutting a graphite golf club shaft is a precise process that requires care and attention to detail. Here’s a step-by-step guide on how to cut a graphite shaft:
Measure and Mark the Desired Length
Start by determining the length to which you want to shorten the graphite shaft. Use a measuring tape or a golf club ruler to measure from the grip end to the desired point.
Mark this point clearly with masking tape or a Sharpie marker. Ensure your measurement is accurate, as any errors here can affect the club’s performance.
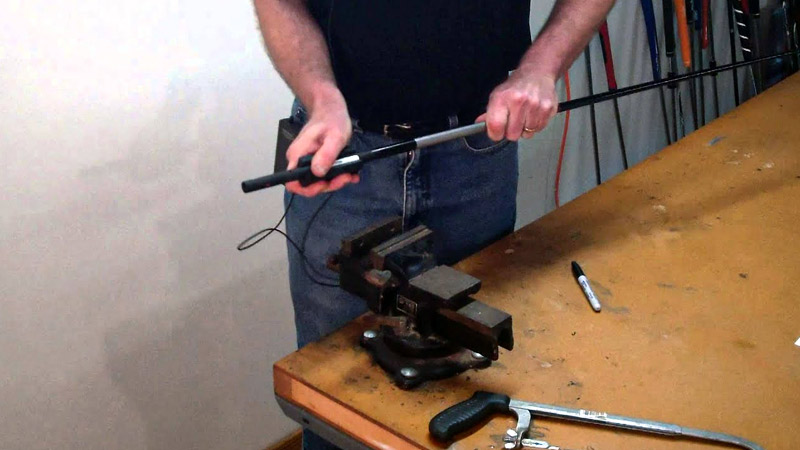
Secure the Shaft in a Vise
To prevent the shaft from moving during the cutting process, secure it in a vise or a specialized shaft clamp.
Be gentle when clamping, as excessive pressure can damage the cut graphite golf shaft material. Make sure the marked point is visible and easily accessible for cutting.
Cut the Shaft Carefully
Use a hacksaw with a fine-toothed blade designed for cutting golf club shafts. Position the saw blade on the marked point and make a slow and controlled cut.
Apply gentle, consistent pressure, letting the saw do the work. It’s crucial to keep the saw blade perpendicular to the shaft to ensure a straight cut.
Be cautious not to force the cut, as this can cause splintering or delamination of the graphite material. Continue to cut until the shaft is cleanly separated.
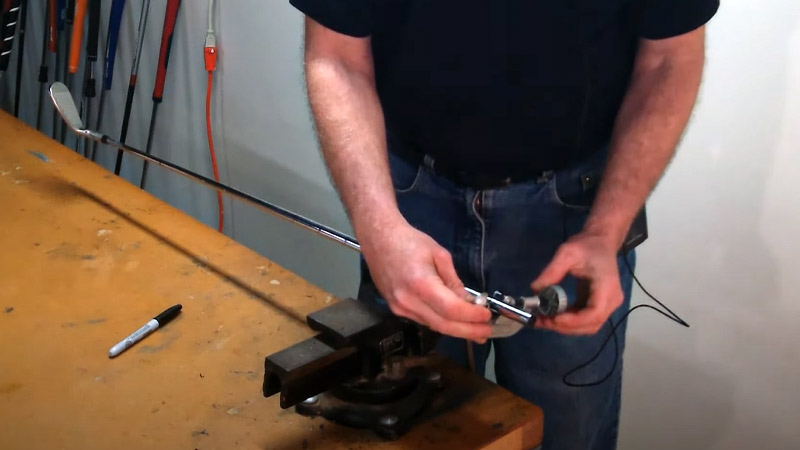
Remove Excess Material and Smooth the Edge
After cutting, you may notice a rough or uneven edge on the newly cut shaft. Use a piece of fine-grit sandpaper to gently smooth the cut end.
Sand in a back-and-forth motion, gradually removing any sharp edges or imperfections. Be gentle to avoid damaging the shaft further.
Re-Grip and Adjust the Swing Weight
Once the shaft is cut to the desired length and the edge is smooth, you will need to re-grip the club. Remove the old grip carefully, and install a new one, making sure it’s properly aligned.
Additionally, when you shorten a graphite shaft, the club’s swing weight may change.
To restore the correct swing weight, you can add lead tape to the clubhead, just below the grip, or experiment with different weighting options until it feels comfortable and balanced during your swing.
Take your time and be patient during each step of the process to ensure that the club shaft is cut accurately and that the club’s performance is not compromised.
Tips for a Successful Graphite Golf Shaft Shortening
Shortening a graphite golf shaft can be a delicate operation, and ensuring success requires attention to detail and precision.
Here are some tips to help you achieve a successful graphite golf shaft shortening:
Accurate Measurement and Marking
Precision is key when shortening a graphite shaft. Measure the desired length carefully using a measuring tape or a golf club ruler. Double-check your measurement to ensure it’s accurate.
Use masking tape or a sharpie marker to mark the cutting point on the shaft. Even a small mistake in measurement can lead to an irreversible error, so take your time during this step.
Proper Tools and Techniques
Ensure you have the right tools for the job, such as a fine-toothed hacksaw designed for cutting golf club shafts. Avoid using a standard hacksaw blade, as it can splinter the graphite.
When cutting, make slow and controlled movements, keeping the saw blade perpendicular to the shaft. Applying excessive force or rushing through the process can result in damage to the shaft.
Vise or Shaft Clamp
Use a vise or a shaft clamp to secure the club shaft in place during the cutting process.
This minimizes vibrations and movement, ensuring a clean and straight cut. When clamping, be careful not to overtighten, as excessive pressure can damage the graphite material.
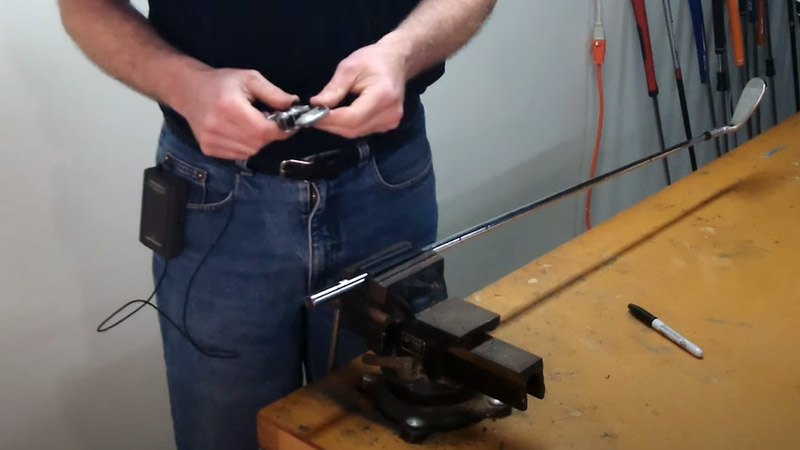
Smooth and Finish the Cut
After cutting, the cut end of the shaft may have rough or uneven edges. It’s important to gently sand the cut area with fine-grit sandpaper to smooth it out.
This step not only enhances the aesthetics but also prevents any potential discomfort when gripping the club.
Re-Grip and Balance the Club
Once the shaft is cut to the desired length, remove the old grip and install a new one. Ensure the grip is properly aligned and securely attached.
Additionally, remember that shortening the shaft may alter the club’s swing weight.
To maintain the right balance and feel, you can add lead tape to the club head, just below the grip, or experiment with different weighting options until it suits your swing preferences.
Always remember that working with graphite shafts requires a gentle touch and attention to detail.
If you’re not confident in your ability to perform the shortening correctly, it’s advisable to seek the assistance of a professional club fitter or a local golf shop.
Testing and Fine-Tuning
Testing and fine-tuning are essential steps in various processes, including product development, software design, and even personal skills improvement.
Here are some elaborated points on how to approach testing and fine-tuning effectively:
Define Clear Objectives and Metrics
Before you begin testing and fine-tuning, it’s crucial to have a clear understanding of your goals. Define what you want to achieve and establish measurable metrics to assess success.
Whether it’s improving the performance of a software application, optimizing a manufacturing process, or enhancing your golf swing, having specific objectives and quantifiable criteria will guide your efforts.
Collect Data and Feedback
In most cases, testing involves gathering data and feedback. This could be user feedback for a software application, performance data for a manufacturing process, or self-assessment of your skills in a particular area.
Be thorough in collecting this information, as it will serve as the basis for making informed decisions during the fine-tuning process.
Iterate and Make Incremental Changes
Fine-tuning is a process of continuous improvement. Instead of attempting to make massive changes all at once, take an iterative approach. Implement small, incremental adjustments based on the data and feedback you’ve collected.
This allows you to observe the impact of each change and make further refinements as necessary. It’s a methodical way to avoid unexpected negative consequences.
Test in Different Conditions and Scenarios
To ensure the robustness of any improvement or fine-tuning, it’s essential to test under various conditions and scenarios. For software, this might involve testing in different operating systems and browsers.
In golf, it might mean practicing your swing in various weather conditions or on different courses. This diverse testing helps identify potential weaknesses and ensures your solution or skill is versatile.
Document and Track Progress
Keeping detailed records of your testing and fine-tuning efforts is vital. This documentation includes what changes were made, the outcomes observed, and the timeline of adjustments.
Over time, this record becomes a valuable resource for future reference and can assist in diagnosing issues or setbacks that may arise later.
Involve Stakeholders and Seek Expert Guidance
In many cases, involving relevant stakeholders and seeking expert guidance can be immensely beneficial.
Users, clients, or colleagues can provide valuable insights, and experts in the field can offer valuable advice and best practices. Collaboration and external perspectives can lead to more effective fine-tuning.
Maintain Flexibility and Patience
Fine-tuning can be a time-consuming process, and it may involve some trial and error. Be patient and flexible in your approach.
Adapt to unexpected findings and be open to revising your strategy as necessary. Success often comes through persistence and a willingness to learn from both successes and setbacks.
Testing and fine-tuning are critical for achieving optimal results in various endeavors.
FAQs
How to cut a graphite golf shaft at home?
Cutting a graphite golf shaft at home involves using a saw with a fine-toothed blade.
Measure the desired length, mark it on the shaft, secure it, and carefully cut it. Be sure to wear safety glasses and take precautions to prevent splintering.
How to shorten a graphite driver shaft?
To shorten a graphite driver shaft, follow a similar process as cutting a graphite shaft.
Measure, mark, and secure the shaft, then carefully cut it to the desired length using the appropriate tools and safety precautions. Remember, cutting affects the club’s performance, so be cautious.
What should I do if I make a mistake while cutting the shaft?
If you make a mistake, it’s challenging to reverse. Take your time with measurements and cuts to avoid errors. Seek professional help if unsure.
Will shortening the shaft affect the club’s performance?
Shortening the shaft can alter the club’s swing weight and potentially affect your performance. You can adjust the balance using lead tape to compensate for the change.
What’s the role of re-gripping in the process of shortening a graphite shaft?
Re-gripping is necessary to ensure a comfortable and secure grip. Remove the old grip carefully, align it, and install a new one. It also helps maintain the club’s aesthetics and functionality.
Wrapping Up
Shortening a graphite golf club shaft is a skill that can significantly enhance your performance on the golf course.
By following the steps outlined in this guide, you’ll be able to tailor your clubs to match your playing style and physical characteristics.
Whether you’re seeking more control, precision, or just a better fit, the knowledge and techniques provided here will empower you to make these modifications with confidence.
Remember, precision and patience are key, so take your time to measure, cut, and adjust your clubs to perfection.
By mastering this aspect of club customization, you’ll be one step closer to achieving your best game yet, and ultimately, to enjoying every round of golf to the fullest. Thank you so much.


