Breaking in a new catcher’s mitt can be a bit of a challenge, but with the right techniques it can be easy. Here are some tips to help you get started: Start by warming up the mitt before trying to break it in.
Use a hammer or another blunt object to hit the ball softly and slowly at first. As the mitt becomes more soft, start hitting the ball harder and faster, until it feels comfortable to you. Make sure to keep practicing regularly, so that your mitt is broken in properly and feels like an extension of your arm.
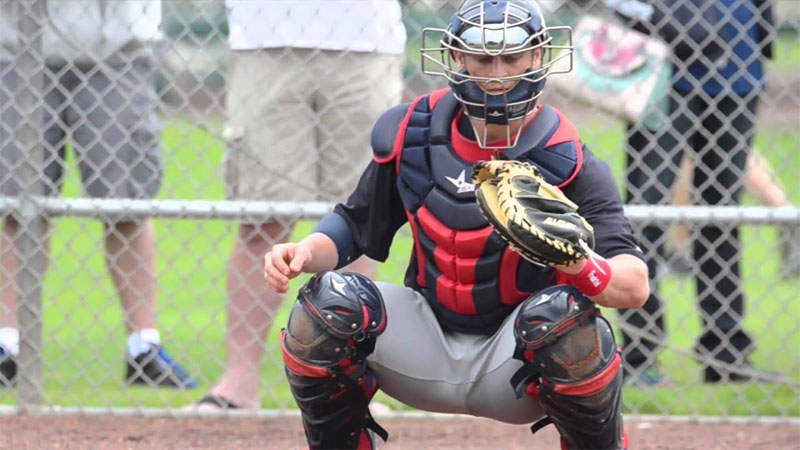
Source: catching-101
How To Break In A Catchers Mitt
If you are looking to improve your batting skills, then breaking in a catcher’s mitt is a good way to do so. By using a hitting drill and practicing with a rubber ball, you can help break the mitt in properly.
You can also install a catcher’s mitt training aid to make the process even easier.
Put A Hitting Drill To Use
If you want to improve your batting skills, it’s important to use a hitting drill. A hitting drill can help you learn how to hit the ball squarely and far. When using a hitting drill, make sure that you practice at different speeds and angles.
You don’t have to be a professional player to benefit from using a hitting drill. You can find a hitting drill that is suitable for your skill level at most sports stores or online retailers. Make sure that you practice with the drill regularly so that your batting skills continue to improve.
When practicing with the drill, always keep a positive attitude and stay focused on your goals. Remember that practice makes perfect – so don’t give up on your batting skills until you reach your goals! Use ahitting drills as part of your training regimen to help improve your batting skills quickly and easily!
Use A Rubber Ball To Practice
When breaking in a catcher’s mitt, start with a rubber ball. It’s important to have the right technique when practicing so you don’t injure your hand. Work on getting your hand into a comfortable position and use the rubber ball to help improve your grip.
Be patient and work through the different stages of practice until you perfect your technique. Practice regularly so that you can develop muscle memory and improve your catching abilities. If you ever experience pain or discomfort while catching, stop and consult with a trainer or doctor before continuing to practice.
Make sure to store your catcher’s mitt in a safe place where it will not get damaged, such as in a glove case or cabinet. You can also display it proudly on your mantelpiece or in another prominent spot in your home. Put away your catcher’s mitt after each use and dry it off thoroughly before storing it away again so it is ready for the next practice session.
Be patient and keep at it – eventually, you will become a master catcher!
Break In The Mitt By Hand
Breaking in a catcher’s Mitt is not as hard as you may think. You can do it by hand if you are patient and consistent. If you find that the Mitt isn’t fitting well or it is too tight, then it is time to take steps to break it in.
The key to breaking in your Mitt is using the right techniques and being persistent with them. When stretching the Mitt, make sure you keep tension on all of the seams so that they stretch evenly. Try different positions while stretching the Mitt and pay attention to how it feels when you put pressure on each seam.
Use a ball of rubber or some other object to help smooth out any bumps or unevenness on the surface of the Mitt before trying it out again. Be patient with your Mitt and allow it time to stretch and conform to your hand properly. Make sure you use a clean, dry mitt after every use and store it in a cool place away from sunlight or moisture.
Install A Catchers Mitt Training Aid
To get your catcher’s mitt training started, you will need a few supplies. A catcher’s mitt is an essential tool for catching balls in baseball and other sports. If you don’t have one, now is the time to purchase one.
When choosing a catcher’s mitt, make sure it fits comfortably and has enough room to grip the ball securely. You can install a catcher’s mitt training aid by yourself or with help from a friend or family member. Some simple installation instructions are included with most catcher’s mitts.
Once installation is complete, it’s time to start practicing your skills! Practice makes perfect – so take your time and enjoy catching those balls! Remember: safety is always number one when it comes to playing sports with your pet, especially baseball and other ball-related activities!
In addition to using a catcher’s mitt, try some of these other tips for successful ball play with your feline companion: -Set up batting cages indoors or outdoors-Encourage tosses in the air-Play fetch games outside.
Warm Up The Mitt
Breaking in a new mitt can be difficult, but it is essential to make the transition from novice catcher to professional. There are a few things you can do to ease your transition into catching like practicing with the same glove every day.
By working on your batting technique, you will develop muscle memory and improve your accuracy. When you first get the mitt, it may feel stiff and uncomfortable. Don’t give up! You should also take breaks after each practice session so that your hand doesn’t get too sore.
If you find that the mitt is becoming too sweaty or sticky, rinse it off and let it air dry before using it again. Finally, remember to keep your hands warm by wearing gloves during cold weather games or practices sessions. Make sure to store your new mitt neatly so that it does not get damaged in between uses.
Hold The Mitt Against Your Hand
To break in a new catcher’s mitt, hold it against your hand for about seconds each day. When you first get the glove, try to use it as if it were your own hand. Do not force the mitt onto your hand–you’ll only make it harder to break in.
Soaking the mitt in warm water before use will help soften the leather and make it easier to grip. Another technique is to rub mineral oil into the palm of your hand and work the oil into the leather fibers. Finally, dry the glove completely before use by placing it on a towel or cloth and folding it over several times.
If you’re having difficulty breaking in the glove, talk to your coach or trainer about what you can do next. Be patient; breaking in a new catcher’s mitt takes time but is well worth it when you have a durable glove that will protect you from injury!
Throw A Ball Into The Mitt
Breaking in a new catcher’s mitt is an important step in becoming a better player. Start by throwing the ball around the house, to get used to the feel of it. When you’re ready, take your new mitt to a park or field and start practicing catch drills.
Before long, you’ll be catching balls like a pro!
Repeat Steps 2 And 3 Until The Mitt Feels Stretched
When breaking in a catchersmitt, follow the same steps every time to ensure that it stretches and conforms to your hand. Start by stretching the fabric of the mitt over your fist.
Then use your other hand to push down on the fabric at the base of your thumb so that it stretches further. Keep pushing down until the fabric feels stretched and spongy. Once it feels like it’s ready, you can grip objects with the mitt and start using them.
Be sure to stretch the mitt before each use and store it in a cool, dry place when not in use. Repeat Steps and until the mitt feels comfortable and fits snugly.
Conclusion
If you want to break in a catchersmitt, it is best to do so when the glove is completely dry. Moisture can cause the leather to stretch, making it easier for you to put your fingers through the mesh. Besides break-in, you should steam your Catcher’s Mitt sometime.