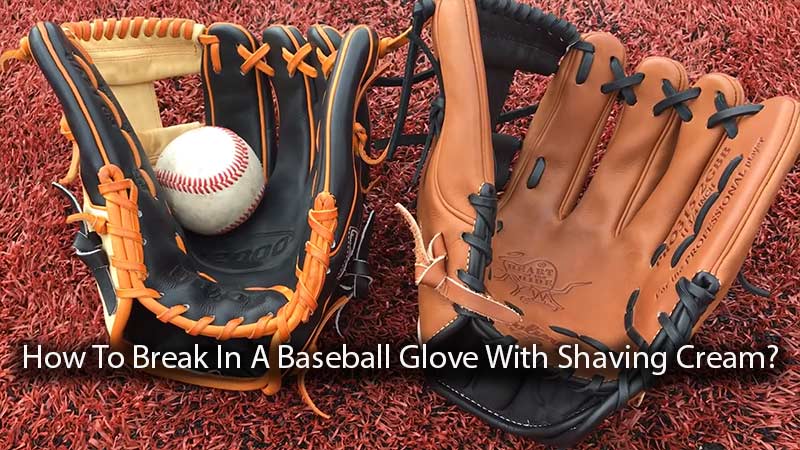
The crisp sound of a ball hitting the pocket of a well-seasoned glove is one of the most iconic sounds in sports.
However, for many players, the journey to that perfect “pop” begins with a stiff, unyielding piece of leather that feels more like a wooden board than a performance tool.
For decades, a specific dugout tradition has been passed down through generations of ballplayers: the shaving cream method.
While modern technology has introduced various oils and specialized conditioners, the use of lanolin-based shaving cream remains a cornerstone of traditional glove maintenance.
To achieve a professional-grade break-in that balances flexibility with structural integrity, one must understand the intersection of leather chemistry and mechanical shaping.
The Chemistry of the Break-In: Why Lanolin Matters
Leather is a biological material that requires moisture to maintain its tensile strength and elasticity. When a glove is manufactured, the hide is treated and dried, often resulting in a rigid product that requires “opening” the pores of the leather.
The reason shaving cream became a standard tool for this process is not the soap itself, but a specific ingredient: lanolin.
Lanolin is a natural oil secreted by sheep that acts as a powerful emollient. In the context of leather care, lanolin serves as a moisturizer that penetrates the fibers of the hide, softening them from the inside out without the aggressive chemical breakdown associated with synthetic oils.
It is vital to distinguish between traditional foam and modern alternatives. Modern shaving gels and aerosol creams often contain alcohol, fragrances, and harsh detergents designed for human skin but devastating to bovine leather.
These additives can strip the natural oils from the glove, leading to premature cracking and dry rot. To execute this method successfully, the choice of material must be a classic, foamy cream—such as Barbasol Thick & Rich—which specifically lists lanolin as a key component.
The Essential Toolkit for a Professional Result
Before beginning the process, gather the following materials to ensure the glove is treated with the precision required for high-level play:
- Lanolin-based foamy shaving cream: Ensure it is a foam, not a gel.
- A baseball or softball: This will serve as the “mold” for your pocket.
- Clean microfiber cloths or paper towels: For controlled application and wiping excess.
- A glove mallet or a weighted bat: For mechanical softening of the hinges.
- Large socks, heavy-duty rubber bands, or a leather strap: To maintain tension during the shaping phase.
Step I: Controlled Application and Moisture Management
The most common mistake in glove maintenance is over-saturation. A baseball glove is a precision instrument; adding too much moisture can make the leather heavy, soggy, and prone to losing its shape.
1. The “Less is More” Approach
Begin by applying a quarter-sized dollop of the shaving cream onto a clean cloth rather than directly onto the glove.
This allows you to control the distribution. Focus your efforts on the “hinges” (the areas where the glove naturally folds) and the pocket. These are the zones that require the most flexibility for catching and securing the ball.
2. Targeted Distribution
Rub a thin, even layer into the leather. You should see the foam disappear as the leather absorbs the lanolin. Avoid coating the entire glove, especially the finger stalls or the back of the glove, as these areas need to remain somewhat rigid to provide support.
Excessive moisture in the finger stalls can lead to internal rot, which is impossible to fix once it begins.
3. Immediate Cleanup
Once the cream has been worked into the leather, use a fresh cloth to wipe away any white residue or excess foam. The goal is to leave the lanolin behind, not the soap.
Step II: The Curing Process
Leather requires time to stabilize after a moisture treatment. This phase is often where players become impatient, leading to long-term damage.
The 24-Hour Rule
After application, the glove must air-dry in a cool, dry environment. This typically takes between 12 and 24 hours. During this time, the lanolin settles into the fibers, and any water content in the foam evaporates.
The Danger of Artificial Heat
A critical warning that cannot be overstated: Never use a microwave, oven, or hair dryer to speed up the drying process. High heat causes the natural collagen fibers in the leather to shrink and become brittle.
This results in “leather burn,” where the glove becomes permanently stiff and eventually cracks under the stress of play. Direct sunlight should also be avoided, as UV rays can bleach the leather and accelerate drying to a damaging degree.
Step III: Forming the Pocket and Setting Memory
A glove is only as good as the pocket it provides. Without proper shaping, a soft glove is merely a “pancake” that will struggle to retain the ball.
1. Creating the Mold
Place a baseball or softball exactly where you want the “sweet spot” of your pocket to be. For middle infielders, this is often shallower; for outfielders, it may be deeper toward the webbing.
2. The Wrap Technique
Fold the glove naturally around the ball, ensuring the “pinky” and “thumb” of the glove are aligned according to your personal preference (e.g., thumb-to-middle-finger or thumb-to-pinky). Secure this shape tightly using a large sock, a belt, or heavy rubber bands.
3. Setting the Memory
Leave the glove wrapped for a full 24 hours. This forces the leather to develop “memory,” meaning it will naturally want to return to this closed position even after the wraps are removed.
Step IV: Mechanical Breakdown and Manual Flexing
Once the leather is moisturized and shaped, it requires physical force to break the stiff bonds of the hide.
1. Pounding the Leather
Using a glove mallet or a baseball, repeatedly strike the pocket and the base hinges. This mimics the impact of thousands of catches in a fraction of the time. The goal is to create a “hinge” that allows the glove to snap shut effortlessly.
2. Manual Manipulation
Insert your hand into the glove and work the leather by opening and closing it repeatedly. Flex the leather in multiple directions to ensure that the lanolin has reached the inner layers of the hide. This step customizes the glove to your unique hand strength and grip style.
Step V: The Final Integration Through Play
While the shaving cream and mallet provide a head start, there is no substitute for the final stage of a professional break-in: active play.
Spend at least 15 to 20 minutes playing catch with a partner. The velocity of a real throw forces the leather to stretch and conform to your hand structure in a way that static shaping cannot replicate. This stage effectively “seals” the break-in, ensuring the glove moves as an extension of your body.
Modern Perspectives: The Risks of Traditional Methods
While the shaving cream method is a storied tradition, it is important to acknowledge the evolution of leather manufacturing. Modern gloves, particularly high-end models from manufacturers like Rawlings and Wilson, use different tanning processes than the gloves of the mid-20th century.
Manufacturer Warnings
Many top-tier manufacturers now explicitly advise against using shaving cream. The primary concern is that modern shaving formulas, even those with lanolin, contain detergents that can break down the adhesives used in the glove’s construction or weaken the laces over time.
Warranty Considerations
For players investing in professional-grade “Pro Preferred” or “A2K” models, it is worth noting that using non-approved substances can sometimes void the manufacturer’s warranty.
If the leather fails or the laces snap prematurely, the manufacturer may attribute the damage to the use of household chemicals rather than leather-specific conditioners.
Professional Alternatives: The Rise of Specialized Conditioners
For those who want the softening benefits of the lanolin method without the risks associated with soap and detergents, the industry has developed dedicated solutions.
Sarna Conditioning Cream
Products like Sarna Conditioning Cream are designed specifically for the pH levels of high-end baseball leather. These conditioners provide the same moisturizing benefits as lanolin but without the harsh additives found in shaving cream. They are engineered to penetrate the hide deeply, offering a “greaseless” finish that maintains the glove’s weight and responsiveness.
Long-Term Glove Maintenance Strategy
Breaking in a glove is only the first step. To ensure a glove lasts for multiple seasons, a consistent maintenance schedule is required:
- Seasonal Cleaning: Use a damp cloth to wipe away dirt and salt (from sweat) after games. Salt is an abrasive that dries out leather quickly.
- Humidity Control: Store the glove in a climate-controlled environment. Avoid leaving it in a hot car or a damp equipment bag.
- Annual Conditioning: Apply a dedicated leather conditioner once or twice a year, focusing on high-wear areas like the pocket and the lacing.
- Lace Maintenance: Check the tension of your laces regularly. Loose laces can lead to a “floppy” glove that loses its structural integrity during high-velocity plays.
Conclusion
The “shaving cream method” is more than just a trick; it is a testament to the enduring relationship between players and their equipment.
By focusing on the lanolin content and adhering to a strict process of application, drying, and mechanical shaping, you can transform a stiff factory glove into a game-ready asset.
However, the professional standard is always evolving. While the old-school method remains effective for many, players should weigh the traditional appeal of shaving cream against the safety and warranty protections offered by modern, dedicated conditioners.
Regardless of the substance you choose, the key to a perfect glove is patience, consistency, and plenty of time spent on the field playing catch.