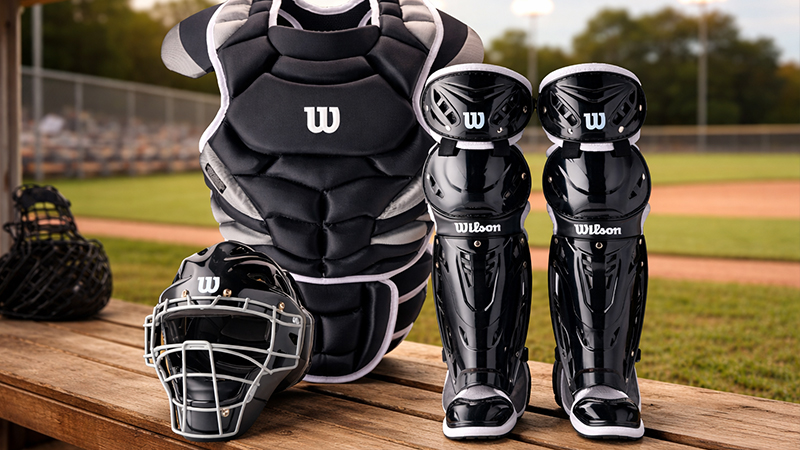
For any ballplayer, the tools of the trade are more than just plastic and foam—they are a significant financial investment and the primary line of defense against high-velocity pitches and home-plate collisions. As a catcher, your role is demanding, and your gear bears the brunt of that intensity.
Failing to properly maintain your equipment leads to premature wear and tear, which ultimately forces you or your parents to spend more money on replacements sooner than necessary.
This comprehensive guide explores why gear care matters and provides a step-by-step blueprint for washing and maintaining every piece of your “tools of ignorance.”
Why Catcher’s Gear Maintenance Matters
Before diving into the “how,” it is essential to understand the “why.” Taking care of your equipment off the field is just as critical as your performance on it. There are three primary benefits to a dedicated maintenance routine:
Extends Equipment Lifespan
Regular cleaning and proper storage reduce the rate at which materials degrade, ensuring your gear lasts through multiple seasons rather than just one.
Enhanced Protection and Comfort
Well-maintained gear stays functional. When padding is clean and straps are resilient, the equipment fits better and provides the maximum level of impact absorption intended by the manufacturer.
Significant Cost Savings
Catcher’s sets are expensive. By preventing unnecessary damage, you save yourself (and your parents) from the high costs of frequent replacements.
The Post-Game Ritual: Your First Line of Defense
Maintenance doesn’t start once a month; it starts the moment the final out is recorded. To prevent your gear bag from becoming a breeding ground for bacteria, follow this immediate post-game routine:
- Empty the Bag: Never leave damp, sweaty gear stuffed inside a closed bag overnight.
- Debris Removal: Shake off any loose dirt, clay, or turf pellets.
- Initial Wipe Down: Use a dry cloth to wipe away sweat or moisture from the hard shells and padding immediately after use.
- The Rain/Mud Rule: If you played in wet conditions, you must allow every component to air dry completely in a well-ventilated area before you even think about long-term storage.
How to Wash Catcher’s Gear?
When the dirt becomes ground-in and the smell becomes unavoidable, it’s time for a deep clean. Never use a washing machine or a dryer for any part of your catcher’s gear, as the mechanical agitation and high heat can destroy the structural integrity of the foam and plastic.
Preparation
Before applying water or soap, you must strip the gear down to its base components.
- Remove Detachable Parts: Take off all removable straps and padding from the helmet, chest protector, and shin guards. This allows you to clean the hidden nooks where sweat and bacteria often accumulate.
Cleaning the Hard Shells (Helmet and Shin Guards)
The exterior plastic of your helmet and shin guards is designed to be durable, but it still requires gentle care to avoid degrading the material.
- Wipe Down: Use a damp cloth paired with mild soap or disinfectant wipes to clean the surfaces.
- Scrubbing: For stubborn stains or dried mud, use a soft brush (an old toothbrush or a specialized cleaning brush) to gently agitate the dirt without scratching the shell.
Cleaning the Soft Padding and Straps
Padding is the most sensitive part of your gear because it absorbs the most sweat and is prone to bacterial growth.
- The Tub Method: Hand wash the removable padding in a tub or sink filled with warm water and mild detergent.
- Chest Protector Care: For the chest protector, wipe it down with a damp cloth and mild soap. Some experts recommend using products like “Scrubbing Bubbles” for deeper cleaning of these surfaces.
- Bacteria Prevention: Pay close attention to the straps and liners where sweat buildup is highest, as this is where bacteria are most likely to grow.
The Mask and Visor
Visibility is everything for a catcher. A dirty mask isn’t just gross; it’s a performance inhibitor.
- Frame: Wipe the metal or composite frame with a damp cloth and mild soap.
- Visor: If your mask features a visor, use a dedicated glass cleaner to ensure a streak-free, clear view.
Mastering the Drying Process: The Golden Rule
The most common way catcher’s gear is ruined is through improper drying. Direct, intense heat is the enemy of your equipment.
- Air Dry Only: All components should be laid out in a well-ventilated area or in the shade to dry naturally.
- Avoid the Sun: While it might seem faster, direct sunlight can sometimes cause plastics to become brittle or colors to fade prematurely.
- Total Dryness: Ensure every piece is 100% dry before reassembling or storing. Moisture trapped between padding and shells is a recipe for rust and mildew.
Odor Management and Rust Prevention
If your gear has already developed a “locker room” scent, or if you are worried about the metal components of your mask and shin guards, follow these specialized tips:
- Eliminating Odors: Use Lysol spray or a baking soda mixture to neutralize bacteria and remove stubborn smells. This ensures you aren’t the “smelly guy” on the field.
- Preventing Corrosion: Metal buckles and mask frames are susceptible to rust if left damp. Thoroughly drying these components is the only way to prevent rust from weakening the hardware.
Caring for Your Catcher’s Mitt
Your mitt is arguably your most vital piece of equipment. Unlike the plastic shells of your guards, the mitt requires leather-specific care:
- Conditioning: Apply a quality leather conditioner every few uses. This keeps the leather supple, prevents it from drying out and cracking, and maintains its performance.
- Proper Storage: Store your mitt in a cool, dry place. Never leave it in a hot car or a damp basement, as extreme temperatures can ruin the leather’s shape and integrity.
- Lace Inspection: Keep a close eye on your glove laces. If they appear frayed, get them restrung immediately before they snap during a game.
Safety First: Proactive Gear Inspections
Washing your gear provides the perfect opportunity to perform a safety audit. Look for the following red flags during your cleaning routine:
- Helmet Integrity: Check the shell for any hairline cracks and ensure no padding has become loose or significantly compressed.
- Hardware Check: Inspect all straps and buckles for signs of fraying or wear. Replace them immediately if they seem compromised.
- Padding Breakdown: Feel the foam in your chest protector and shin guards. If it feels “flat” or no longer springs back, it may no longer provide the necessary impact protection and should be replaced.
Conclusion
Properly washing and maintaining your catcher’s gear is a hallmark of a professional mindset.
By following a consistent post-game routine, using gentle hand-washing techniques, and adhering to strict air-drying rules, you protect your safety, your performance, and your wallet.
Treat your gear like the professional-grade investment it is, and it will take care of you behind the plate.