
Sewing a golf head cover is a creative and practical DIY project that allows golf enthusiasts to protect their precious clubs with a personalized touch.
These stylish accessories not only shield your clubs from damage but also add a touch of individuality to your golf gear.
In this guide, we will walk you through the step-by-step process of crafting your very own golf head cover.
Whether you prefer classic designs, vibrant patterns, or custom embroidery, sewing your head covers allows you to showcase your unique style while keeping your clubs safe and distinct on the golf course.
Let’s get started on this exciting sewing adventure!
15 Steps to Sew a Golf Head Cover
Sewing a golf head cover is a fun and practical project for golf enthusiasts who want to protect their clubs in style.
Making your own golf head cover allows you to customize the design, choose your preferred fabrics, and create a unique accessory for your golf bag.
Here’s a step-by-step guide on how to sew a golf head cover:
Materials You’ll Need:
- Fabric
- Lining Fabric
- Thread
- Interfacing
- Sewing Machine
- Scissors or Rotary Cutter
- Pins
- Iron
- Template
Steps to Sew a Golf Head Cover:
1. Create a Template
To make a template, take one of your existing golf head covers and place it on a piece of paper or cardboard.
Carefully trace around the outline of the head cover, ensuring you capture its exact shape. If necessary, make adjustments to the template to fit your club heads.
Don’t forget to add a seam allowance of about 1/4 inch (0.6 cm) around the traced outline. This extra space will account for the stitching.
2. Cut Fabric
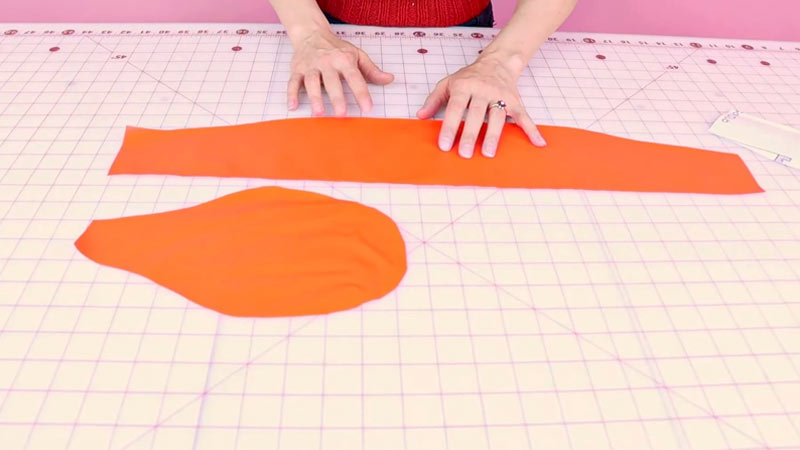
Lay your selected main fabric and lining fabric flat on your work surface. Using your template, place it on the main fabric and carefully cut around it.
Repeat this process to get two main fabric pieces.
Next, do the same with the lining fabric to create two lining pieces.
Lastly, cut one piece of interfacing to match the shape of your template.
3. Apply Interfacing
Follow the manufacturer’s instructions to attach the interfacing to the wrong side of one of the main fabric pieces.
Use your iron to press the interfacing onto the fabric, creating a secure bond. This step is crucial for adding structure and stability to your golf head cover.
4. Pin Fabric
Lay one of the main fabric pieces (the one with interfacing) right-side up on your work surface.
Place one of the lining fabric pieces on top of the main fabric, ensuring that the right sides are facing each other. Align the edges carefully and use pins to secure the two fabric pieces together.
5. Sew the Edges
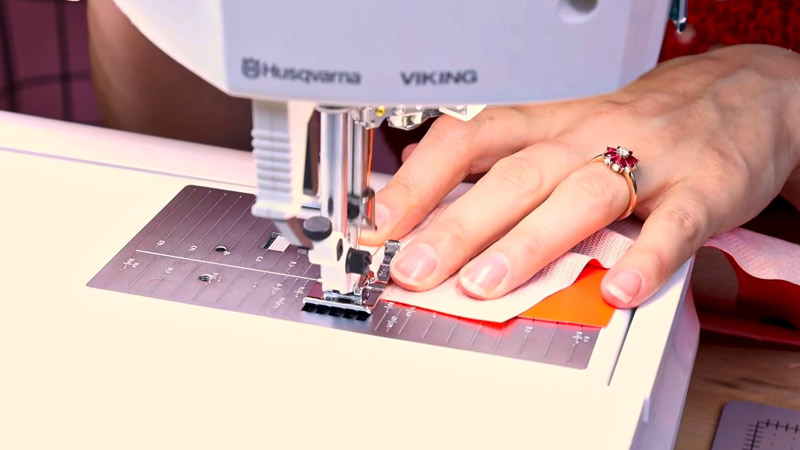
With your sewing machine, begin sewing around the edges of the pinned fabric pieces. Use a 1/4 inch (0.6 cm) seam allowance and make sure to backstitch at the beginning and end of your stitching to secure the seams. The bottom of the head cover should remain open, as it will be stitched later.
6. Clip Corners

After sewing, trim the corners at an angle. This will reduce bulk in the corners and help them lie flat when you turn the head cover right side out.
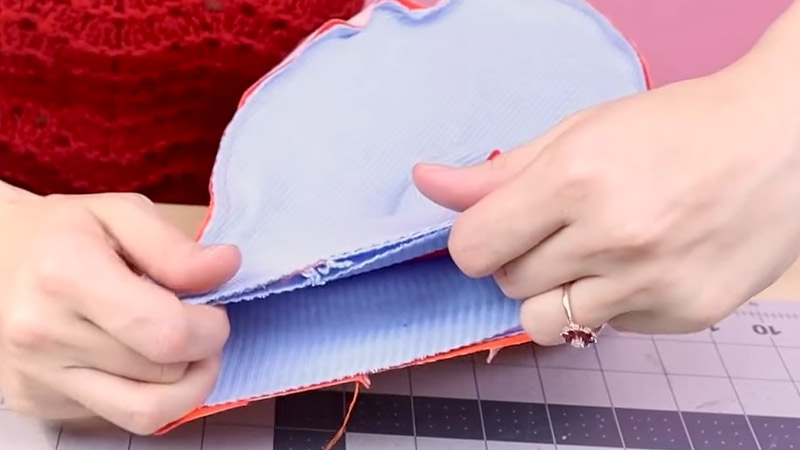
7. Turn Right Side Out
Carefully turn the sewn fabric pieces right side out. This process will reveal a “pocket” with one side made from the main fabric and the other from the lining fabric.
8. Press
To achieve a neat and crisp appearance, use an iron to press the seams and edges of the fabric. This step ensures that your golf head cover looks professional and well-finished.
9. Assemble
Place the lined main fabric piece (the one with interfacing) inside the other lined main fabric piece, ensuring that their right sides are facing each other.
Carefully tuck the lining fabric inside, making sure the seams and edges align correctly. Pin around the bottom edge to secure the two pieces together.
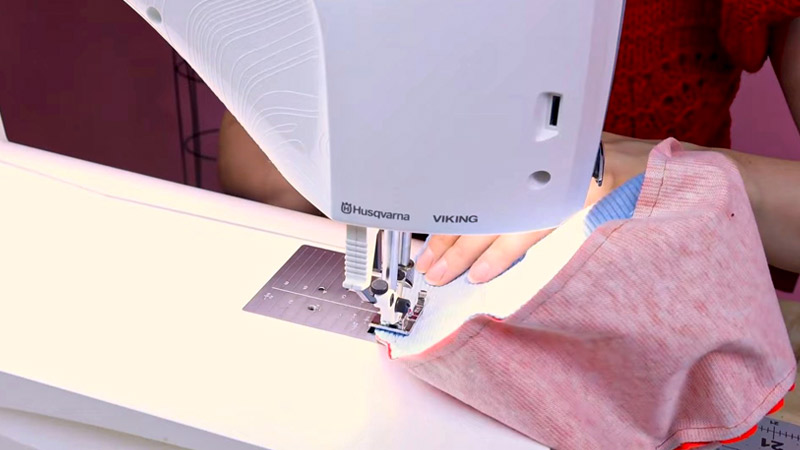
10. Sew Bottom Seam
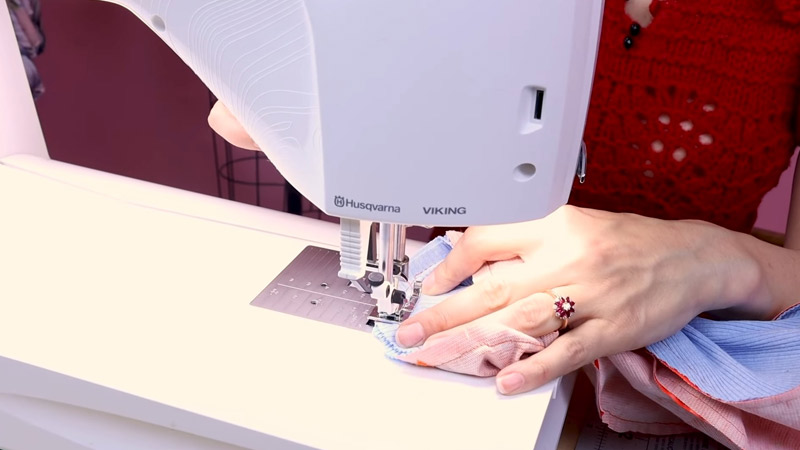
Stitch the bottom seam of the head cover. Use a 1/4 inch (0.6 cm) seam allowance, just as you did earlier. Remember to leave a small opening in the bottom seam to facilitate turning the cover right side out.
11. Turn Right Side Out
Gently turn the golf head cover right side out through the opening you left in the bottom seam. This step should reveal the completed head cover shape.
12. Hand-Stitch the Opening
Use a slip stitch or a hand-sewing needle and thread to carefully close the opening in the bottom seam. Ensure that your stitching is secure and the closure is neat.
13. Add Embellishments
This is your opportunity to get creative! Personalize your golf head cover with embroidery, appliqué, or any other decorative elements that reflect your style and personality.
14. Fit Your Club Head
Slide one of your golf club heads into the cover to check the fit. It should be snug but not overly tight, allowing for easy removal and ensuring that your club is well-protected.
15. Enjoy Your New Head Cover
Your custom-made golf head cover is now ready for use. Create additional covers for your other clubs to make a complete set.
Display your unique and stylish head covers on the golf course while keeping your clubs safe and protected.
DIY Golf Head Cover Sewing Patterns
Creating your own golf head cover sewing patterns is an exciting way to personalize your golf accessories and protect your clubs with style.
There are countless design options to choose from, and you can tailor them to match your personality and preferences.
Here are some popular DIY golf club head cover sewing patterns with various design ideas:
Classic Stripes
Classic stripes are a versatile design choice that can give your golf head covers a timeless and sophisticated appearance.
You can experiment with different stripe widths, orientations, and color combinations. Bold, contrasting colors create a striking look, while subtle, monochromatic stripes exude elegance.
Diagonal stripes offer a dynamic visual effect, while vertical or horizontal stripes provide a traditional touch.
Nature-Inspired Patterns
Drawing inspiration from nature, you can create golf head covers with patterns like leaves, branches, or flowers. These designs can add a touch of the outdoors to your golf bag.
Consider using fabrics with botanical prints for a fresh and natural look, or explore camo patterns or animal prints for a unique and wildlife-inspired theme.
Personal Monogram or Initials

Adding your monogram or initials to your golf head covers is an excellent way to make them uniquely yours.
Choose a font that reflects your style, and select embroidery thread colors that complement your overall design. Personalization not only adds an elegant touch but also helps you identify your clubs easily.
Geometric Shapes
Experiment with geometric patterns like triangles, diamonds, or hexagons to give your golf head covers a modern and dynamic appearance. The choice of colors and arrangements can significantly impact the final look.
Vibrant, contrasting colors and irregular shapes create a bold and contemporary design, while subdued colors and symmetrical shapes convey a sense of balance and harmony.
Plaid or Checkered
Plaid and checkered patterns are a classic and timeless choice for golf head covers. They can be customized in various ways, with different sizes and styles of checks.
You can create traditional tartan patterns, which have a rich history or opt for gingham checks that bring a touch of simplicity and charm.
Experiment with oversized checks for a bold statement or asymmetrical checks for a modern twist.
Vintage and Retro Prints
Vintage and retro patterns such as polka dots, paisley, or houndstooth can add a touch of nostalgia and whimsy to your golf head covers.
These patterns evoke a sense of history and style. Consider using fabrics with vintage-inspired prints and pair your covers with a vintage-style golf bag for a coordinated and chic look.
Sports Themes
Show off your favorite sports team or sport by incorporating their colors and logos into your golf head cover design. This allows you to display your team pride while on the golf course.
You can also experiment with patterns inspired by sports equipment, such as using fabrics with tennis ball or baseball motifs, adding a playful and sports-themed touch to your covers.
Nautical Themes
Nautical patterns, such as anchors, sailboats, or seashells, evoke a coastal or maritime ambiance.
Choosing fabrics in shades of blue, white, and red, and featuring these iconic nautical elements, gives your golf head covers a beachy and summer-ready appearance. It’s a great choice if you enjoy beachside or seaside golfing.
Camouflage
Camouflage patterns are a popular choice for those who want a rugged and outdoorsy look.
You can create traditional woodland camo patterns or experiment with urban or digital camo designs for a modern and urban twist.
Camo patterns can help your golf head covers to blend into the natural surroundings while making a fashion statement.
Whimsical and Fun Designs
For a lighthearted and playful touch, consider whimsical designs such as cartoon characters, emojis, or funky abstract patterns.
These patterns add an element of fun and creativity to your golf head covers, showcasing your unique personality and sense of humor.
Abstract Art
Abstract patterns or swirls can give your golf head covers a unique and artistic appearance.
Experiment with fabric paints, fabric markers, or tie-dye techniques to create eye-catching, one-of-a-kind designs. These patterns can be a reflection of your individuality and creativity.
Patchwork
A patchwork design involves combining various fabric scraps to create a one-of-a-kind golf head cover.
This eclectic and bohemian-inspired style can tell a story with each square or piece of fabric, making your covers truly unique and meaningful.
FAQS
What type of fabric is best for a golf head cover?
When sewing a golf head cover, it’s essential to choose a durable and thick fabric that can protect your clubs effectively.
Felt, fleece, and leather are common choices. Consider the fabric’s weight and texture to ensure it can withstand outdoor conditions.
How do I secure the head cover onto the club?
You can add a closure mechanism to your head cover, such as a button, Velcro, or an elastic cord with a cord stopper.
These closures help keep the head cover in place and ensure a snug fit on your club.
Can I create a set of matching head covers for my clubs?
Absolutely! You can sew a set of matching head covers to protect all your clubs. This allows you to maintain a cohesive and stylish look for your golf bag.
What’s the best way to clean and maintain my fabric head covers?
To keep your fabric head covers clean, spot-clean them with mild detergent and water.
Avoid machine washing, as it can damage the fabric and any embellishments. Regularly inspect them for wear and tear, and make any necessary repairs.
Can I add extra padding to my head covers for additional club protection?
Yes, you can insert extra padding between the lining and the main fabric to provide added protection for your clubs.
To Recap
Sewing a golf head cover is a rewarding endeavor that combines creativity with functionality. Crafted with care and personal flair, these covers not only protect your clubs but also make a stylish statement on the golf course.
From classic designs to bold patterns and custom embroidery, the possibilities are endless. As you embark on this DIY journey, you’ll discover that sewing your golf head covers allows you to express your unique style and keep your clubs safe in a distinctive manner.
So, whether you’re a novice or an experienced seamstress, embrace this project as a chance to add a personal touch to your golf gear, making each round of golf truly your own.


