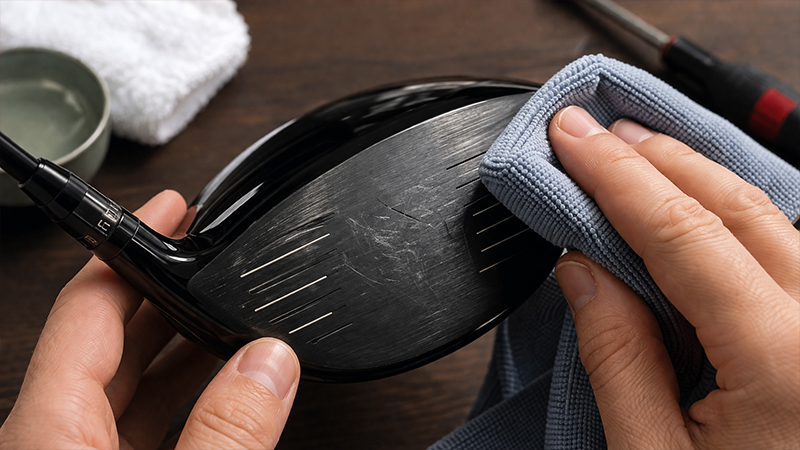
Your driver is arguably the most important club in your bag, both for performance and for the confidence it inspires when you stand on the tee box.
However, whether it’s from a “sky mark” during a steep swing or “bag chatter” from a bumpy cart ride, scratches are an inevitable part of a golfer’s life.
Cosmetic damage doesn’t just hurt the resale value of your club; it can be a distracting eyesore during your address.
Fortunately, you don’t need to send your club back to the manufacturer for a professional refurbishing. By understanding the depth of the damage and using the right tools, you can restore that factory shine at home.
Step 1: Assessing the Damage (The Fingernail Test)
Before you reach for the sandpaper or polish, you must determine how deep the scratch actually goes. Not all scratches are created equal, and the repair method depends entirely on which layer of the club’s finish is compromised.
The most effective way to evaluate this is the fingernail test. Gently run your fingernail across the scratch.
If your fingernail does not catch in the groove, the damage is likely confined to the clear coat (the protective top layer). These are “surface scratches” or “scuffs” that can usually be buffed out without needing new paint.
If your fingernail does catch, you have a deep scratch that has penetrated the paint layer. This will require a more intensive process involving sanding and color matching.
Step 2: Cleaning and Preparation
Regardless of the scratch’s depth, you must never start a repair on a dirty clubhead. Dust, sand, and grass trapped in the scratch can act as additional abrasives, potentially making the damage worse during the buffing process.
- The First Step: Always clean the clubhead thoroughly with warm, soapy water to remove all debris.
- Dry Completely: Use a clean microfiber towel to ensure there is no moisture left on the surface, as this can interfere with the adherence of polishes or paints.
- Protect the Surroundings: Use painter’s tape to mask off the areas you aren’t working on. This includes the clubface, the hosel, and any alignment markers on the crown. This prevents polish or paint from getting into the grooves or onto the decorative elements of the driver.
Step 3: Removing Light Scuffs and Surface Scratches
If your driver has light tee marks or “cloudy” scuffs on the crown, you can typically restore the finish using mild abrasives and a bit of elbow grease.
Method A: Automotive Polishing Compounds
Since most modern golf drivers use finishes similar to car paint, automotive scratch removers are highly effective. Products like Meguiar’s ScratchX or standard rubbing compounds are designed to clear up the top coat.
- Apply a small amount of the compound to a microfiber towel.
- Work the product into the scratch using circular motions.
- Buff the area until the scratch disappears and the gloss returns.
Method B: The Toothpaste Hack
If you don’t have automotive products on hand, you can use plain white toothpaste. Toothpaste acts as a very mild abrasive that can level out the clear coat.
- Apply a small dab of white toothpaste to the scuff.
- Buff it with a microfiber cloth.
- Rinse with soapy water afterward to ensure no sticky residue remains.
Method C: Specialized Golf Club Polish
For those who prefer gear designed specifically for the sport, specialized golf club polishing agents are available. These are particularly good at removing stubborn tee marks and light scratches that accumulate over a season.
Step 4: Repairing Deep Scratches and Sky Marks
Sky marks (scratches on the top edge of the driver crown where it meets the face) usually cut through the paint. These require a multi-step restoration process.
Sanding the Surface
To create a smooth foundation for new paint, you must level the edges of the scratch.
- Use fine-grit sandpaper, specifically ranging from 600 to 1500-grit.
- Lightly sand the damaged area until it feels flush with the rest of the clubhead.
- Warning: Be careful not to sand too aggressively, as you only want to smooth the defect, not remove the surrounding healthy paint.
Applying Touch-Up Paint
Once the surface is smooth and clean, you need to restore the color.
- Color Matching: You can use specialized golf club paint pens or automotive touch-up paint that matches your driver’s color.
- Application: Apply the paint in thin layers. It is better to apply two thin coats than one thick, globby one.
Restoring the Gloss with Clear Coat
The final step in a professional-looking DIY repair is the clear coat spray. This fills in the remaining microscopic gaps and provides the “factory shine” that protects the new paint layer.
Step 5: The “Quick Fix” for Black Drivers
If you are on the road or need a temporary aesthetic fix before a big round, there is a simple “pro tip” for drivers with dark finishes.
A black permanent marker can be used to mask shallow scratches on black drivers. While this is not a permanent fix, it is an excellent way to hide an unsightly mark until you have the time for a full restoration.
Summary of Best Practices for Driver Care
| Method | Best For | Tools Needed |
|---|---|---|
| Polishing Compound | Surface scuffs/Clear coat | Microfiber towel, Automotive polish |
| Toothpaste | Light marks/Budget fix | White toothpaste, soapy water |
| Sanding & Painting | Deep scratches/Sky marks | 600-1500 grit sandpaper, paint pen, clear coat |
| Marker Hack | Temporary disguise | Black permanent marker |
By following these steps, you can keep your driver looking as good as the day you bought it, ensuring that the only thing you have to focus on at the tee is your swing.
Would you like me to create a set of flashcards to help you remember the specific grit levels and tools needed for these different repair methods?