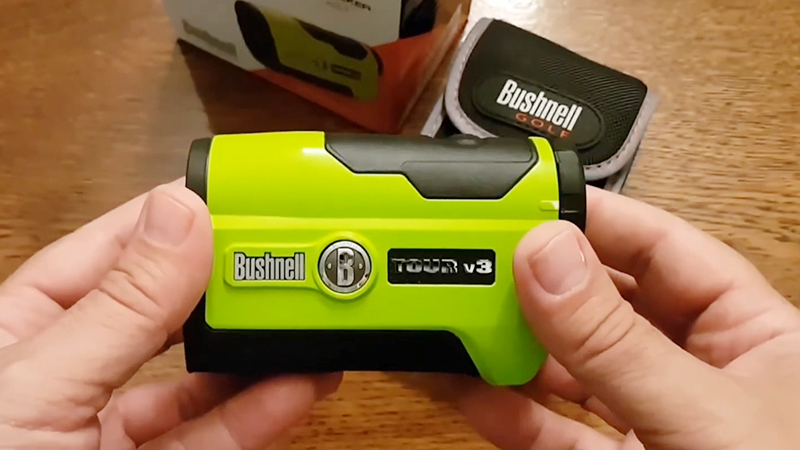
If you own a Bushnell Tour V3 laser rangefinder, you already know it’s built to be rugged: rain-resistant body, tight seals, and a durable shell that can handle golf-bag life. But that same durability can make it confusing when you need to open it up—whether you’re trying to clean the lens from inside, check a loose part, inspect the battery compartment area, or diagnose a button or display issue.
This guide walks you through how to open a Bushnell Tour V3 safely, what tools you’ll need, what to watch out for, and how to put everything back together without damaging the casing or internal components.
Before You Start: What “Open” Means on the Tour V3
There are two “levels” of opening:
- Opening the battery compartment (easy, user-serviceable)
- Opening the casing/shell (advanced, for troubleshooting and internal access)
Most users only need the battery compartment. If you’re doing anything beyond that, take your time—this device has delicate optics and ribbon cables that can be damaged with force.
Tools and Materials You’ll Need
For battery access, you’ll typically need no tools. For opening the casing, gather:
- Small precision screwdriver set (Phillips #00/#0 and/or Torx bits)
- Plastic pry tool or guitar pick (avoid metal blades)
- Tweezers (optional, for small connectors)
- Microfiber cloth
- Small tray or magnetic mat (to keep screws organized)
- Isopropyl alcohol (70–99%) and cotton swabs (for gentle cleaning)
- Nitrile gloves (optional, helps avoid fingerprints on optics)
Avoid: using a kitchen knife or metal flathead to pry—this can crack the housing or scar the sealing edge.
Power Down and Prep the Device
- Turn the device off. If it’s on, press the power button and let it shut down.
- Remove the unit from any case and wipe off dirt or moisture.
- Work on a clean table with good lighting.
- Place a soft cloth down so the lenses don’t scratch when set face-down.
Open the Battery Compartment (User-Serviceable)
On most Bushnell Tour V3 units, the battery compartment is designed for quick access.
- Locate the battery door (usually on the underside or side—look for a circular or small door panel).
- Twist or slide the cover depending on your version:
- Some models use a coin-turn slot.
- Others have a small latch or twist cap.
- Remove the battery carefully.
- Inspect for:
- corrosion (white/green buildup)
- bent contacts
- dirt or moisture
Cleaning battery contacts (optional)
- If you see corrosion, lightly dab a cotton swab with isopropyl alcohol and gently clean.
- Let it dry fully before reinstalling a fresh battery.
Reinsert the battery, close the door firmly, and test. If the problem is solved, you’re done.
If you still need internal access, continue.
Opening the Outer Shell Carefully
Identify screw locations
Remove visible screws
Loosen rubber grip sections (if required)
Pry the Housing Open Without Cracking It
Once screws are out, the housing may still be held by clips and a tight seam.
- Insert a plastic pry tool at the seam (start near a corner).
- Work around the perimeter slowly:
- twist gently
- listen for soft “clicks” as clips release
- Never force one area wide open—open gradually around the whole body.
What you should NOT do
- Don’t jam a metal tool deep inside.
- Don’t pry near the lens edges aggressively.
- Don’t pull the halves apart quickly—there may be ribbon cables connecting both sides.
Open Like a Book (Watch for Cables)
When the casing begins to separate:
- Lift one half slowly.
- Look for internal connections:
- ribbon cable(s) for buttons/display
- small wires for the power system
If you see a cable, stop pulling. Open the device like a hinged book and keep both halves supported.
What to Check Inside (Common Reasons People Open It)
After opening the Bushnell Tour V3, perform a careful visual inspection to identify common issues.
Loose Parts or Rattling Sounds
Look for any loose screws, small debris, or broken plastic posts inside the housing. Avoid shaking the device, as this may cause further damage. Instead, use tweezers to carefully remove any foreign objects.
Button Not Responding
Examine the rubber button pad and the contact points on the circuit board. Check for dust buildup, dirt, or slight misalignment. Never scrape contacts with metal tools. If cleaning is needed, gently use a dry microfiber cloth or a lightly dampened alcohol swab.
Display Problems
Inspect the ribbon cable connection to the display, if accessible. Ensure it is properly seated in its connector. If it appears slightly loose, gently press it back into place. Do not pry or dig at the connector, as ribbon cables are delicate and can tear easily.
Internal Lens Fogging or Dust
If you notice internal dust, use a manual air blower to remove particles. Avoid canned compressed air, as it may release propellant that can damage components.
If an internal lens surface is reachable, lightly wipe it with a clean microfiber cloth. Never touch optical coatings with your fingers, as oils can permanently affect clarity.
Step 7: Reassemble the Bushnell Tour V3 Correctly
Reassembly is where most people accidentally damage the unit. Go slow.
- Ensure no wires are pinched.
- Align the halves carefully at the seam.
- Press around the perimeter until clips seat.
- Reinstall screws by hand first (don’t power-drive).
- Tighten snug, not overly tight—plastic threads strip easily.
- Re-seat rubber grips if lifted:
- press firmly along edges
- if adhesive is weak, use a tiny amount of suitable rubber-safe adhesive (optional)
Restore water resistance (best effort)
If the unit has a gasket:
- confirm it’s in place and not twisted
- ensure the seam closes evenly all around
Water resistance can be compromised if the gasket is damaged or misaligned.
Testing After Opening
Before taking it back to the course:
- Insert a fresh battery and power on.
- Check the viewfinder clarity.
- Aim at a fixed object and verify distance readings.
- Press buttons multiple times to confirm responsiveness.
If it powers on but readings are inconsistent, internal alignment may be affected. That’s usually a job for a service center.
Troubleshooting: When Not to DIY
Stop and seek professional repair if you notice:
- cracked optics
- torn ribbon cable
- moisture inside electronic areas
- burnt smell or discoloration on the board
- the unit won’t power on even with a new battery
Laser rangefinders have precise alignment. Even small internal shifts can affect accuracy.
Final Tips for Safe Opening
- Take photos at each step so you know how it goes back together.
- Keep screws grouped by location and length.
- Avoid touching lenses and internal mirrors.
- Don’t over-tighten screws.
- If you’re opening it only to fix power issues, check battery contacts first—that solves a surprising number of problems without opening the shell.