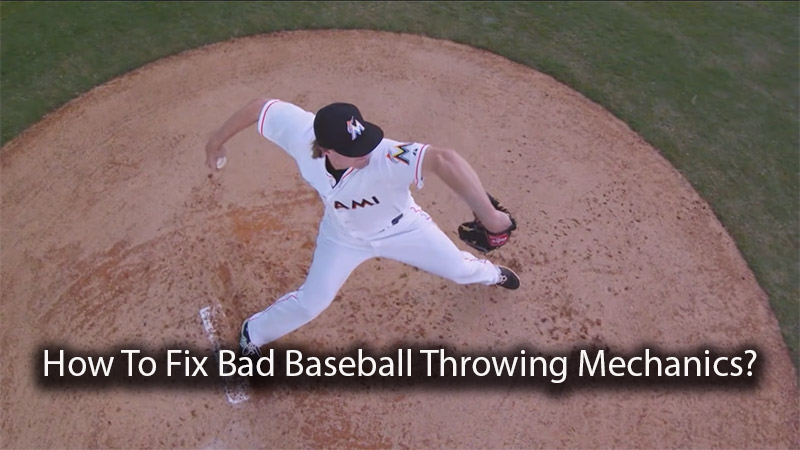
The quest for higher velocity and sustainable arm health is often met with a barrage of anecdotal “fundamentals” that have remained largely unchanged for decades.
However, the elite landscape of modern baseball has shifted toward a more analytical, data-driven approach.
Moving beyond the outdated model of a coach shouting cues from a bucket, we now understand that fixing “bad” mechanics is not about forced imitation but about creating a guided process of movement efficiency.
Developing a professional-grade delivery requires a synthesis of physical conditioning, proper intent, and the strategic use of training tools.
This guide breaks down the essential components of throwing mechanics, identifies the common “velocity killers,” and provides actionable strategies to rebuild your arm action from the ground up.
The Biomechanical Blueprint: Foundational Checkpoints
Before diving into advanced training, an athlete must master the primary checkpoints that ensure the body is moving in a safe and efficient manner.
1. The Four-Seam Grip: The Starting Point of Precision
Every elite throw begins at the fingertips. To maximize both control and velocity, players should utilize a proper four-seam grip.
This involves placing the index and middle fingers across the wide seams of the ball, with the thumb positioned directly underneath for balance.
A common mechanical flaw among amateur players is “burying” the ball too deep into the palm. This creates excessive friction and prevents a clean release.
By maintaining a slight gap between the ball and the palm, the athlete allows the fingers to create the necessary backspin and “bite” required for high-velocity throws.
2. Lower Half Alignment: The “North-South” Stride
The lower body acts as the engine of the throw. Proper alignment is critical to ensure that the force generated by the legs is directed toward the target rather than dissipated laterally.
- The Checkpoint: Ensure the front foot and stride move directly “north-south” toward the target.
- The Flaw: Stepping across the body or “landing open” can cause a disconnect between the trunk and the arm, leading to a significant loss of torque and increased stress on the shoulder.
3. The Efficient Arm Path
The transition from the glove break to the release point must be fluid. Ideally, hands should break with the thumbs pointing down. At the moment of foot plant, the throwing elbow should be level with or slightly below the shoulder.
Maintaining an elbow angle between 70 and 90 degrees at landing is crucial; an “obtuse” or overly wide angle creates a longer lever that is harder to accelerate, inevitably bleeding velocity.
Identifying the 10 Performance Bottlenecks
Even athletes with high-level potential often struggle with mechanical inefficiencies that cap their performance. Identifying these “bottlenecks” is the first step toward corrective intervention.
1. Insufficient Body Mass and Strength
In the professional ranks, there is a clear correlation between physical stature and throwing power. Major league pitchers are increasingly taller and more muscular.
For the developing athlete, the “weight room” is just as important as the bullpen. Building a bigger, stronger frame provides the physical foundation necessary to generate and absorb high-velocity forces.
2. The Flying Glove Arm
The glove arm is frequently neglected by amateur coaches, yet it plays a vital role in rotational efficiency. If the glove arm “flies out” or creates a large gap from the body during the delivery, the athlete loses leverage and speed.
The glove arm should remain packed close to the body as the chest drives toward the target, acting as a stabilizer for rotation.
3. Sub-Optimal Arm Slots
Every athlete has a natural arm slot dictated by their unique anatomy. Attempting to force a high-overhead slot when the body naturally wants to be at a three-quarters angle can hinder performance.
However, once an athlete drops into a sidearm or “below sidearm” slot, velocity generally begins to decrease. It is essential to “tinker” and find the specific slot where power is maximized without compromising comfort.
4. Premature Hip Opening
Landing with the hips or chest already open toward the target is a primary velocity killer. To maximize torque, the chest should stay closed all the way until the front foot lands in the stride. This “hip-shoulder separation” is what allows the body to act like a loaded spring.
5. Weak Forearms and Scapular Stability
The muscles of the forearm and the rotator cuff serve two roles: propulsion and protection.
- Forearm Strength: These muscles are the last to propel the ball forward and are the primary defenders of the ulnar collateral ligament (the “Tommy John” ligament).
- Scapular Stability: A robust arm care program focusing on the scaps and rotator cuff ensures the shoulder stays healthy while allowing the athlete to throw with higher frequency and intent.
6. Incorrect Elbow Angles at Plant
As previously noted, an elbow angle that is too wide (obtuse) at landing increases the moment of inertia, making the arm slower to rotate. Keeping the arm compact, between 70 and 90 degrees, allows for a more explosive “whip” action.
7. Standing “Too Tall” at Release
Elite throwers do not finish the throw in an upright position. They use their entire body, driving their chest toward the target and creating a long, low lower-body angle at the moment of release. If an athlete releases the ball while standing too tall, they are failing to utilize the powerful muscles of the legs and trunk.
8. Lack of Throwing Volume
You cannot develop elite arm strength by throwing only two or three times a week. However, this does not mean throwing at maximum intensity every day.
A balanced program includes bullpens, long toss, and “low-speed” throwing days to build the necessary chronic workload for arm durability.
9. Passive Intensity
Velocity is a product of intent. High-level throwers are amazing finishers who maintain high intensity through the very end of the follow-through.
“Easing off” to try and “paint the corners” often results in a loss of both speed and command. Athletes must learn to control their maximum effort rather than slowing down to achieve accuracy.
The Modern Paradigm: Data vs. Intuition
One of the most significant shifts in training is the move away from the “See This, Do That” model. Coaches who rely on low-quality video (24-30 FPS) or simple eyeballing cannot accurately diagnose an elite delivery.
The High-Speed Video Mandate
In a 90+ MPH delivery, the shoulder is rotating at approximately 7,000 degrees per second. Standard iPad or camcorder video is insufficient to capture these movements.
Professional programs utilize high-speed motion capture to analyze the exact timing of hand separation, foot plant, and joint rotation. This deep analysis allows for precise adjustments rather than guesswork.
Guided Mechanical Changes via Weighted Balls
Forcing an athlete to change their mechanics through verbal cues alone is often ineffective. Instead, modern training utilizes weighted implements (overload and underload balls) to effect both active and passive changes.
- Active Monitoring: By measuring velocity deviations between overload (7–11 oz) and underload (2–4 oz) balls, trainers can identify specific constraints in an athlete’s arm action or release phase.
- Passive Adaptation: Research indicates that throwing implements beyond 20% of regulation weight naturally alters biomechanics. These weighted tools provide a new physiological stimulus that “hacks” the arm action, allowing the athlete to find more efficient movement patterns without the need for constant verbal instruction.
Corrective Drills for Accelerated Development
To bridge the gap between analysis and performance, athletes should incorporate specific drills designed to isolate and reinforce proper movement patterns.
1. The Rocker Drill
This drill is designed to build a powerful connection between the lower body and the throwing arm.
- Execution: Start in a wide base with weight concentrated on the back foot. Rock your weight back and then lead the throw with your hips while keeping the arm path compact. This reinforces the feeling of the “hips leading the arm.”
2. Kneeling Throws
By removing the lower body from the equation, this drill forces the athlete to focus on upper body rotation and arm slot.
- Execution: Throw from one knee while facing sideways. This isolates the rotation of the trunk and reinforces a high elbow position without the interference of stride mechanics.
3. Towel and Shadow Drills
These are excellent “low-stress” repetitions that can be performed anywhere.
- Execution: Perform your full throwing motion in front of a mirror (with or without a towel) to visualize hand separation and ensure an “equal-and-opposite” arm action. These drills are vital for building the kinesthetic feel necessary for mechanical consistency.
Sustainability: The Guided Training Process
Fixing bad mechanics is not a one-time event; it is a continuous “test/re-test” cycle. Athletes must constantly analyze their data, monitor their arm health, and adjust their drills accordingly.
Age-Appropriate Training
It is important to note that certain advanced training methods, specifically the use of weighted balls, are generally reserved for high-school-aged athletes and older.
For younger players, the focus should remain on foundational “catch play” and long toss to clean up the arm path naturally.
The “Test/Re-Test” Culture
Professional development is about results. If a specific drill or training method is not producing measurable gains in velocity or efficiency, it must be replaced.
By combining high-speed video analysis with a robust strength program and modern weighted ball routines, athletes can finally move past the limitations of traditional coaching and unlock their full physical potential.
Conclusion: Elevate Your Game
Mastering the mechanics of the baseball throw is a journey of precision and persistence. By focusing on the foundational checkpoints of the four-seam grip and “north-south” alignment, and then layering on modern training tools like high-speed video and weighted implements, you can systematically remove the “velocity killers” from your delivery.
The transition from a “bad” mechanical thrower to an elite athlete is a guided process. It requires more than just trying to “look like” a professional; it requires building the physical strength, rotational torque, and mental intent to perform like one. Stop guessing at your mechanics and start building a data-driven path to the next level.