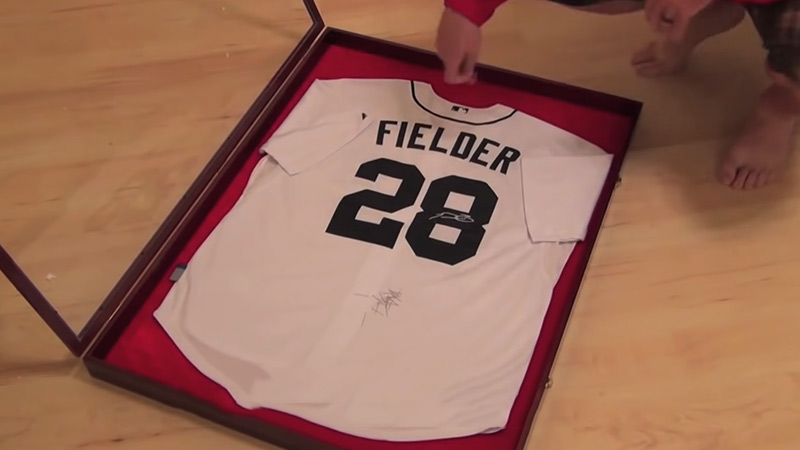
There is a distinct kind of magic that comes with owning a signed sports jersey.
Whether it is a game-worn treasure from your childhood hero, a prized piece from your team’s championship season, or a rare collectible autographed by a legend, that fabric represents a moment in history. It carries a narrative, a memory, and an emotional connection that goes far beyond ordinary memorabilia.
Yet, leaving a valuable signed jersey folded in a drawer, tucked away in a closet, or—worse—hanging unprotected on a standard wall hook exposes it to irreversible damage.
Dust, humidity, physical shifting, and, most destructively, ultraviolet light can degrade the fabric and cause a priceless autograph to fade into oblivion.
Framing your signed jersey in a custom shadow box is the definitive way to protect your investment while turning it into a stunning centerpiece for your home, office, or fan cave.
Done right, framing elevates a piece of sports apparel into fine art. Done incorrectly, it can permanently ruin a treasured collectible.
This comprehensive guide walks you through the exact, museum-grade methodology required to frame a signed sports jersey safely, securely, and stunningly—ensuring it remains pristine for generations to come.
Understanding the Stakes: Why Proper Framing Matters
Before diving into tools and techniques, it is essential to understand what threatens framed memorabilia.
Collectors often make the mistake of using standard picture frames or cheap framing materials found at big-box retail stores. These shortcuts introduce invisible hazards that slowly destroy collectibles over time.
The Threat of Ultraviolet Radiation
Light is the ultimate enemy of autographs. Ultraviolet rays break down the chemical bonds in permanent markers, ballpoint inks, and paint pens used by athletes.
Within just a few years of direct or even indirect sunlight exposure, a vibrant signature can turn ghost-white, wiping out both its sentimental and monetary value.
The Danger of Acid Degradation
Standard cardboard, cheap foam boards, and non-archival paper mats contain high levels of acid.
When these materials come into contact with fabric over a long period, they cause the textile to yellow, grow brittle, and degrade. An acidic backing board acts like a slow-acting chemical burn on your jersey.
Pressure and Moisture Trapping
If a frame is too shallow, the glass or acrylic will press directly against the face of the jersey. Over time, humidity fluctuations can cause the fabric to stick to the glass, lifting ink from the autograph or causing mold growth. A proper display requires a dedicated shadow box with breathing room and environmental protection.
Essential Materials for Museum-Grade Framing
Achieving professional, gallery-quality results requires specific tools and archival-grade materials. Gather the following items before beginning your project:
- Deep Shadow Box Frame: Choose a frame specifically designed for garments. It must feature adequate depth (typically between 1.5 to 2 inches) so that the glass or acrylic never touches the surface of the jersey or the signature.
- UV-Protective Glass or Acrylic: Opt for conservation-grade acrylic or glass rated to block at least 97% to 99% of harmful ultraviolet rays. Acrylic is lightweight, shatter-resistant, and safer for large wall displays.
- Acid-Free Foam Core Board: This serves as the internal template and backbone of your display. Acid-free boards ensure zero chemical breakdown against the fabric.
- Rust-Proof Stainless Steel Pins or Fine Thread: You will need hardware to secure the fabric invisibly. Always use stainless steel or coated pins to prevent rust stains from forming over time.
- A Reliable Steamer or Iron: Essential for removing wrinkles and creases prior to mounting, giving the jersey a crisp, athletic fit.
- Measuring Tape and Utility Knife: For precise cutting of the internal foam core board insert.
- Cotton Gloves: To protect the delicate fabric and prevent natural skin oils from transferring onto the jersey or signature during handling.
Step-by-Step Framing Process
Taking your time during each stage of the mounting process ensures a clean, professional finish. Follow these meticulous steps to transform your jersey into a masterpiece.
Step 1: Prep and Relax the Fabric
A jersey fresh out of storage or shipping packaging will inevitably feature deep folds and creases. Lay the garment down on a clean, flat surface.
- Handle with Care: Put on cotton gloves before touching the jersey, especially near the autograph area.
- Smooth the Wrinkles: Gently steam or iron out creases. Crucial Warning: Never apply direct, high heat over a painted, pressed, or inked signature. High temperatures can reactivate the ink, cause smudging, or melt screen-printed numbers and patches. Work carefully around the signature zone, using low heat and a pressing cloth if necessary.
Step 2: Measure and Cut the Internal Insert
To make the jersey look athletic and filled-out rather than limp and slouchy inside the frame, you need a custom structural insert.
- Measure the Shadow Box Interior: Take precise measurements of the display area inside your shadow box frame.
- Cut the Foam Board: Transfer these measurements to your acid-free foam core board. Using a sharp utility knife and a straight edge, cut the board to match the width and length of the jersey’s torso. The board should fit snugly inside the body of the shirt without stretching the fabric past its natural seams.
Step 3: Shape, Fold, and Structure
A well-framed jersey looks tailored, sharp, and proportional.
- Insert the Board: Slip the cut foam board inside the torso of the jersey, guiding it smoothly down until it sits evenly.
- Manage the Sleeves: Professional framers tuck sleeves cleanly behind the main body board to create a crisp, balanced, rectangular or athletic silhouette. Depending on whether you want to display a short-sleeve or long-sleeve look, fold the sleeves neatly backward, ensuring no bulky fabric lumps distort the front presentation.
- Check the Alignment: Turn the jersey over and view it from the front. Make sure team crests, player numbers, and most importantly, the signature are perfectly centered and visually balanced.
Step 4: Secure the Fabric Invisibly
The goal of mounting is to hold the jersey completely stable without letting any hardware show on the exterior.
- Pinning technique: Lift hidden folds, seams, and underarm areas of the jersey. Push straight, rust-proof stainless steel pins through the interior fabric layers, catching the foam board underneath. Anchor the fabric securely to the supportive backing board so the garment will never slip or sag over time.
- Alternative Stitching: If pins are not your preference, use fine, color-matched thread to subtly tack down hidden internal points of the jersey to the backing board.
- The Golden Rule of Signatures: Never apply glue, tape, or adhesive directly onto or near the autograph. Adhesives degrade the fabric, stain the fibers, and instantly destroy the value of signed memorabilia.
Step 5: Final Assembly and Sealing
Once the jersey is firmly anchored to the backing board and looks immaculate, it is time for final assembly.
- Clean the Acrylic: Wipe down the inside of the UV-protective acrylic or glass with an antistatic, non-abrasive cleaner to remove any dust, lint, or fingerprints.
- Seal the Shadow Box: Carefully place the backing board—with your mounted jersey attached—into the shadow box frame. Secure the backing clips or fasteners. For ultimate preservation, run a strip of archival framing tape around the back perimeter of the frame to seal out dust, moisture, and insects.
Designing the Ultimate Display: Presentation Tips
Framing a jersey is only half the battle; how and where you display it dictates its impact on a room.
Incorporating Complementary Memorabilia
To elevate a standard jersey display into a museum-quality tribute, consider adding complementary elements inside a larger shadow box:
- Trading Cards or Photographs: A rookie card or an action photograph of the athlete wearing that exact style of jersey adds incredible depth and storytelling.
- Nameplates and Plaques: A custom-engraved brass or matte black plaque detailing the player’s name, achievements, or milestone date grounds the display with historical context.
- Ticket Stubs or Game Programs: If you attended the game where the jersey was signed or worn, include the ticket stub tucked neatly into the corner.
Ideal Placement Guidelines
Where you hang your framed masterpiece matters just as much as how it is built:
- Avoid Direct Sunlight: Even with UV-protective acrylic, never hang valuable signed memorabilia on a wall that receives direct daily sunlight. Choose an interior wall away from large windows.
- Climate Control: Keep your display away from damp basements, humid bathrooms, or exterior walls prone to temperature swings. Stable indoor climates prevent fabric degradation and warping.
- Secure Mounting: Because shadow boxes with glass and wood frames can be surprisingly heavy, always anchor your wall mount directly into wall studs or use heavy-duty drywall toggle anchors designed for weight distribution.
Conclusion
A signed sports jersey is more than fabric and ink—it is a tangible piece of sports history, a monument to dedication, and a cherished personal investment.
By skipping cheap shortcuts, utilizing archival acid-free materials, installing UV protection, and mounting the garment with precision and care, you ensure that your collectible remains as vibrant and awe-inspiring decades from now as it was the day the ink dried. Frame it right, protect your passion, and let your legacy shine.