In the world of golf, putting is often described as a game within a game. You can drive the ball 300 yards down the middle of the fairway and stick your wedge to within five feet, but if you cannot square the putter face at impact, your scorecard will suffer.
While many golfers obsess over their stroke or the “roll” of their putter, one of the most overlooked factors in putting consistency is the alignment of the grip itself.
If your putter grip is installed with even a slight twist, your hands will naturally try to square that grip during the stroke, which inadvertently opens or closes the putter face.
To ensure your equipment is working with you rather than against you, you must learn how to install a putter grip straight.
Drawing on professional club-making insights, this guide will walk you through the nuances of grip geometry, reference lines, and the “three-section” alignment technique.
Why “Straight” is the Only Option for Putters
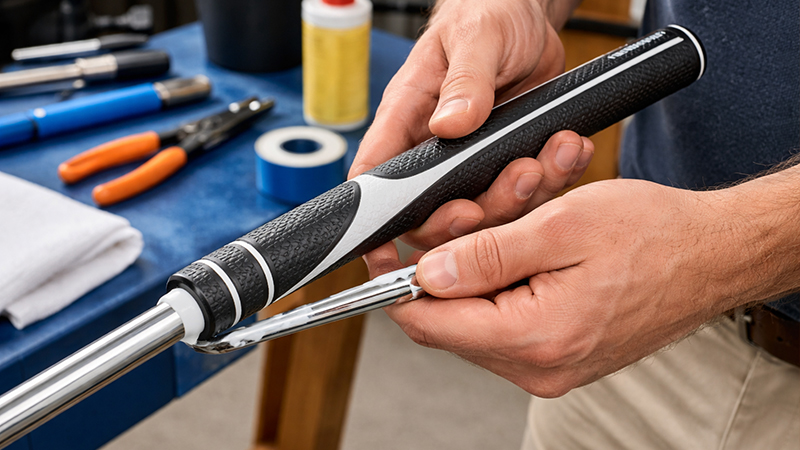
Unlike your drivers or irons, which typically use round grips, the putter grip is unique because it features a prominent flat section. The design intent is simple: this flat side should be perfectly perpendicular to the face of the putter.
When the grip is square, the palms of your hands are essentially “aware” of where the putter face is pointing. If the grip is “closed” (twisted toward the golfer) or “open” (twisted away), your internal sense of alignment will be miscalibrated.
The flat section is the most obvious giveaway of a poor installation; if it isn’t perfectly squared up, the entire putter will look and feel “off”.
Step 1: Analyze Your Grip Geometry
Before you apply a single drop of solvent, you need to understand the physical profile of the grip you are installing. Not all putter grips are shaped the same way, and their “flatness” varies by brand and style.
- Modern Oversized Grips (e.g., Super Stroke): These grips are often engineered to be flat from the very butt end down to the tip. They typically feature hard rubber ends and maintain a consistent geometry throughout their length.
- Traditional Rubber Grips: More traditional models are often flat only in the center. On these grips, the last inch at the butt end and the last inch at the tip tend to transition from flat into a more rounded shape.
Knowing where the flat section actually starts and ends is crucial because these are the areas you will use as your visual cues during the final alignment phase.
Step 2: Identify and Create Your Reference Lines
To get a grip on straight, you need a visual “north star.” You cannot simply “eye-ball” it; you need to find or create lines on the putter head that run parallel to your target path and perpendicular to the face.
Using Existing Sight Lines
Most modern putters come with built-in alignment aids that are perfect for this process:
- Blade/Answer Styles: These often feature a very obvious sight line running down the back flange.
- Mallet Styles: Mallets frequently provide even better guides, often featuring a center sight line plus secondary lines closer to the toe and the heel. All of these parallel lines are invaluable during installation.
Finding “Implied” Lines
If your putter lacks a drawn-on line, look at the physical mass of the head. Many putters are shaped with parallel sections where mass has been positioned. These physical edges or “steps” in the putter cavity can act as makeshift sight lines to help you square the grip.
The “Bullseye” Solution: Creating Your Own Lines
What if you have a minimalist putter, like a classic Bullseye, which only has a single dot and a rounded top? In these cases, you must create your own reference points.
- Apply Masking Tape: Place a strip of masking tape across the top (the crown) of the putter head.
- Use a Ruler: Line up a basic ruler with the leading edge of the putter face so they are perfectly parallel.
- Draw the Perpendicular: Once the ruler is squared to the face, draw a line on the tape extending toward the back of the putter. This line is now your guaranteed perpendicular reference point.
Step 3: Choose the Right Installation Method
While many hobbyists use compressed air to swap iron grips quickly, professional club-makers recommend a more traditional approach for putters: grip solvent and double-sided tape.
The reason is simple: Fine-tuning. Compressed air sets the grip almost instantly. However, a putter grip requires delicate, micro-adjustments to ensure it is perfectly square.
Solvent provides “open time,” giving you several minutes to wiggle, twist, and slide the grip into the exact position required. For a putter, precision is more important than speed.
Step 4: The Professional Installation Process
Once your reference lines are set and your tools are ready, follow these steps for a clean install:
- Secure the Putter: Place the putter shaft in a vise using a rubber protector. Ensure the putter head is sitting nice, square, and straight in the vise.
- Apply Tape and Solvent: Apply your grip tape, then use a generous amount of solvent. Using more solvent than usual is a professional “secret”—it extends your adjustment window and makes the sliding process smoother.
- Slide and Seat: Slide the grip onto the shaft, ensuring it goes all the way on. Give it a small wiggle and a tap at the end to make sure it is fully seated against the butt of the shaft.
Step 5: The “Three-Section” Alignment Check
This is the most critical stage of the process. Because putter grips are often made of soft materials, they can easily bend or twist during the act of sliding them onto the shaft.
The top of your grip can be straight while the bottom (the tip) is slightly crooked.
To avoid this, you must check three distinct sections of the grip: the butt, the midsection, and the tip.
The Rotation Technique
While the solvent is still wet, hold the putter and rotate it in your field of vision, tilting it up and down to align the grip with your sight lines:
- The Butt Section: Align the top of the grip with the reference line closest to the toe of the putter.
- The Midsection: Align the middle of the grip with the center sight line.
- The Tip Section: Align the bottom of the grip with the line closest to the heel of the putter.
By checking all three points, you ensure the entire length of the grip is running parallel to your lines and is perfectly perpendicular to the putter face. If your putter only has one center line, you can use the “ruler trick” mentioned earlier to draw secondary lines on the toe and heel to facilitate this three-point check.
Conclusion: Consistency Starts in the Shop
Installing a putter grip straight is not just about aesthetics; it is about removing variables from your short game. By taking the time to identify your grip’s flat section, creating custom reference lines for minimalist putter heads, and utilizing the three-section alignment check, you ensure that your hands and your putter face are in perfect harmony.
Don’t rush the process. Use plenty of solvent, take advantage of your “open time” to fine-tune the alignment, and verify that every inch of that flat surface is square.
When you stand over a crucial five-footer on the 18th hole, you’ll have the confidence of knowing your equipment is exactly where it needs to be.