In the highly competitive world of elite athletics, the difference between a starter and a bench player often comes down to what happens when the lights are off and the coaches are home.
Many aspiring ballplayers believe that defensive improvement requires a partner, a fungo bat, and a full diamond. However, professional-grade development is rooted in resourcefulness.
Whether you are in a basement, a driveway, or an empty local park, the ability to self-train is a hallmark of the taking full ownership of your career and future.
This comprehensive guide breaks down the essential solo infield drills designed by Coach Justin of Ultimate Baseball Training.
These drills are engineered to refine your ball handling, footwork, momentum, and posture, ensuring you remain game-ready even when training in total isolation.
The Foundation of Elite Infield Play: Ball Handling and “Soft Hands”
The elite infielder’s greatest asset is not their arm strength or their speed, but their relationship with the baseball. Coach Justin emphasizes a core philosophy: the more you touch the baseball, the better an infielder you will become.
In a game situation, you will face “bad hops,” awkward double-play feeds, and bobbles. Developing a high “ball-IQ” through constant contact allows you to recover and make plays that others cannot.
The Ball Handling Circuit
Similar to basketball dribbling drills, these exercises are designed to be performed without a glove to maximize tactile feedback and finger dexterity.
- Torso Circles: Start with the ball in your dominant hand. Move it rapidly around your torso, switching hands behind your back and in front of your stomach.
- Pro Strategy: Start slowly to ensure security. Gradually increase speed to challenge your coordination. If you drop the ball, you are pushing your limits—simply reset and continue.
- Leg and Calf Wraps: Lower your center of gravity and move the ball around your calves. This not only builds hand-eye coordination but also begins the process of “feeling” the ground.
- The Figure-Eight: Weave the ball between and around your legs in a figure-eight pattern.
- The “Soft Hands” Metric: This drill specifically targets the development of “soft hands.” If your hands are tense like “bricks,” the ball will be difficult to handle. You must learn to receive the ball with a relaxed, fluid motion, a skill that translates directly to receiving cutoff throws or turning double plays.
Engineering the Perfect Approach: Footwork and Posture
Footwork is the engine of the infield. Without a precise approach, even the best hands will fail. The goal is to move from a stationary position into a throwing position with maximum efficiency.
The “Right-Left-Tap-Tap” System
This drill focuses on the specific rhythm of approaching a ground ball: Right, Left, Catch; Right, Left, Throw.
- The Glove-Side Alignment: A common mistake among amateur players is fielding the ball in the dead center of their stance or, worse, on their throwing side. Elite players field the ball slightly toward their glove side, specifically near the instep of the left foot (for right-handed players). This alignment prevents awkward arm movements and maintains natural momentum toward your target.
- “Butt Back,” Not “Butt Down”: Coaches often yell “get your butt down,” but this can lead to a dangerous, upright posture where a bad hop could hit a player in the face. Instead, focus on “butt back” with a flat back. This athletic “hinge” ensures that if a ball takes a bad hop, it hits you in the chest, allowing for a recovery play rather than an injury.
- The Drill Execution: Step “right-left” into your fielding position and “tap” your glove to the ground twice to simulate the timing of the catch. Repeat this daily to build the muscle memory required for Major League-level consistency.
The Progression: Step-Through Mechanics
Once the approach is mastered, you must integrate the transition to the throw.
- Perform the Right-Left-Catch.
- Immediately “funnel” the simulated ball into your body.
- Step through with your trailing leg to move directly into a powerful throwing position.
- Maintain a low center of gravity throughout the transition to ensure stability and power.
Overcoming Inertia: The Momentum Drill
One of the most significant hurdles for young infielders is “stuck feet.” Players often run directly at a ball, catch it, and then find themselves at a complete standstill, forced to overcome inertia to make a throw. This leads to weak, inaccurate throws.
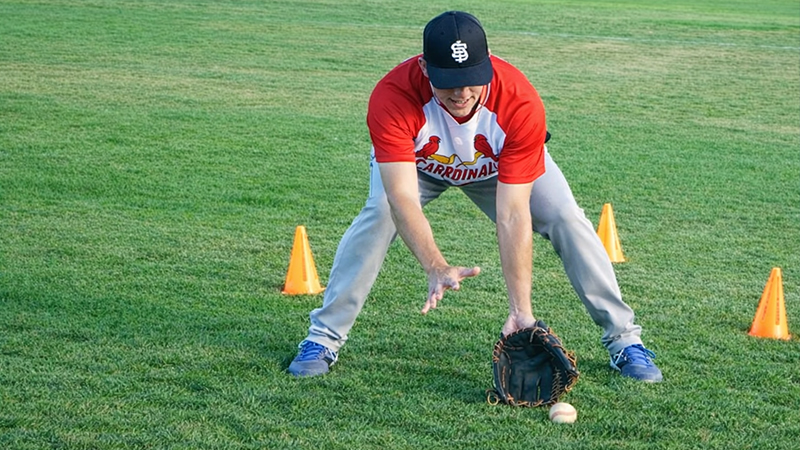
The Triangle Cone Setup
To master momentum, use three cones to simulate “rounding” the baseball.
- Cone A (Start): Placed directly behind the ball.
- Cone B (Right): Placed slightly to the right of the ball’s path.
- Cone C (Left): Placed slightly to the left of the ball.
The Strategy: Instead of a straight-line approach, move around the right-side cone. This creates an angle that allows you to approach the ball while already moving toward your target (e.g., first base). This “rounding” technique ensures that your momentum is working for you rather than against you.
The Ultimate Training Partner: Wall Ball Mastery
The most versatile solo tool in an infielder’s arsenal is a simple wall. Whether using a real baseball or a tennis ball, “Wall Ball” allows you to simulate almost every game-time defensive scenario.
- Short Hops: Throw the ball low against the wall to practice the difficult “pick” of a short hop.
- Forehand and Backhand: Alternate the angle of your throws to force yourself into lateral movements and backhand reaches.
- Integrated Circuit: Combine Wall Ball with the footwork drills mentioned above. Throw the ball, execute your Right-Left-Catch, and finish with your Step-Through into a throwing position.
Conditioning for the Critical Moment: Fielding Position Walks
Defensive excellence is as much about physical endurance as it is about skill. You must be able to make a “gold glove” play in the bottom of the ninth inning when you are exhausted from a long game or a previous double-relay.
The Fielding Walk:
- Get into a deep, athletic fielding position with your glove on the ground.
- Take steps laterally or backward while keeping your glove on the ground.
- Transition your glove from forehand to backhand as you move.
- The Benefit: This provides an intense leg workout and reinforces the “low” posture required for elite play. By training your muscles to operate under the “burn” of fatigue, you ensure your technique won’t crumble during high-pressure game situations.
Enhanced FAQ: Troubleshooting Your Solo Practice
Q: Can I really improve without someone hitting me ground balls?
A: Absolutely. In fact, solo drills often allow for a higher volume of quality “touches” than a standard team practice.
By focusing on the micro-mechanics—like finger dexterity and approach angles—you build a foundation that makes traditional ground ball practice significantly more effective.
Q: What if I don’t have access to a baseball field?
A: These drills are designed for maximum resourcefulness. A driveway, a basement, or even a hallway in front of a mirror can serve as your training ground. The key is consistency, not the facility.
Q: How many reps should I do for the ball handling drills?
A: Focus on quality over quantity, but aim for at least 5-10 minutes of ball handling as a warm-up. The goal is to make the baseball feel like an extension of your hand.
Q: Why is “butt back” better than “butt down”?
A: “Butt back” maintains a flat back and keeps your eyes at a safer angle. If you simply squat “butt down,” your back often rounds, your center of gravity becomes unstable, and you lose the ability to use your chest as a “second glove” for bad hops.
Conclusion: Take Command of Your Development
The path to the Major Leagues—or even just the starting lineup of your varsity team—is paved with the work you do when no one is watching.
By mastering these five pillars of solo infield play, you eliminate excuses and take your career into your own hands.
Key Takeaways for Your Next Session:
- Prioritize Touches: Use the ball handling circuit to develop “soft hands”.
- Master the Rhythm: Internalize the “Right-Left-Catch-Step-Through” cadence.
- Create Angles: Use the momentum drill to avoid “stuck feet”.
- Build Endurance: Use fielding walks to ensure your posture holds up when you’re tired.
Don’t wait for a coach or a teammate to get better. If there is a will, there is a way. Get off the couch, find a ball and a wall, and start outworking the competition today.


