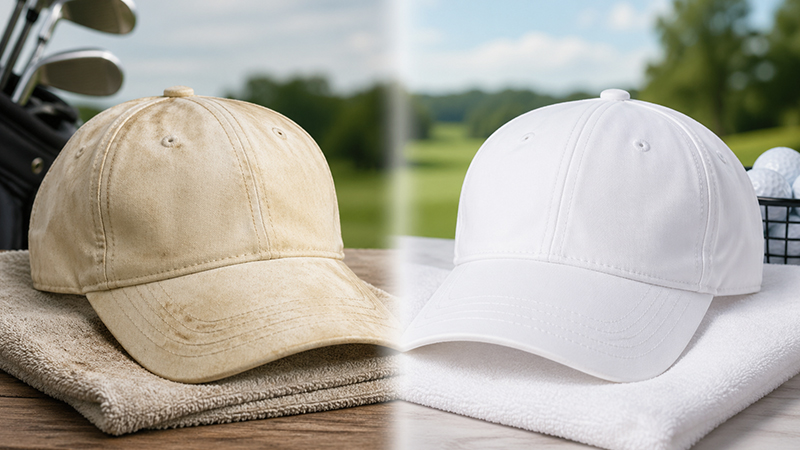
Every golfer knows the heartbreak. You find the perfect white performance cap—the one that fits just right, looks sharp with every polo, and maybe even has a bit of “Sunday Red” luck built into the stitching.
But after three rounds in the sweltering Texas heat, that crisp white turns into what golfers on Reddit affectionately (and disgustedly) call “yell-brown ick”.
The sweat, the sunscreen, the bunker dust—it all converges to create a ring of grime that seems permanent.
Many players simply give up, with some even joking that the best way to clean a hat is simply to “clean it with a new hat”. But for those of us with a favorite tournament giveaway or a lucky lid, “buying a new one” isn’t always an option.
The Foundation: Why Do Golf Hats Fail?
Before we dive into the “how,” we must understand the “why.” A golf hat is more than a fashion statement; it is a piece of performance equipment.
The Science of the “Ick”
The yellowing you see on a white hat is a chemical cocktail. It starts with sodium and potassium from your sweat, which react with the oils (sebum) from your skin.
Throw in the zinc or oxybenzone from your sunscreen, and you have a recipe for a stubborn, oxidized stain that bonds to synthetic fibers.
Material Matters: Performance vs. Cotton
The strategy for cleaning depends heavily on what your hat is made of:
- Performance (Polyester/Spandex): These are the modern “tech” hats. They are generally easier to clean because synthetic fibers are designed to moisture-wick and resist deep staining.
- Cotton Twill: These are your classic “dad hats.” While comfortable, cotton is an organic fiber that loves to hold onto stains and can easily lose its shape or fade if treated too harshly.
- The Leather Factor: Be extremely careful with hats featuring leather patches. Over-soaking these can ruin the leather, causing it to bleed or become brittle.
The “OxiClean Power Play”: The 10-Minute Miracle
If you are looking for the most effective way to return a white hat to “brand spanking new” status, the consensus from both professionals and enthusiasts is clear: OxiClean is the king of restoration.
Why It Works
OxiClean uses oxygen-based bleach (sodium percarbonate), which breaks the organic bonds of sweat and oil without the harsh, fiber-weakening effects of traditional chlorine bleach.
The Step-by-Step “Deep Soak”
- Prepare the Bath: Fill a sink or a small bucket with hot water. You want it hot enough to activate the OxiClean, but not boiling.
- The Mix: Add a scoop of OxiClean and stir until dissolved.
- The Soak: Submerge the hat entirely. For standard grime, a 10-minute soak is often sufficient to see the “bright white” return.
- Targeted Scrubbing: If the sweatband is particularly gross, use a soft toothbrush to gently work the solution into the fabric during the soak.
- The Rinse: This is the most important part. You must rinse thoroughly with cool water. If any OxiClean residue remains, it can lead to future yellowing when it reacts with the sun.
The Gold Standard: Professional Hand Washing
For structured caps where you want to minimize any risk of crown collapse, the traditional hand-wash method is the safest and most recommended approach.
The Equipment List
- A clean sink or bucket.
- Dawn Dish Soap: Specifically, Dawn, as it is engineered to break down animal fats and oils (the very things in your sweat).
- A soft-bristled toothbrush or a specialized nail brush.
- Warm (not hot) water.
The Process
- Pre-Treatment: Spray heavy stains with a dedicated stain remover like Shout, or a 50/50 mix of white vinegar and water.
- The Lather: Mix one tablespoon of Dawn into the warm water until you have a soapy bath.
- Gentle Agitation: Submerge the hat and use your toothbrush to scrub the sweatband and the underside of the brim. Avoid scrubbing the “crown” too hard, as you can create “pilling” on the fabric.
- The Time Factor: Let the hat soak for 30 to 60 minutes. This allows the surfactants in the soap to lift the oils away from the polyester fibers.
- The Rinse: Rinse under a cold tap until the water runs clear and no bubbles remain.
The Dishwasher Method: Tech Shortcut or Gear Killer?
The “dishwasher method” is a polarizing topic in the golf community. Some swear it “works magic,” while others fear for their hat’s structural integrity.
The Rules of Engagement
- Top Rack Only: The heating element in most dishwashers is at the bottom. Placing a hat on the bottom rack is a one-way ticket to a melted brim.
- Use a “Hat Cage”: These plastic frames keep the crown of the hat from collapsing under the weight of the water jets.
- Detergent Check: Use normal dishwasher detergent, but ensure it does not contain bleach or harsh lemon-based acids that might strip the color.
- NO HEATED DRY: This is the most common mistake. The high-heat drying cycle will shrink your hat and ruin the adhesive in the brim. Stop the cycle before the drying phase begins.
The “Shower Method”: The Shape-Preserver’s Secret
One of the most creative solutions from the r/golf community involves taking your gear into the shower with you. This might sound eccentric, but it solves a major engineering problem: maintaining the crown’s shape.
How to Execute
- Wear the Hat: Put the dirty hat on your head and step into the shower.
- Shampoo as Soap: Use your regular shampoo or body wash. Since shampoo is designed to remove hair oils, it is surprisingly effective at removing the oils on your hat’s sweatband.
- The Scrub: Use a small nail brush to scrub the ring while the hat is still on your head.
- The Result: By wearing the hat while it’s wet and soapy, you ensure that the fabric doesn’t shrink or warp. It stays molded to the exact shape of your head.
The Drying Phase: Where 90% of Hats Are Ruined
You can have the best washing technique in the world, but if you fail the drying phase, your hat is destined for the trash. Never, ever put a golf hat in a clothes dryer.
The “Form” Factor
To maintain that crisp, pro-shop look, you need a “form” for the hat to sit on while it dries.
- The Kitchen Solution: An upside-down colander, a coffee can, or a saucepan that matches the size of your head are perfect for keeping the crown rounded.
- The Shadow Rule: Dry your hats in the shade. Direct sunlight can act as a natural bleach, which is fine for white hats, but it will cause colored hats to fade unevenly.
- Dehumidification: If you have a basement with a dehumidifier, hanging the hat nearby can speed up the process without the risk of heat damage.
Advanced Troubleshooting: Stubborn Stains & Materials
The Magic Eraser Trick
For those stubborn “yellow rings” that won’t come out with soap alone, many golfers have found success using a Magic Eraser (melamine sponge).
Lightly dampen the sponge and “erase” the stain on the sweatband. Be careful, however, as this is a micro-abrasive and can wear down the fabric if used too aggressively.
Handling “The Leather Patch”
If your hat has a premium leather patch, you must minimize its contact with water. If the patch gets wet, do not use heat to dry it, as this will cause the leather to crack. Instead, apply a tiny amount of leather conditioner after it air-dries to keep it supple.
When is a Hat “Dead”?
At some point, the fabric will simply reach its limit. If you have scrubbed, soaked in OxiClean, and tried the shower method, and the “permanent stain” remains, it may be time to listen to “the wife” and retire the hat. As one golfer noted, eventually a hat is just “permanently stained,” and that’s when it becomes your “yard work hat”.
Proactive Protection
In the world of professional logistics, the best way to handle a problem is to prevent it. You should treat your golf hats like high-end upholstery.
The Scotchgard Ritual
Before you ever wear a new hat to the range, spray it with a fabric protector like Scotchgard. This creates a hydrophobic barrier that allows sweat and water to bead off the surface rather than soaking into the fibers. This single step can triple the lifespan of a white performance hat.
The 2-Round Maintenance Rule
Don’t wait for the “ick” to become visible. Every 2-3 rounds, give your hat a quick “spot-scrub” with cold water and a toothbrush. This prevents the salt and oils from deeply embedding into the polyester weave.
Summary: The Expert’s Quick-Reference Table
| Goal | Method | Key Benefit |
|---|---|---|
| Whiter Whites | 10-Min OxiClean Soak | Removes yellowing instantly. |
| Shape Preservation | The Shower Method | Keeps the crown molded to your head. |
| Gentle Care | Hand Wash w/ Dawn | Safest for delicate/cotton hats. |
| Deep Clean | Top Rack Dishwasher | Hands-off, high-volume cleaning. |
| Prevention | Scotchgard Spray | Blocks stains before they start. |
Conclusion: Wear It With Pride
Whether you choose to “endorse the color” and wear your sweat stains as a badge of “blood, sweat, and tears” or you prefer the “brand spanking new” look of a freshly OxiCleaned lid, your headwear is a vital part of your game.
By following these data-driven, community-vetted methods, you ensure that your favorite gear stays in the rotation for seasons to come.
Proper maintenance isn’t just about aesthetics—it’s about the discipline and care that defines the spirit of the game. Now, grab that OxiClean, head to the sink, and bring those white hats back to life.