If you are a baseball fan and are looking for a way to keep your gloves safe and protect them from dirt, stains, and water damage, then you should learn how to tie a thumb loop on your baseball glove.
This simple tutorial will show you how to do it in just a few easy steps.
Source: youtube
How To Tie Thumb Loop On Baseball Glove
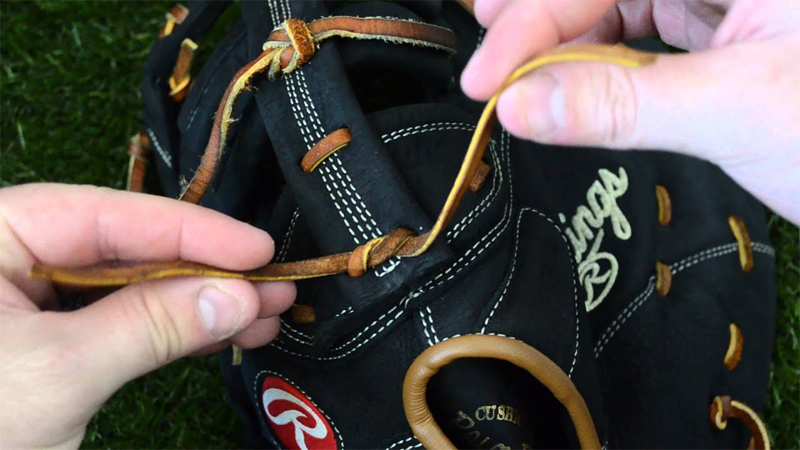
It can be difficult to tie a thumb loop on a baseball glove, but with the help of this tutorial, it will not be a problem. First, Thread the thumb loop over your index finger.
Then, tighten the thumb loop by pulling up on the ends. Make a second thumb loop and put the glove on your hand. Hold the ends of the first thumb loop in your palm and pull them through the hole in the second thumb loop.
Finally, pull the ends of the first thumb loop through the hole in your palm and tighten them. You are now ready to play ball!
Thread Thumb Loop Over Index Finger
To tie the thumb loop on a baseball glove, start by threading your index finger through the loop. Next, pull the index finger tight and tuck it underneath the thumb loop. Then, hold on to the thumb loop with your other hand and repeat this process with the other glove fingers.
Be sure to make a knot in the end of the thumb loop so it doesn’t come undone while you’re playing ball!
Tighten Thumb Loop By Pulling Up On Ends
To tighten the thumb loop on your baseball glove, you will need to pull up on the ends. Once the thumb loop is tightened, it will be easier to grip and throw the ball. Make sure to practice with your glove every day so that you can get a good throwing motion.
When tightening the thumb loop, make sure that it is tight enough so that it doesn’t come off during gameplay. If your thumb loop does come off, don’t worry; just re-tighten it by pulling up on the ends. Baseball gloves are essential for playing in any game, indoors or out.
The tighter the thumb loop, the better chance you have of catching that crucial fly ball! Practice makes perfect when it comes to playing catch – keep at it and you’ll soon be batting in no time! Don’t forget: always replace your baseball glove every year because deterioration and wear occur over time.
Always follow manufacturer’s instructions when tightening or replacing parts on your glove
Make Second Thumb Loop
Once you have tied the first loop on your baseball glove, make a second loop by tying an overhand knot in the string about two inches below the first loop. Make sure both loops are tight so that they don’t come undone when you swing the glove.
When playing catch, it is important to keep your hand close to your body to prevent balls from flying out of the glove. To do this, tie one loop around your index finger and thumb and then tie the other loop around your middle finger and thumb. This will create a “Y” shape with your fingers inside of it.
You can now hold onto the ends of the loops with enough force so that they don’t slip off while you throw or catch a ball. It is also helpful to practice making these loops before playing catch so that you get used to them quickly.
Put Glove On Hand And Hold Ends Of First Thumb Loop In Palm Of Other Hand
To tie a thumb loop on a baseball glove, hold the glove’s ends in your palm and put it on your hand as shown. Then make a small loop with one of the glove’s loops by holding it between your thumb and first two fingers.
Make the second loop the same way, but this time hold it between your index finger and middle finger. Finally, tie each loop together by overlapping them and tucking them behind the glove. You can now use this knot to fasten the glove securely to your hand.
Pull Ends Of First Thumb Loop Through Hole In Second Thumb Loop
Tying a baseball glove’s thumb loop is an easy task that can prevent the glove from slipping off your hand during games or practice. To tie a thumb loop, first make a small loop with one thumb and then make a larger loop with the other thumb.
After making the loops, thread one end of each through the hole in the loops on the opposite hand. Pull tight to secure the loops.
Materials You’Ll Need
To tie a thumb loop on a baseball glove, you will need:-A baseball glove-Thumb loop-Tape measure Measure the circumference of your thumb at the base of your thumb and make a small mark with the tape measure.
Loop the thumb loop around your thumb twice and then pull tight to make a knot. Make sure that the knot is centered on the mark you made on your thumb earlier. Now repeat steps for every hand in your baseball team!
Step By Step Guide
Tying a thumb loop on your baseball glove is an easy way to keep it on your hand while you play. To tie the loop, start by threading one end of the strap through the hole in the palm of your glove.
Make a small loop and pull it tight, then repeat on the other side of the strap. Now take the remaining strap and make a loop big enough to fit around your thumb once it’s been tightened. Put your thumb inside the loop and tie it off with a knot, making sure that the end of the strap is positioned over your index finger.
Try different knots until you find one that’s comfortable and prevents the glove from coming off while you play. Keep in mind that baseball gloves can be wet, so make sure to wipe them down after each game or practice session. Store your baseball glove away from sunlight and heat, which could damage its leather surface.
If you lose or misplace your baseball glove, don’t worry! There are plenty of replacement options available online or at local stores.
Tying The Thumb Loop
To tie the thumb loop on your baseball glove, follow these simple steps: a. Open up the glove so that you have a clear view of the thumb loop. b. Hold the thumb loop between your thumb and first two fingers.
c. Pull up on the thumb loop with your first two fingers to tighten it around your index finger. d. Now hold onto the top of the thumb loop with your second two fingers and pull down on it to loosen it from around your index finger.
You can use this method to tighten or loosen any thumb loop on most baseball gloves.
How To Use Your Glove
When it comes to baseball, you need a good glove to play the game right. To make sure your glove is in good condition, use this thumb loop tutorial. This will help keep your glove together and make it more playable. Also, tie your glove laces at a comfortable position.
You don’t need to be an expert to do this, so give it a try the next time you have some free time. And if you ever lose or damage your thumb loop, be sure to replace it quickly before the gloves fall apart completely!
Conclusion
When tying a thumb loop on a baseball glove, make sure the index and middle fingers are positioned below the ball of the glove with the thumb pointing straight up. Next, take the left wrist strap and place it behind your hand, then hook it around the back of your hand.
Finally, position the right strap so that it crosses in front of your fist and loop it around the back of your hand, then pull tight to form a knot.