In the high-stakes world of competitive baseball, the difference between a clean line drive and a weak pop-fly often comes down to a fraction of an inch—and the confidence in your hands.
While much of the spotlight shines on swing mechanics and exit velocity, elite players understand that performance begins with the interface between the athlete and the equipment: the grip.
Professional icons such as Prince Fielder and David Ortiz have long utilized specific taping designs to optimize their control and ensure a consistent feel in every at-bat.
For the modern player, relying on traditional methods like pine tar can be a liability; the sticky residue is notorious for becoming ineffective in extreme weather, turning into a “rock-hard” substance in the cold or a slippery mess in the heat.
This comprehensive guide delivers a deep dive into the three premier methods of taping a wooden baseball bat.
Whether you are a collegiate athlete seeking an ergonomic edge or a parent looking to equip a young player for success, mastering these DIY techniques is a strategic advantage that fosters irreplaceable comfort and confidence at the plate.
The Strategic Importance of the Custom Grip
Before diving into the “how,” we must address the “why.” In sports psychology, the “feel” of a tool is a significant driver of proprioception—the body’s ability to perceive its position and movement in space.
A bat that feels like an extension of the arm allows for more fluid movement and faster reaction times.
Why Tape Over Traditional Pine Tar?
- Weather Consistency: Athletic tape provides a reliable tactile surface regardless of humidity or temperature.
- Maintenance: A well-executed tape job can be completed in 20–30 minutes and will last for a significant portion of the season, whereas pine tar requires constant reapplication.
- Customization: No two sets of hands are the same. Taping your own bat allows you to adjust the thickness and texture to your exact physiological needs.
Foundation and Preparation
Fortunately, the barrier to entry is low, and the brand of the bat or tape is secondary to the technique of application.
Essential Materials
- Wooden Baseball Bat: Ensure the handle is clean and free of old adhesive or excessive dirt.
- Athletic Tape: Standard cloth athletic tape is preferred. While color is a matter of personal branding, the texture should be consistent.
- Scissors or a Sharp Knife: While optional (as tape can be torn), precision cutting is recommended for a professional, “clean” finish at the ends of the wrap.
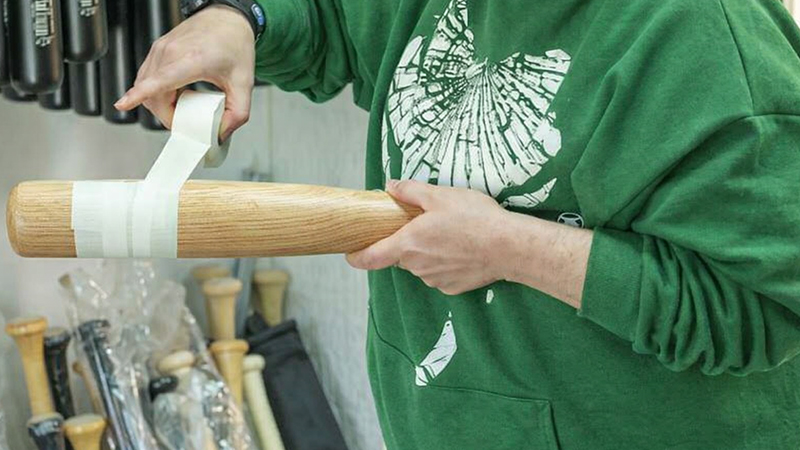
Method 1 – The Straight Wrap (The Functional Classic)
The Straight Wrap is the gold standard of bat taping. It is favored by purists and professional players alike for its minimalist, purely functional design that maximizes grip strength without unnecessary bulk.
Step-by-Step Execution
Establish the Base
The initial wrap must be perfectly horizontal and flush with the butt of the bat. This creates a secure anchor point that prevents the tape from sliding up the handle during high-velocity swings.
Initiate the Spiral
As you begin the second rotation, angle the tape downward toward the barrel. The secret to a professional finish is the 50% overlap rule. By ensuring that only half of the previous layer is exposed, you create a seamless, double-layered surface that is both durable and comfortable.
Maintain Continuity
While it is ideal to use one continuous strip of tape, don’t panic if a mistake occurs. You can cut the tape and restart at the point of interruption with minimal impact on performance.
The Spiral Reach
Continue the downward spiral for at least 2.5 hand widths. Avoid extending the tape onto the barrel, as this can affect the bat’s balance and sweet spot.
The Professional Finish
To prevent fraying and peeling—the hallmarks of an amateur job—cut the tape and apply a final horizontal strip around the ending point. This locks the spiral in place and provides a clean, aesthetic termination.
Method 2 – The Crosshatch (Speed and Visual Impact)
If you find yourself in a high-pressure situation—perhaps breaking a bat mid-game—the Crosshatch method is your best tactical option. It is the fastest method to apply, often taking as little as 10 minutes, while offering a unique “diamond” aesthetic.
Step-by-Step Execution
The First Ring
Unlike the Straight Wrap, the Crosshatch requires immediate downward spiraling at a steep slope. Aim to leave approximately 1/2 inch of wood showing between each layer of tape.
Integrity Warning
Because this method uses less overlapping surface area, the integrity of the tape strip is paramount. If the tape rips, it is highly recommended to restart the strip to prevent premature fraying.
The Inverse Wrap
Once you reach the desired length, repeat the process in the opposite direction. When done correctly, the two paths of tape will intersect to form a “diamond” pattern of exposed wood.
Security Strips
Because this design is more prone to movement, you must apply support strips at both the butt of the bat and the bottom of the wrap. These protect the ends from the constant friction of the hands.
Method 3 – The High Ridge (Advanced Ergonomics)
For the power hitter who demands maximum leverage, the High Ridge Wrap is the ultimate choice. This is the most complex method, utilizing a custom-made “coil” to create physical ridges under the final layer of tape.
Step-by-Step Execution
Creating the Coil
Cut a strip of tape nearly the length of the bat itself. Twist the tape until it forms a tight, consistent cord or coil.
Setting the Ridge
Secure the start of the coil at the butt of the bat with a horizontal strip. Wrap the coil downward for 2.5 hand lengths, spacing the ridges to fit comfortably within your grip.
Locking the Ergonomics
Once the ridges are set, secure the end with another horizontal strip and trim the excess coil.
The Overwrap
Apply a standard Straight Wrap (Method 1) directly over the coiled ridges. Note that the ridges will naturally want to separate the top layer of tape, so you must be extra diligent in maintaining the overlapping structure to ensure the wood remains covered.
Advanced Insights: Maximizing Equipment Longevity
- Avoid Fraying: Fraying is the primary enemy of a good grip. Using one continuous piece of tape (rather than multiple segments) significantly reduces the number of exposed edges that can catch on your batting gloves.
- The Power of DIY: While pre-made grips exist, the emphasis is that every person’s taping style is different. Doing it yourself allows for micro-adjustments in tension and ridge placement that commercial products cannot replicate.
- Psychological Edge: The ritual of taping your bat serves as a mental “reset.” It is a time for the athlete to focus on the upcoming performance, building a sense of ownership over their tools that translates into confidence at the plate.
Enhanced FAQ: Expert Answers for Peak Performance
Q: Does the brand of athletic tape matter?
A: Generally, no. Most athletic tape is functionally similar across major brands. The key is the application technique rather than the logo on the packaging.
Q: Can I use these methods on aluminum or composite bats?
A: In wooden bats, these athletic tape methods are highly versatile and can be applied to any handle surface to improve tactile feedback.
Q: How often should I re-tape my bat?
A: If the tape begins to fray significantly or if the adhesive starts to “bleed” through the cloth, it is time for a refresh. A high-quality Straight Wrap should last several weeks of heavy use.
Q: Why do pros like Prince Fielder use tape instead of just gloves?
A: Tape provides a consistent diameter and texture that gloves alone cannot offer. It allows the player to “feel” the wood, which is essential for making micro-adjustments during the swing.
Conclusion: Take Control of Your Swing
Mastering the art of the bat grip is a foundational skill for any serious baseball player. By moving away from the inconsistency of pine tar and embracing these three proven taping methods, you elevate your game through better equipment management and increased mental confidence.
Whatever your preference, the most important step is to do it yourself. The comfort and confidence that come from knowing your equipment is tailored exactly to your hands is an advantage that cannot be bought—it must be built.
Ready to dominate your next at-bat? Grab your tape and start building your perfect grip today.