In the high-stakes world of competitive golf and premium club maintenance, the ability to pivot—whether in your swing or your equipment—is a hallmark of expertise.
For the discerning golfer, the “cut-and-replace” method of grip maintenance is increasingly seen as an outdated, wasteful practice.
Whether you are transitioning a high-performance shaft, correcting an installation error, or preserving a rare, discontinued putter grip, nondestructive grip removal is an essential skill set.
This comprehensive guide integrates professional-grade techniques, safety protocols, and economic insights to transform your home workshop into a tour-level studio.
By leveraging the same methodologies used by master club-fitters, you can protect your investment while ensuring your equipment remains optimized for the links.
The Strategic Value of Grip Salvaging
Modern golf grips are more than just rubber sleeves; they are sophisticated components engineered for tactile feedback and moisture management.
With premium grips often costing between $12 and $30 per club, a full bag replacement is a significant investment.
The primary challenge in salvaging a grip lies in overcoming the adhesive bond of the grip tape without compromising the structural integrity of the grip’s inner core.
Mastering these techniques allows for “grip recycling,” enabling you to test different shafts with your preferred grip profile without incurring repetitive costs.
The Professional Inventory: Essential Tools for Nondestructive Removal
While DIY hacks exist, professional-grade tools ensure repeatability and safety.
The Chemical Catalyst: Grip Solvent
The foundation of any mechanical removal process is the introduction of a lubricant that can neutralize the tape adhesive.
- Mineral Spirits or Specialized Grip Solvent: These are the gold standard for breaking down the chemical bond of the tape while providing enough lubrication for the grip to slide off the shaft.
- The Injection Mechanism: For high-precision removal, using a long needle or a squeeze bottle with a narrow tip is recommended to deliver the solvent directly into the gap between the grip and the shaft.
Mechanical Removal Tools
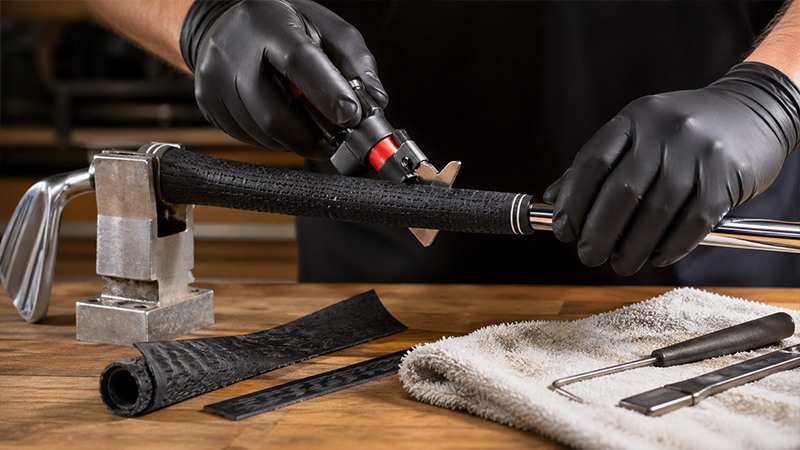
- The V-Style/Blade Tool: Tools like the Golfworks V-style or Dynacraft Blade Style grip remover are engineered to slide the full length of the grip. These tools feature a channel (the “V”) that allows you to squirt solvent deep into the grip as you work it down the shaft.
- The Improvised Professional Alternative: A modified metal coat hanger can serve as a highly effective tool if you have the dexterity. By rounding the ends, you can insert it into the grip’s mouth to create the initial gap for solvent entry.
Pneumatic Equipment
- The Air Compressor: For speed and efficiency, compressed air is the preferred method of the modern club builder.
- The Safety Shield: When using air, a PVC pipe or a “grip protector” is a non-negotiable safety item to prevent the grip from over-expanding or rupturing under pressure.
Stabilization
- Vise with Rubber Clamp: You cannot achieve precision while a club is sliding across a workbench. A vise equipped with a specialized rubber shaft clamp is essential to secure the club safely without damaging graphite or steel shafts.
Method 1: The Mechanical “Solvent and Slide” Technique
This method is ideal for those who do not have access to an air compressor or are working with delicate grips that may not respond well to high-pressure air.
Step 1: Entry and Lubrication
Begin by gently pulling back the edge of the grip at the bottom (near the shaft). Insert your removal tool—be it a dedicated blade or a rounded coat hanger—into this gap. Immediately apply a small amount of solvent to the opening.
Step 2: The “Twist and Work” Protocol
Once the tool is inserted, do not force it. Instead, twist, turn, and pull the grip while rotating the tool around the circumference of the shaft. This action ensures the solvent is distributed evenly, breaking the adhesive bond across the entire surface area.
Step 3: Deep Saturation
As the tool moves further down the shaft, it may begin to “bind.” This is a signal to apply more solvent. If you are using a V-style tool, utilize the groove to guide the solvent toward the butt end of the club.
Step 4: Extraction
Once the tool reaches the end of the shaft, the grip should slide off with minimal resistance. If the grip is older and has lost its elasticity, proceed with caution to avoid tearing the end.
Method 2: The Pneumatic “Air Blast” Technique
Compressed air is widely regarded as the fastest and cleanest way to remove grips, particularly those installed without heavy adhesive tape.
The Danger of “Grip Bombs”
A critical warning for any technician: Never attempt to remove a grip with air if it was installed with double-sided tape without using a protective sleeve.
High pressure can cause the grip to expand rapidly, creating a “grip bomb” that can rupture and cause injury.
Step-by-Step Air Removal
- Secure the Club: Place the club in a vise using a rubber clamp.
- Safety First: Slide a piece of PVC pipe or a dedicated grip-saving tube over the grip. This limits the maximum expansion of the rubber.
- Insert the Nozzle: Place the air compressor nozzle against the hole in the butt end of the grip.
- Controlled Bursts: Apply short, controlled bursts of air. You will see the grip “inflate” slightly. The air will find a path up one side of the grip, breaking the friction between the rubber and the shaft.
- Glide to Removal: While the air is active, gently pull the grip toward the head of the club. It should glide off the shaft on a cushion of air.
Advanced Putter Grip Salvaging
Putter grips, particularly those with flat fronts or oversized profiles (like SuperStroke), require a nuanced approach. Because these grips often have a core made of different materials, they can be more prone to internal damage.
- Tool Selection: Use a long, thin tool to reach the full length of the putter grip.
- Solvent Management: Putter grips often use more tape to build up thickness. Incremental solvent application is key to ensuring the tape doesn’t “roll up” and jam the grip inside.
- Air Support: For oversized putter grips, a combination of a small amount of solvent and low-pressure air often yields the best results, allowing the grip to “expand” over the tape without tearing.
Troubleshooting and Expert Tips
Even the most seasoned club-fitters encounter challenges.
The “Stubborn” Grip
If a grip won’t budge after five minutes of effort, it may be more cost-effective to cut it off. However, if you are determined to save it, let the solvent sit for 10 minutes to fully penetrate the adhesive before trying again.
Tape Residue
Once the grip is removed, you will often find old tape stuck to the shaft. Use a heat gun (on low) to soften the tape before peeling, and clean the shaft with a fresh wipe of solvent.
The Error of “Bone-Headed” Installations
If you realize you’ve stopped a grip an inch from the butt end and the tape has already set, immediate action is required. Using air to “re-expand” the grip is often the only way to slide it the remaining distance without starting over.
Enhanced FAQ: Strategic Club Maintenance
Q: Is it always worth it to save a grip?
A: From a strategic standpoint, if the grip is new and was simply installed incorrectly (e.g., misaligned), salvaging is highly recommended.
If the grip is 4+ years old, the rubber may have lost the elasticity required to stretch over the tool without tearing, making replacement the more efficient choice.
Q: Can I use WD-40 instead of grip solvent?
A: While WD-40 is a lubricant, it is an oil-based product that can be difficult to fully remove from the inside of the grip.
Residual oil will prevent the grip from adhering properly when reinstalled. Professional-grade mineral spirits are preferred as they evaporate cleanly.
Q: How do I know if my grip was installed with tape or air?
A: Grips installed with air alone will often “twist” under extreme pressure and are very easy to remove with air.
Grips installed with tape will feel much more “locked” to the shaft and will require solvent or a safety sleeve for air removal.
Conclusion: Elevate Your Equipment Strategy
Mastering the art of nondestructive golf grip removal is a testament to a golfer’s commitment to precision and efficiency.
By utilizing the correct tools—from air compressors to V-style removers—and adhering to strict safety protocols, you can maintain your equipment at a professional standard while significantly reducing long-term maintenance costs.
Whether you are a DIY enthusiast or a competitive player looking for an edge, these techniques ensure that your “touch” on the course starts with perfectly maintained equipment.