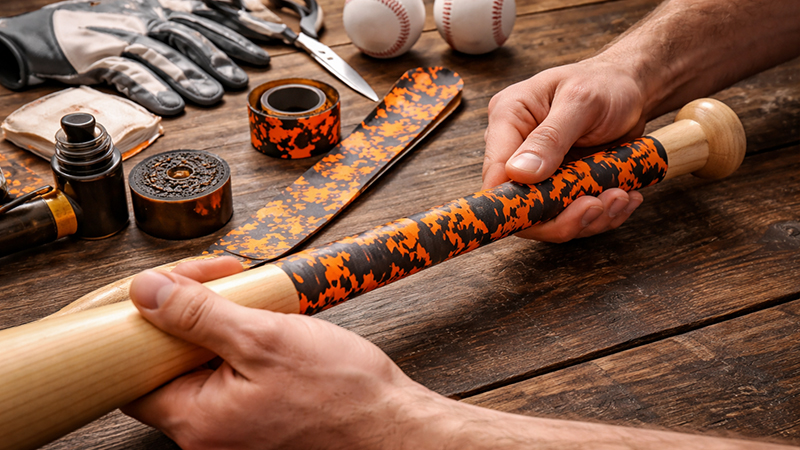
Stepping into the batter’s box with a wooden bat requires a unique level of confidence. Unlike metal bats that often come with pre-installed rubber grips, many wooden bats are bare or have a slick finish that can compromise your control.
Updating your bat’s grip is more than just a cosmetic change; a new bat wrap helps you maintain a secure hold through the entire swing, leading to better control and increased success at the plate.
Whether you are a professional player or a weekend warrior, learning the proper technique for applying grip tape can significantly enhance your comfort and performance.
This guide provides a deep dive into the process, specifically tailored for wooden bats, using professional insights and industry-leading techniques.
The Importance of a Quality Bat Grip
A fresh grip acts as your primary connection to the bat. Over time, old tapings become worn out, slippery, or uncomfortable. By choosing the right tape and applying it correctly, you gain:
- Enhanced Control: A secure grip prevents the bat from twisting in your hands during high-velocity swings.
- Vibration Reduction: Thicker grips help absorb the “sting” of off-center hits, which is particularly common with wooden bats.
- Improved Swing Speed: Thinner grips can help you bring the bat through the strike zone quicker, yielding better hitting results.
- Personalization: Adding a new wrap allows you to customize your gear with colors and styles that reflect your personality.
Choosing the Right Grip Thickness
Before you begin the installation, you must decide which thickness suits your hitting style. There are generally three categories:
- Thin Grips: Ideal for players who want maximum feel for the wood and a faster swing.
- Medium Grips: A perfect blend of performance and comfort, providing enough cushion without losing the “feel” of the handle.
- Thick Grips: Recommended for players seeking maximum hand comfort and those who want to significantly reduce hand fatigue and vibration.
Essential Tools for the Job
To achieve a professional-grade finish, gather the following items before starting:
- Your Wooden Bat
- New Bat Grip Tape (e.g., standard tape or advanced options like VukGripz)
- Electrical Tape (for securing the end)
- Scissors
- Sandpaper or a Small Rock (specifically for wooden bats)
- Paint Scraper and Liquid Cleaner (for removing old residue)
Step 1: Preparing the Wood Surface
Preparation is the most critical step for wooden bats. Unlike metal bats, wooden bats often have a shiny, glossy, or slick finish due to the paint or protective lacquer.
Roughing Up the Handle
If your wooden bat is brand new or has a very smooth finish, grip tape may struggle to adhere properly. Pro Tip: Use sandpaper to lightly rough up the handle where the tape will be applied.
This decreases the slipperiness of the glossy finish and provides a better “bite” for the adhesive. If you are in the field and don’t have sandpaper, you can even use a small rock to achieve a similar effect.
Removing Old Residue
If you are re-gripping an old bat, you must remove the old bat wrap completely to start with a clean slate. Use a paint scraper to get rid of stubborn adhesive, dirt, or pine tar.
If you use liquid cleaners to remove residue, ensure the handle is completely dry before applying the new tape, as any moisture will prevent the adhesive from sticking.
Step 2: Starting the Wrap
Once the handle is clean and prepped, you are ready to begin.
- Identify the Ends: Unravel your tape and find the pre-cut ends. Locate the flat, unfinished end; this part should be placed closest to the knob.
- The Tapered End: Ensure the tapered (angled) end of the tape is facing toward the barrel of the bat.
- The “Stick and Peel” Method: For advanced tapes like VukGripz, do not remove all the backing at once. Only peel off a small portion to keep the rest of the adhesive protected and the tape stiff during application.
Step 3: The Professional Wrapping Technique
The way you hold the bat and apply tension determines how long the grip will last.
Hand Positioning
Keep both hands as close to the handle as possible during the process. Ideally, your thumbs should almost be touching throughout the entire wrap.
This differs from traditional methods where the applying hand is several inches away; keeping your hands close allows for much better control and precision.
Applying Tension
Apply constant tension as you wrap. It is helpful to follow the perforations (if available) on the tape to ensure uniform coverage along the handle.
Crucial Note on Tension: Instead of pulling tight in the middle of the tape, apply pressure with your thumbs exactly where the grip is being stuck to the bat. This technique prevents the edges from curling and ensures the wrap lies perfectly flat.
Step 4: Finishing the Grip
- Continue to the Top: Wrap until you reach your desired height on the handle.
- Secure with Electrical Tape: Once you reach the end, cut a small piece of electrical tape and wrap it around the final revolution of the grip. This provides the primary security to keep the grip from unraveling.
- The Finishing Sticker: If your grip kit came with a finishing sticker, place it directly over the electrical tape. While this is purely cosmetic, it gives the bat a complete, professional look.
Special Considerations for Unique Bats
Axe Handle Wooden Bats
If you are using an Axe Handle bat, the process is similar, but you must be careful not to overstretch the tape. Use your thumbs to help the tape lay flat against the unique contours of the handle.
Metal Tapers on Wood
While less common on pure wood bats, if your bat has a plastic or foam taper added to the handle, do not rely on the thin electrical tape often used to hold those tapers in place.
Instead, wrap athletic cloth tape over the taper first to create a rough, stable surface for your grip tape to adhere to.
Maintenance and Reusability
A well-applied grip can last a long time, but eventually, the friction and sweat from play will take a toll. Some high-end tapes, such as those from VukGripz, are actually reusable.
If you need to move the grip to a different bat, you can carefully peel it off—letting it dangle rather than pulling hard—and reapply it following the same tension and hand-positioning rules.
By taking the time to clean, prep, and properly wrap your wooden bat, you ensure that your equipment is working with you, not against you. A professional grip provides the comfort and control necessary to focus entirely on the pitch and excel in the batter’s box.