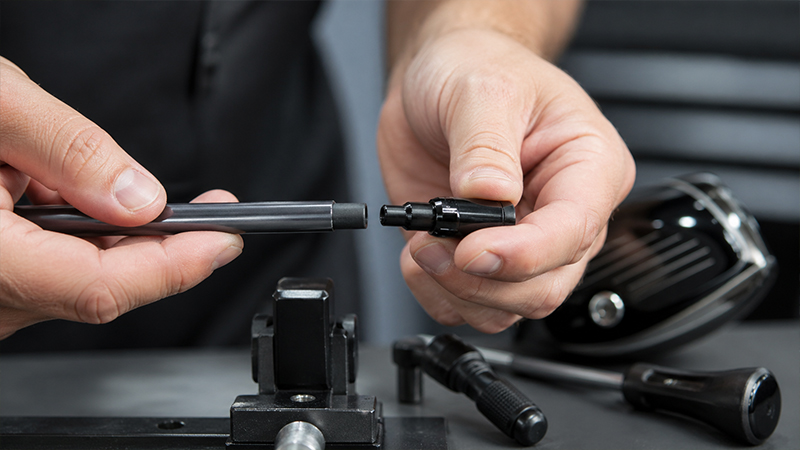
In the modern era of golf, adjustability is no longer a luxury; it is a fundamental requirement for performance optimization.
For the dedicated golfer, the ability to swap shafts across different driver heads or fine-tune loft and lie settings is critical to maintaining a competitive edge.
However, the integrity of these adjustments relies entirely on the quality of the bond between the shaft and the adapter.
This guide provides a comprehensive, professional-grade walkthrough of the golf shaft adapter installation process.
we combine technical precision with advanced material science to ensure your equipment performs exactly as the manufacturers intended.
The Foundation: Why Precision Installation Matters
Installing a golf shaft adapter is a meticulous process involving three primary pillars: shaft tip preparation, chemical bonding, and precise alignment.
While the steps may appear straightforward, the margin for error is slim. Graphite shafts, which dominate the high-performance market, are composed of intricate carbon fiber layers.
Improper handling during the prep phase can lead to structural failure, while poor epoxy application can result in the dreaded “head fly-off” at 110+ mph swing speeds.
By following this master guide, you are not merely “gluing” a part; you are engineering a high-stress joint that must withstand extreme torsional forces.
The Essential Toolkit: Professional Materials for Superior Bonds
To achieve a “Tour-ready” finish, you must utilize professional-grade materials. Substandard adhesives or improper cleaning agents are the most common causes of bond failure.
1. The Adapter
The adapter must be specifically compatible with your driver or fairway wood head (e.g., TaylorMade FCT, Callaway OptiFit, Titleist SureFit).
Using an “off-brand” or non-compatible adapter can lead to improper seating and potential damage to the clubhead’s internal hosel.
2. High-Strength Epoxy
Standard hardware store epoxy is insufficient for the shear forces generated during a golf swing. Professionals utilize “Tour Set” or high-strength epoxy, such as 3M 420 DP.
These adhesives are formulated for high impact resistance and specific cure times that allow for minor adjustments during the set.
3. Cleaning Agents
Chemical purity is non-negotiable. You require Acetone or 91% Isopropyl Alcohol to remove all residual oils, fingerprints, and dust from the bonding surfaces.
4. Preparation Tools
- 80-grit sandpaper: Ideal for stripping the outer finish without deep-gouging the graphite.
- Utility Knife: Used for the “scrape method” to protect fiber integrity.
- Pencil/Marker: For defining the depth of the installation.
1: Measurement and Dry Fitting
Before any permanent changes are made, you must establish the physical parameters of the build.
The Dry Fit Process
Begin by sliding the adapter onto the shaft tip without any adhesive. This serves two purposes:
- Verification: Ensures the shaft tip diameter (typically .335″ or .350″) matches the adapter’s internal diameter.
- Seating Depth: Note how far the shaft travels into the adapter.
Marking the Prep Zone
Once the adapter is fully seated, use a pencil to mark the shaft at the very top of the adapter. This line is your “safe zone.”
You will prep the shaft only up to this mark, ensuring no raw, sanded graphite is visible once the adapter is installed, maintaining a clean, professional aesthetic.
2: Mastering Shaft Tip Preparation
The most critical—and often botched—step in the process is prepping the graphite tip. The goal is to remove the paint and clear coat to expose the raw fibers for bonding without actually damaging those fibers.
The “Scrape Method” vs. Sanding
While 80-grit sandpaper is standard, expert club builders often prefer a sharp utility knife.
- The Technique: Hold the knife blade perpendicular to the shaft.
- The Action: Gently scrape away the paint layers.
- The Benefit: Scaping is more controlled than sanding and significantly reduces the risk of “rounding” the tip or thinning the walls of the graphite, which could lead to breakage at the hosel.
If you choose to use sandpaper, use light pressure and rotate the shaft constantly to ensure an even removal of the finish.
Chemical De-greasing
Once the finish is removed, the surface is covered in microscopic dust and skin oils. Thoroughly clean the sanded tip and the inside of the adapter with acetone or isopropyl alcohol.
If the paper towel comes away grey or black, repeat the process until it remains clean. This ensures the epoxy bonds to the material, not the debris.
3: The Assembly and Bonding Strategy
With the surfaces prepped and cleaned, you are ready to create the bond.
Mixing the Epoxy
Consistency is key. Mix equal parts of your high-strength epoxy thoroughly. If using a dual-cartridge system like the 3M 420 DP, ensure the first small bead is discarded to guarantee a perfect 1:1 ratio in the subsequent mix.
Application Technique
Do not simply coat the shaft.
- Inside the Adapter: Apply a generous amount of epoxy to the internal walls of the adapter using a small stir stick or toothpick.
- On the Shaft: Apply a thin, even coat to the prepped area of the shaft tip.
- The Insertion: Slide the adapter onto the shaft while rotating it. This rotation “screws” the epoxy into the grooves and ensures 100% coverage with no air pockets.
4: Precision Alignment and Seating
In an adjustable club, the orientation of the adapter determines the loft and lie.
Alignment Standards
Before the epoxy begins to set, align the adapter’s primary markings (such as “Standard” or “Neutral”) with the shaft’s logo or your preferred grip orientation.
Most players prefer the shaft logo to be in the “down” position (facing the ground at address), but this is a matter of personal preference.
The “Seating Tap”
To ensure there are no gaps between the shaft tip and the bottom of the adapter, tap the end of the shaft firmly on the ground (butt-end down). This uses gravity to seat the adapter fully, ensuring a consistent club length and a secure fit.
Phase 5: The Final Cure and Cleanup
A professional job is defined by the cleanup. Use a paper towel dampened with alcohol to wipe away any epoxy that squeezed out of the top of the adapter.
The 24-Hour Rule
Patience is the final ingredient. Even “fast-set” epoxies require time to reach maximum shear strength. Allow the club to cure undisturbed for a full 24 hours before use.
Attempting to hit balls before the 24-hour mark can cause the bond to shear internally, leading to eventual failure even if it feels solid initially.
Enhanced FAQ: Troubleshooting and Expert Insights
1. How do I know if my adapter is fully seated?
A properly seated adapter will have no “play” or wiggle room. The “seating tap” mentioned in Phase 4 is the best way to ensure the shaft has reached the bottom of the adapter bore.
2. Can I reuse an old adapter?
Yes, but you must first remove the old epoxy residue from the inside of the adapter using a wire brush and heat. Always inspect the adapter for heat damage or warping before reinstallation.
3. What happens if I sand too much of the graphite?
Sanding too deeply weakens the structural integrity of the shaft. if you see significant “shaving” of black carbon fiber rather than just paint dust, the shaft may be compromised. In such cases, consulting a professional is advised.
4. Is acetone safe for all shafts?
Acetone is safe for the raw tip area, but avoid getting it on the shaft’s graphics or clear coat higher up, as it can melt the finish.
Conclusion: Elevating Your Equipment Standards
By mastering the installation of your golf shaft adapters, you gain complete control over your equipment’s performance.
This process ensures that the “engine” of your club—the shaft—is perfectly integrated with the head, providing the stability and precision required for elite-level play.
Key Takeaways for Success:
- Always perform a dry fit and mark your depth.
- Prioritize the “scrape method” to protect graphite fibers.
- Never compromise on epoxy quality; use high-strength “Tour Set” formulas.
- Respect the 24-hour cure time for a permanent, safe bond.
Whether you are building a new “gamer” or experimenting with different shaft profiles, following these professional protocols ensures your gear is never the weak link in your game.