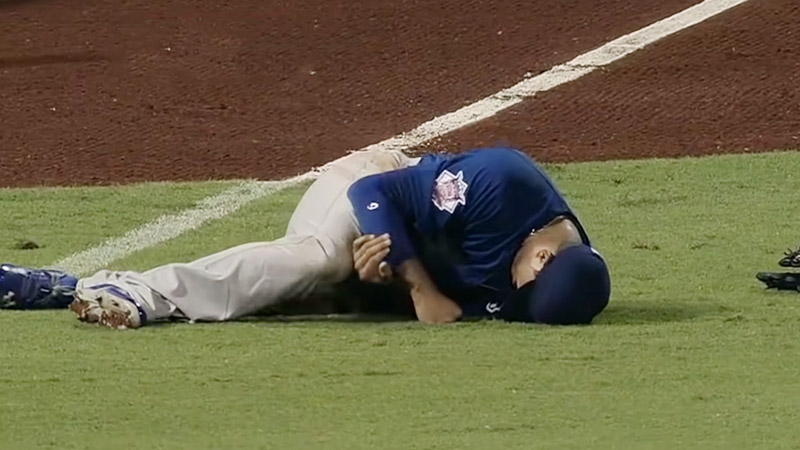
The final out is recorded, the dugout empties, and your arm is already talking to you. That dull ache in the back of the shoulder, or the tightness along the inside of the elbow, is familiar to every pitcher, catcher, and infielder who has thrown hard.
For decades, the answer was simple: wrap a bag of ice around the arm and sit with it for half an hour. Today, sports medicine gives a more precise answer. Ice still has a place, but how, when and why you use it decides whether it helps your recovery or quietly works against it.
This guide gives you a clear, step-by-step method for icing your shoulder and elbow after baseball. You’ll also learn what current research actually says, the mistakes that slow recovery, and the warning signs that call for a doctor instead of a cold pack.
Whether you’re a high school pitcher, a weekend league player, or a parent watching your child’s arm, you’ll finish with a routine you can use tonight.
What Happens Inside Your Arm When You Throw
Throwing a baseball is one of the most violent motions in sport. Biomechanics research has measured shoulder rotation speeds approaching 7,000 degrees per second in skilled pitchers. That is faster than almost any other movement the human body makes.
The real work happens after the ball leaves your hand. Your rotator cuff and the muscles behind your shoulder blade act like brakes, slowing the arm down in a fraction of a second.
This braking, called eccentric loading, creates tiny tears in muscle fibers. At the same time, the inside of your elbow absorbs heavy stretching forces that test the ulnar collateral ligament, the tissue repaired in Tommy John surgery.
The result is predictable:
- Muscle soreness that peaks 24 to 48 hours later, known as delayed onset muscle soreness
- Temporary strength loss, especially in the muscles that rotate the shoulder outward
- Stiffness and reduced range of motion in the shoulder and elbow
This is normal training stress, not injury. Your body repairs these micro-tears and comes back slightly stronger.
The goal of post-game care, including ice, is to manage pain and help you recover function in time for your next outing. It is not to erase every trace of the work you just did.
Should You Still Ice? What the Research Says in 2026
Yes, for most in-season throwers, short and targeted icing after a game is still a smart choice. The debate around ice is real, but the evidence specific to pitchers points in a clear direction.
Why ice fell out of favor
Dr. Gabe Mirkin coined the famous RICE method (rest, ice, compression, elevation) in 1978. He later backtracked, arguing that ice relieves pain but may slow healing. His reasoning: inflammation is part of how the body repairs tissue, and cold restricts the blood flow that carries repair cells.
Some studies backed this up. Research on eccentric muscle damage found that repeated icing did not speed recovery and may have made it worse. Many coaches and trainers stopped recommending ice altogether.
What pitcher-specific studies show
The picture changes when researchers study actual throwers. In a 2003 study of pitchers who threw 98 pitches, both ice groups reported less shoulder soreness. The best strength recovery came from combining ice with light shoulder exercise.
A newer study in the Journal of Strength and Conditioning Research went further. Sixteen college pitchers threw 75 max-effort pitches, then received either 15 minutes of ice or a massage gun session.
As physical therapist Mike Reinold explains, the ice group’s external rotation strength returned to roughly 100% within 48 hours. The massage gun group was still about 11% weaker. Ice also improved shoulder position sense and reduced pain.
The practical takeaway
Context matters. The soreness from 75 pitches is not the same as a serious injury or surgery. For routine post-game recovery during the season, brief icing helps you feel better and regain strength sooner.
During the off-season, when your goal is building strength, strength coach Eric Cressey notes that regular shoulder icing is not recommended because cold may blunt training gains.
How to Ice Your Arm After Baseball: Step by Step
The right method takes about 25 minutes and needs nothing more than two zip-top bags, crushed ice, and an elastic wrap. Follow these steps in order.
- Cool down before you ice. Spend 5 to 10 minutes on light movement first: easy arm circles, light band rotations, and a short walk or bike ride. Research on pitchers shows ice works best when paired with light shoulder exercise, not as a replacement for it.
- Use crushed ice, not a frozen gel pack. Fill two plastic bags with crushed ice or small cubes and squeeze out the air. Crushed ice molds to the joint and stays at a safe temperature. Gel packs straight from the freezer can drop below freezing and damage skin.
- Add a thin barrier. A damp paper towel or thin cloth between the bag and your skin protects against cold burns. Skip thick towels, which block most of the cooling.
- Position your arm comfortably. Sit upright with your throwing arm relaxed at your side or resting on a pillow, elbow slightly bent. Muscles should be loose, not braced.
- Ice the shoulder. Place one bag over the front and top of the shoulder and a second over the back of the shoulder, where the rotator cuff does most of its braking work.
- Ice the elbow carefully. Place the bag over the inner forearm muscles just below the bony knob on the inside of the elbow. Avoid pressing ice into the groove behind that knob. Your ulnar nerve, the “funny bone” nerve, sits close to the skin there and can become irritated by cold and pressure.
- Secure the bags lightly. Use an elastic wrap or plastic wrap just snug enough to hold the ice in place. You want cold, not heavy compression, and you should never feel throbbing or tingling.
- Set a timer for 15 minutes. This matches the protocol used in the 2026 pitcher study. Never exceed 20 minutes in one session.
- Remove the ice and move. Finish with a few slow, pain-free shoulder and elbow movements to restore motion as the tissue rewarms.
Position players who made only routine throws usually don’t need the full routine. Catchers and infielders who made a high volume of hard throws can use the same steps, especially if they feel soreness.
Timing: When, How Long and How Often
Ice within 30 minutes of finishing your cool-down, for 15 minutes, once per outing. That simple rule covers most situations.
When to start
Cold works best on fresh soreness. Pitching coach Dan Blewett notes that icing for acute inflammation is most effective within about 30 minutes of the work. Do your light cool-down first, then ice right away.
How long
Aim for 15 minutes and cap it at 20. Longer sessions add little benefit and raise the risk of skin and nerve irritation.
How often
One session after a game or bullpen is enough for most players. If you’re unusually sore, wait at least an hour for your skin to return to normal temperature before a second round. Reinold now recommends icing after bullpen sessions as well as games.
When not to ice:
- Before throwing. Cold temporarily reduces muscle responsiveness and joint position sense, which is the opposite of what you need on the mound.
- Between innings. Keep the arm warm with a jacket or sleeve instead, so it stays loose for the next inning.
- During the off-season. When you’re building strength, skip routine icing and let your body adapt to training naturally.
Six Icing Mistakes That Slow Your Recovery
Most icing problems come from doing too much, not too little. Watch for these common errors.
- Icing for 30 minutes or more. The old habit of sitting with ice through the whole bus ride does more harm than good. Stick to 15 minutes.
- Putting frozen gel packs directly on skin. These can get colder than ice water and cause frostbite. Use crushed ice and a thin barrier.
- Wrapping too tightly. A tight wrap combined with cold can compress nerves and blood vessels. Numbness, tingling or a pale, waxy patch of skin means remove the ice now.
- Freezing the funny bone. Direct cold and pressure over the ulnar nerve groove behind the inner elbow can leave your hand tingling for hours.
- Using ice to hide sharp pain. Ice dulls symptoms. If you need it just to get through the next game, the real problem is still there and may be getting worse.
- Treating ice as your whole recovery plan. Ice manages soreness. It does not replace a cool-down, sleep, nutrition or a smart throwing schedule.
Build a Complete Recovery Routine Around Ice
Ice is one tool in a larger system. The players with the healthiest arms combine it with movement, rest and fuel.
Active recovery
The day after you pitch, 15 to 20 minutes of easy cycling or brisk walking raises blood flow without stressing the arm. Light movement, not total rest, helps sore muscles bounce back.
Light band work
Low-resistance external rotation, rows, and shoulder blade squeezes keep the rotator cuff active. Keep the effort easy; this is recovery, not a workout.
Gentle mobility
Slow movements for the shoulder, upper back and hips restore range of motion. Avoid forcing a sore shoulder into aggressive stretches.
Sleep
Your body does most of its tissue repair during deep sleep. Teenage players should aim for 8 to 10 hours, adults for at least 7 to 9.
Nutrition and hydration
Eat a meal with protein and carbohydrates within a couple of hours of the game, and replace the fluids you lost in the heat.
Track your arm
Rate your soreness from 1 to 10 each morning. Soreness that drops steadily over two to three days is normal. Soreness that stays flat or climbs is a signal to rest and get checked.
A Note for Parents and Youth Coaches
For young players, rest and pitch counts protect the arm far more than ice ever will. A growing arm is different from an adult arm, and the rules need to reflect that.
Young throwers have open growth plates near the shoulder and inner elbow. These areas are weaker than the surrounding ligaments and tendons, which is why conditions like “Little League elbow” and “Little League shoulder” exist. Pain in a youth thrower is more likely to be growth plate stress than ordinary muscle soreness, so it deserves a closer look.
If your child ices after a game, keep it to 10 to 15 minutes, use a barrier on the skin and stay nearby to check for numbness. Then focus on what matters most:
- Follow pitch count and rest-day limits. MLB and USA Baseball’s Pitch Smart guidelines set daily pitch maximums and required rest by age.
- Take real time off. Pitch Smart advises at least four months off from throwing each year, with two to three of those months in a row, for players 12 and under.
- Don’t catch on non-pitching days. Pitch Smart specifically advises pitchers to avoid playing catcher when they aren’t on the mound.
- Avoid multiple teams at once. Overlapping seasons make it nearly impossible to track total throwing.
- Make it safe to speak up. Kids often hide pain to keep playing. Ask how the arm feels, not just how the game went.
Warning Signs That Ice Isn’t Enough
Normal soreness is a dull, general ache that improves each day. Stop throwing and see a sports medicine physician, athletic trainer or physical therapist if you notice any of the following:
- Sharp, stabbing, or pinpoint pain during or after throwing
- Pain on the inside of the elbow that you can press with one finger
- Numbness or tingling in your ring and pinky fingers
- A pop, click, or slipping feeling in the shoulder or elbow, especially with pain
- A sudden drop in velocity or control
- Soreness that lasts beyond 72 hours, or that worsens instead of fading
- Pain that wakes you at night or shows up at rest
- Visible swelling or bruising around a joint
In the meantime, you can still use ice for short-term pain relief. Just don’t let it become a way to keep throwing through a warning sign.
Your Post-Game Arm Care Checklist
Print this page or save it to your phone and keep it in your bat bag. It turns everything above into a routine you can follow without thinking.
Right after the game
- 5 to 10 minutes of light cool-down: arm circles, easy band work, a short walk
- Crushed ice in two bags, air squeezed out
- Thin, damp barrier between ice and skin
- Ice the front and back of the shoulder, plus the inner forearm below the elbow
- Timer set for 15 minutes, never over 20
- A few slow, pain-free movements after the ice comes off
That evening
- A meal with protein and carbohydrates
- Plenty of fluids
- Second ice session only if very sore, at least an hour after the first
- Full night of sleep
Next morning and the following days
- Rate arm soreness from 1 to 10
- 15 to 20 minutes of easy cardio
- Light band work and gentle mobility
- Check for any warning signs listed above
- Follow your throwing program and required rest days
The Bottom Line
Icing your arm after baseball still works when you do it the right way: a short cool-down, 15 minutes of crushed ice on the shoulder and inner forearm, and then movement.
The newest pitcher research shows this simple routine can help restore shoulder strength within 48 hours and ease next-day soreness.
Ice is not a cure, and it should never hide real pain. Pair it with sleep, good food, light activity and smart pitch counts, and you give your arm its best chance to stay healthy all season and for years to come.