Embarking on a journey to create your shoulder tube? You’re in the right place. I’m here to guide you through the process from start to finish.
There’s something gratifying about crafting your fitness equipment, and a shoulder tube is no exception. It’s cost-effective and allows for customization based on personal needs and preferences.
A shoulder tube, sometimes known as a “shoulderok” or mobility stick, is an underrated piece of exercise gear that can significantly improve shoulder strength and flexibility.
If you’ve never heard of it before, don’t worry – by the end of this article, you’ll know what it is and how to make one yourself.
Now, let’s dive into the details. To build your DIY shoulder tube, there are some specific materials and steps you’ll need to follow.
By taking this project into your own hands (quite literally), you’re set to gain more than just physical strength – think of the sense of accomplishment when swinging your personally crafted tool! So stay tuned as we delve further into our step-by-step guide on making a shoulder tube at home.
The Basics of a Shoulder Tube
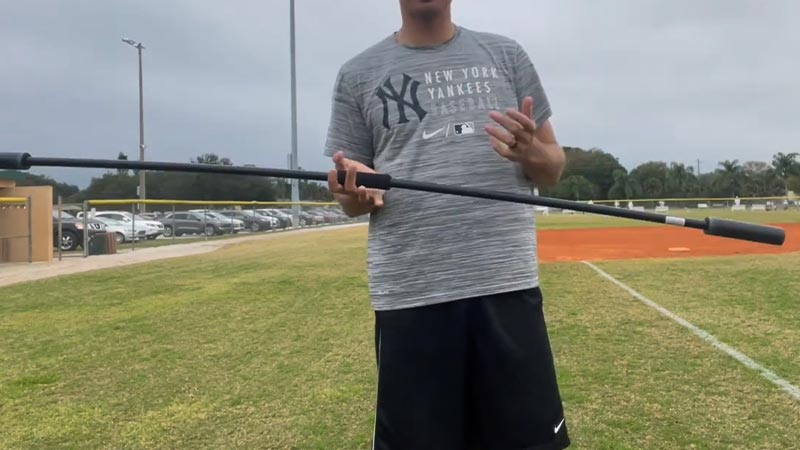
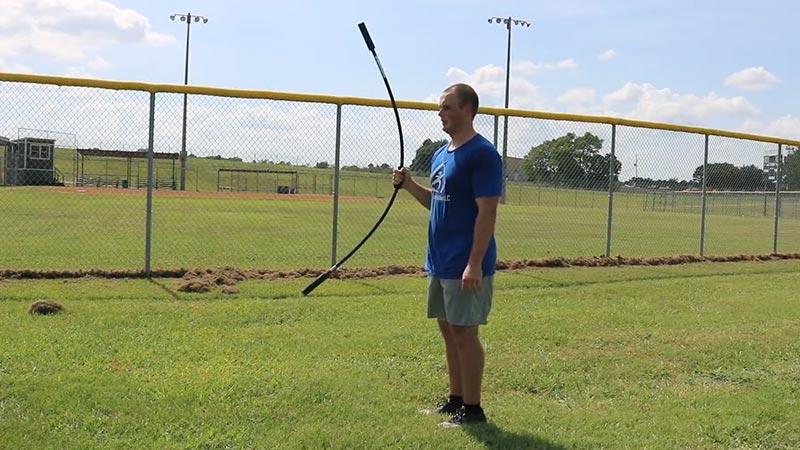
A shoulder tube is a versatile tool used in physical therapy and sports training to strengthen the rotator cuff muscles, enhancing shoulder flexibility and strength.
Typically constructed from lightweight materials like PVC or aluminum, it’s 4 to 6 feet long with ridges at one end for gripping while rotating the arm.
This simple yet effective movement targets the small but crucial muscles responsible for shoulder motion.
While beneficial for individuals engaged in repetitive overhead motions, such as swimming or tennis, consulting with a professional before incorporating it into an exercise routine is crucial. Consistent use can yield significant improvements over time.
Materials Required to Make a Shoulder Tube

Before we dive into making a shoulder tube, let’s take a moment to gather all the essential materials. Trust me when I say it’s much easier when you have everything at your fingertips!
To summarize:
- PVC Pipe (1.5-inch diameter, shoulder-width length)
- Two End Caps (to fit your chosen pipe)
- Filling Material (sand, rice, or small pebbles)
- Duct Tape
- Optional: Foam Padding / Tennis Wrap
With these items, you’re all set to create your shoulder tube! I’ll detail each step in detail in the next section, so stay tuned!
Step-by-Step Guide to Build Your Shoulder Tube
Building a shoulder tube is a relatively simple process that requires a few materials and essential tools. Follow these step-by-step instructions to create your shoulder tube:
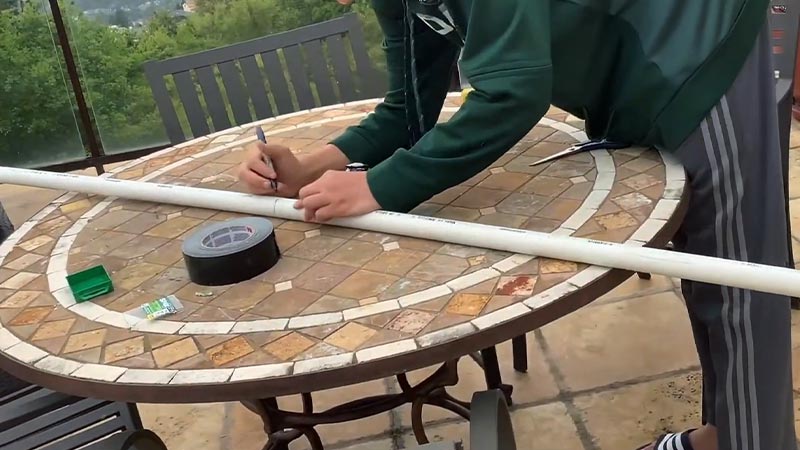
Gather Materials
Head to a hardware store and procure a sturdy PVC pipe, approximately 24 inches long and 1.5 inches in diameter. Ensure the quality of the pipe to avoid any safety concerns.
Select Foam Padding: Acquire a roll of high-density foam that provides comfort and durability. Opt for a type that can withstand regular usage without wearing out quickly.
Prepare Components:
- Cut two pieces of foam from the roll, each matching the length of the PVC pipe.
- Utilize a strong adhesive, such as epoxy, to bond the foam pieces together along their length.
- Once securely attached, wrap the foam around the PVC pipe. Ensure a snug fit.
Secure Assembly:
- Confirm that the foam is securely wrapped around the PVC pipe.
- Use duct tape to firmly secure the foam, ensuring it stays snugly attached to the pipe.
Safety Measures:
- Always warm up before utilizing the shoulder tube to prevent injury.
- Consult a fitness professional or physical therapist if proper usage or exercises are uncertain.
- Remember, progress in strength-building takes time; avoid rushing or overexerting yourself.
Following these steps, you’ve successfully constructed your DIY shoulder tube, a versatile tool for enhancing shoulder mobility and overall upper-body strength.
Enjoy the benefits of your creation while prioritizing safety and gradual progress in your fitness journey.
Maintenance Tips for Your Homemade Shoulder Tube

Maintaining your homemade shoulder tube is crucial for ensuring its longevity and continued effectiveness. Here are some essential maintenance tips to keep your DIY fitness tool in top-notch condition:
Regular Cleaning
After each use, clean your shoulder tube to remove sweat and grime. A simple wipe-down with a damp cloth should suffice. Use mild soap, but avoid harsh chemicals that could damage the materials if necessary.
Proper Storage
Store your shoulder tube in a cool, dry place away from direct sunlight when not in use. Prolonged exposure to heat and sunlight can cause the materials to warp or degrade over time.
Inspection Before Use
Before each workout session, inspect your shoulder tube for any signs of wear and tear, such as cracks or deformities. If you notice any damage, refrain from using it until it’s repaired or replaced to prevent accidents or injuries.
Rotate Usage
If you have multiple shoulder tubes, rotate their usage to distribute wear and tear evenly. This can help extend the lifespan of your DIY fitness equipment.
Replace When Necessary
Despite your best efforts, no piece of equipment lasts forever. If your shoulder tube shows signs of wear or damage that cannot be repaired, replace it immediately to prevent accidents and ensure your safety during workouts.
By following these maintenance tips regularly, you can ensure that your homemade shoulder tube remains in optimal condition, allowing you to continue reaping its benefits for a long time.
FAQ
Can I use a shoulder tube if I’ve never had shoulder problems?
Absolutely! Shoulder tubes are great for maintaining shoulder health and improving mobility, even if you haven’t experienced issues before.
How long should I use a shoulder tube during each session?
It depends on your fitness level and goals. Starting with 5-10 minutes of shoulder tube exercises and gradually increasing duration as you build strength and endurance is a good approach.
Can I customize the length or thickness of my homemade shoulder tube?
Yes, you can adjust the length and thickness of your DIY shoulder tube based on personal preference and comfort, but ensure it remains sturdy and functional.
Are there any specific warm-up exercises I should do before using a shoulder tube?
Yes, gentle shoulder and arm stretches and dynamic movements like arm circles can help warm the muscles before using a shoulder tube.
Can I use a shoulder tube if I’ve had shoulder surgery?
In most cases, following your surgeon’s or physical therapist’s guidance regarding post-operative exercises and restrictions is essential. Always consult a healthcare professional before starting any new exercise regimen after surgery.
Conclusion: Embrace DIY and Enhance Your Fitness Journey
Embracing the Do-It-Yourself (DIY) approach, particularly in fitness, isn’t just about saving money. It’s also about better understanding your body, its needs, and how to meet those needs effectively.
Through building my shoulder tube, I’ve developed a practical skill and deepened my commitment to personal health and well-being.
Creating a shoulder tube might seem daunting at first glance. Yet, with patience and persistence, it’s an achievable goal for anyone interested in taking their fitness journey to the next level. The satisfaction that comes from using equipment you’ve crafted yourself is incomparable.
That said, here are some key takeaways from this experience:
- DIY fitness equipment like a shoulder tube can be made with readily available materials
- Making your gear allows for customization that suits individual needs best
- The process involved gives you a better understanding of how exercise equipment works
Remember, though, while creating something on your own is exhilarating, safety should always be paramount. Ensuring all materials used are sturdy enough to withstand heavy usage is critical.
So why not give it a shot? Get creative with your fitness routine by making your very own shoulder tube! Trust me; it’ll create an enriched sense of ownership over your workouts – one that buying off-the-shelf products seldom provides.
To conclude this journey, let’s remember that each step towards self-sufficiency brings us closer to being masters of our bodies. After all, isn’t that what fitness is ultimately about?


