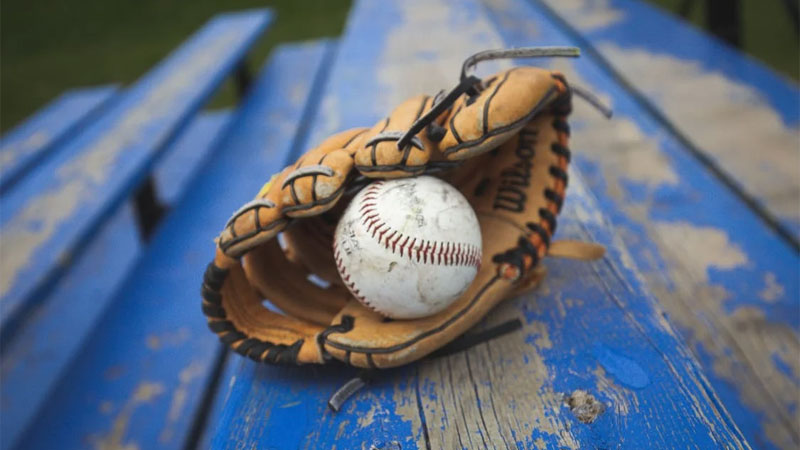
Every second-millisecond matters on the dirt. Whether you are turning a lightning-fast double play from deep short or trying to scoop an off-target throw at second base, your glove is your primary tool.
Among fielders at the collegiate and professional levels, glove shaping is not just about personal preference—it is a functional science.
One technique stands out for players who demand the fastest possible ball transfer: the flare.
This comprehensive, step-by-step guide walks you through how to flare your baseball glove correctly, the mechanics behind why it works, and how to maintain that perfect shape without compromising your leather’s structural integrity.
What Does It Mean to Flare a Baseball Glove?
Flaring a baseball glove means manually shaping the upper tips of the thumb and pinky stalls outward, away from the center pocket. Instead of a traditional, roundly cupped glove shape, a flared glove creates a wider, flatter funnel.
TRADITIONAL SHAPE                    FLARED SHAPE
    (Deep Pocket)                 (Wide, Shallow Funnel)

      /   \                            \   /
     /     \                            \ /
    (  ( )  )                          (   )
     \     /                            \ /
      \___/                            /   \
Why Do Infielders Flare Their Gloves?
- Expanded Catching Surface Area: Bending the outermost finger stalls outward opens up the mouth of the glove. This wider funnel gives you a larger margin for error on ground balls and line drives.
- Faster Ball Transfers: A traditional deep pocket holds onto the ball tightly. A flared glove creates a shallow, accessible pocket. When the ball hits the leather, it quickly guides the ball directly to your bare hand, trimming split seconds off your throw to first base.
- Customized Pocket Depth: Flaring allows fielders to customize how deep or shallow their glove plays, giving you complete control over how the ball interacts with your palm.
Flare Styles: Which One Is Right for Your Position?
Before applying pressure to your leather, you need to choose the flare style that best complements your position and fielding mechanics.
Tools and Equipment Needed
To achieve a professional-grade flare without damaging your glove’s leather, gather these basic tools:
- Warm Tap Water: Useful for dampening the leather fibers slightly to increase flexibility. Avoid hot or boiling water.
- Glove Conditioner or Oil: Formulated specifically for baseball leather (e.g., neatsfoot oil or specialized leather conditioner) to preserve moisture.
- Regulation Baseball or Softball: Used to form and maintain the core pocket shape.
- Glove Wrap or Heavy Rubber Bands: To secure the shape during the curing process.
- Wooden Glove Mallet: Optional, but useful for pounding and loosening stiff leather.
Step-by-Step Guide: How to Flare Your Baseball Glove
Follow these five steps to achieve a clean, durable flare without causing structural failure to the glove’s internal felt padding or leather stays.
Step 1: Prepare and Condition the Leather
Working with dry, stiff leather can cause micro-tears in the grain or crack the outer finish.
- Lightly Dampen the Stalls: Apply a small amount of warm water to the back side of the thumb and pinky finger stalls. Use a moist cloth or your fingers.
- Avoid Full Submersion: Never soak, submerge, or microwave your glove. Excess water degrades internal glue, softens structural felt inserts prematurely, and rots leather over time.
- Apply Leather Conditioner: Rub a dime-sized amount of conditioner onto the exterior leather of the thumb and pinky stalls to ensure the fibers bend smoothly without cracking.
Step 2: Isolate and Bend the Thumb and Pinky Stalls
The key to a long-lasting flare is targeting the tips of the finger stalls rather than bending the glove from its base.
- Grasp the Top Half of the Thumb: Place your thumb inside the stall and grab the top two inches of the thumb outer shell with your opposite hand.
- Apply Outward Pressure: Work the top section of the thumb stall away from the palm, rolling the leather outward using steady, thumb-over-thumb pressure.
- Protect the Lower Support Stay: Do not bend the rigid plastic insert at the base of the thumb. Keep the base solid for wrist support while only flaring the upper tip.
- Repeat on the Pinky Stall: Work the outer tip of the pinky stall, rolling and pushing it outward away from the center of the hand.
Step 3: Flatten and Widen the Palm Center
Flaring the sides without adjusting the center can create an awkward, distorted shape. You need to balance the outward flare by setting the palm correctly.
- Open the Glove Face: Place the glove palm-up on a solid surface or flat against your knee.
- Work the Pocket: Push down firmly into the center pocket area with your fist or a wooden glove mallet.
- Pull Middle Fingers Down: Pull the index and middle finger stalls slightly backward to widen the entry area of the web and pocket.
Step 4: Lock In the Shape with a Glove Wrap
Leather has a natural memory. Once you bend the fibers into position, you must hold them in place while the leather dries and sets.
                    +-----------------------+
                    |   1. Insert Baseball  |
                    +-----------+-----------+
                                |
                                v
                    +-----------------------+
                    |   2. Close Halfway    |
                    +-----------+-----------+
                                |
                                v
                    +-----------------------+
                    |   3. Wrap Securely    |
                    +-----------+-----------+
                                |
                                v
                    +-----------------------+
                    |  4. Dry (12-24 Hours) |
                    +-----------------------+
- Place a Ball in the Pocket: Insert a regulation ball right into the target pocket area below the webbing.
- Close the Glove Halfway: Fold the glove lightly over the ball, ensuring your newly flared thumb and pinky tips remain pointed outward and are not compressed inward by the wrap.
- Secure with a Wrap: Wrap a flexible rubber band, elastic glove wrap, or leather lace around the base of the glove and around the ball area. Leave the flared tips exposed or supported outward.
- Allow to Dry: Let the glove sit in a cool, dry room for 12 to 24 hours. Keep it out of direct sunlight and away from hot air vents.
Step 5: Field Testing and Ongoing Maintenance
A flare is not a one-time adjustment—it is an ongoing shaping process that evolves as you break in your glove.
- Play Catch Immediately: Once you unwrap the glove, put it on and play a session of catch. The impact of the ball landing in the pocket will help set the new shape relative to your hand movement.
- Manual Finger Work: Periodically during games or practices, use your off-hand to pull the thumb and pinky tips outward to reinforce the flare.
- Store Correctly: When putting your glove in your equipment bag, place it palm-down or rest it on its pinky side. Never shove it upside down or drop heavy gear on top of it, which could flatten your flared tips out of alignment.
Common Flaring Mistakes to Avoid
Even experienced players can ruin a high-end steerhide or Kip leather glove by rushing the flaring process. Avoid these common pitfalls:
- Bending the Entire Finger Insert: Gloves use internal plastic inserts for structure. Bending these inserts near the wrist weakens the glove’s backbone and ruins its structural strength. Focus only on the top half of the finger stalls.
- Over-Saturating the Leather: Water is a temporary lubricant for leather fibers, but too much of it strips away essential natural oils, leaving the leather brittle once dry.
- Using Heat Sources: Never use ovens, microwaves, or hot car trunks to speed up the process. Heat dries out leather adhesives, shrinks internal stitching, and significantly reduces the lifespan of the glove.
- Flaring Outfield Gloves: Outfielders require deep, secure pockets to track down fly balls and hold onto the ball during dives. Flaring an outfield glove creates a shallow pocket, increasing the likelihood of drops on high-impact catches.
Frequently Asked Questions
Can you flare any type of baseball glove?
Yes, you can flare almost any glove made of real leather, but the results vary based on leather quality and position type.
Infield gloves (11.25 inches to 11.75 inches) respond best to flaring. Outfield gloves and catcher’s mitts should generally not be flared due to their need for deep pockets and deep ball security.
Does flaring ruin a baseball glove?
No, when done correctly, flaring does not ruin a glove. It alters the break-in pattern to suit specific field preferences. However, aggressive bending of the lower structural stays can weaken the glove’s support over time.
How long does a flared shape last?
Depending on the stiffness of your leather (e.g., Japanese Kip vs. soft cowhide), a flared shape lasts anywhere from a few weeks to several months of regular play. Routine manual adjustments during catch will keep the shape locked in permanently.
Can you undo a flared glove?
Yes. If you decide you prefer a traditional cupped shape, moisten the outer finger stalls slightly, fold the thumb and pinky tips inward toward the palm, wrap the glove tightly around a ball, and let it cure.
Final Thoughts
Flaring your baseball glove is one of the most effective ways to customize your gear for elite infield performance.
By converting your pocket into a wide, accessible funnel, you build confidence on grounders and eliminate unnecessary friction during ball transfers.
Take your time, work the leather gently with moisture and conditioner, and regularly reinforce the tips by hand to build a long-lasting, high-performing infield glove.