If you want to build a baseball net, there are a few things that you will need. First, you will need some sturdy posts that will support the netting. You can find these at any home improvement store or lumberyard.
Next, you will need wire mesh panels and stakes to hold the mesh in place. You can find these at any hardware or sporting goods store. Finally, you will need fishing line and weights to hang the netting.
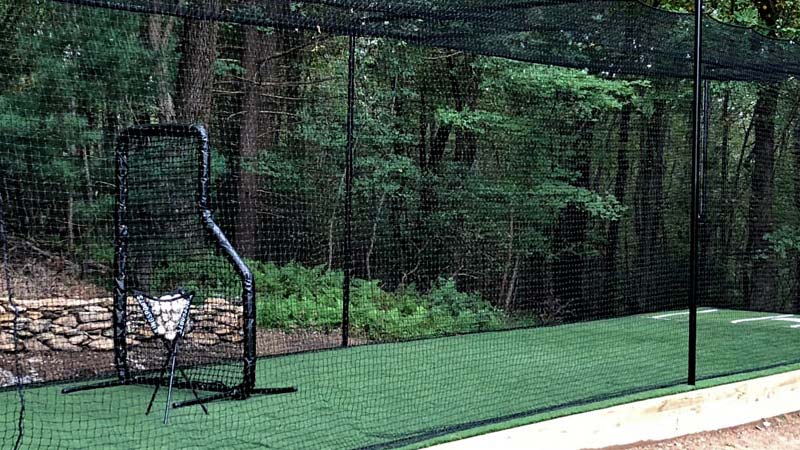
Source: simplifiedbuilding
How To Build A Baseball Net
If you are a baseball enthusiast and would like to install a net in your backyard, then you will need to purchase the right netting and find the right location with clear space.
You should also measure and cut the netting to fit, assemble the nets, and then install them.
Purchase The Proper Netting
When you’re building a baseball net, the first thing you need to do is purchase the proper netting. This will help keep your lawn and garden safe while you have fun playing catch with your friends. There are a variety of different types of netting available, so make sure to find the right one for your needs.
Purchase the Correct Netting
The type of netting you’ll need to purchase will depend on the sport or activity you’re trying to recreate. For baseball, for example, a standard regulation 8 foot by 18 foot batting net is necessary. When purchasing netting, be sure to read the dimensions carefully and make sure that you’re getting what you need.
Preparing the Netting
Before you can start using your new batting net, you’ll first have to prepare it by cutting it to the correct size and shape. This can be done with a simple utility knife or even a garden saw if necessary. Once the net is cut to size, it can then be secured with stakes or ropes in any desired location.
Playing Baseball in Your New Batting Net
Now that your batting net is properly prepared and in place, all that’s left is to play some baseball! Be sure to take advantage of your new batting net and hit some home runs.
Find A Location With Clear Space
When looking for a place to set up your homemade baseball net, be sure to consider the surrounding area. Consider the location of any obstructions and whether they would create a problem when setting up the net.
If you can find an open space without any trees or other obstacles in the way, then go for it! Another consideration is weather: if there’s rain in forecasted, then finding an indoor location might be better for your project.
To keep your net as sturdy as possible, measure twice and drill once—or use wood glue and screws to attach each post securely to the ground. Assemble all of the components before starting to construct your netting so that everything lines up perfectly when finished.
Use stakes or fishing line to hold the net in place while you’re waiting for the weather to clear—it’ll stay put even in gusty conditions! Once you have a perfect spot picked out, get ready for some serious baseball playtime with friends and family.
Measure And Cut The Netting To Fit
To build a baseball net, you’ll need to measure and cut the netting to fit. First, find the dimensions of the netting you want to use. Second, determine how wide your base will be. Third, calculate how high your posts will be. Finally, cut the netting to the desired width and height.
- First, measure the size of your netting and cut it to fit. Use a straight edge to make sure that the edges are even.
- Next, fold the corners in so that they form an “L” shape. This will help to keep the netting from coming undone while you are playing.
- Finally, secure the netting with staples or wire ties.
Assemble The Nets
Baseball nets can be a great addition to any backyard and can give your children hours of fun. The process of assembling a baseball net is simple, but it does require some tools and materials.
To start, you will need a pair of stakes, nylon cord, and Velcro. Next, cut the nylon cord into inch pieces and tie one end to each stake. Make sure that the ends of the nylon cord are tucked underneath the stake so that they’re out of sight.
Once you have tied all of the cords together, wrap the Velcro around each stake twice and attach it to the top of the netting. Now you’re ready to hang the netting! Use either tension wires or rope to secure it in place against trees or other objects in your yard.
You can also use a baseball net as an impromptu play area for your children when they’re outside playing ball games. If you have dogs that love to chase balls, installing a baseball net may keep them off your lawn while you play catch with your son or daughter! Assemble a baseball net today and enjoy hours of fun with your family outdoors.
Install The Nets
If you’re looking to add some fun and excitement to your backyard games, then installing a baseball net is the perfect solution! This simple project can be done in just a few hours, and it’s sure to bring friends and family together for hours of fun.
Prep the Area
Before you can install the net, you’ll need to prepare the area. Remove any obstacles that could get in the way of the net, such as trees or power lines. You’ll also need to remove any rocks or debris from around the base of the nets so they don’t damage your turf.
Assemble The Nets
Once the area is prepped, it’s time to assemble the nets. Start by attaching one end of each net to a post or tree trunk using metal wire cables. Make sure that each cable is tight and doesn’t sag in the middle.
Hang The Nets
Now it’s time to hang the nets! To do this, tie one end of each net onto another post or tree trunk using more metal wire cables. Make sure that both ends of eachnet are hanging at equal distances from each other and from the post/tree trunk they’re attached to.
Check for Straps
Make sure there are no gaps between each net and check for straps that may have gotten loose during assembly. If there are any problems with your baseball net installation, be sure to fix them before game day.
Materials You’Ll Need
To build a baseball net, you’ll need the following materials:
-Tennis net
-Plywood
-Fencing wire
-Nails
-Wooden dowel rods
-Ruler or a straight edge
-Cordless drill
PVC pipe
Tarps
Nails or screws
How To Assemble The Net
Building a baseball net is a great way to enjoy the game outdoors with friends. There are many different ways to assemble a net, so be sure to find one that fit your needs and abilities. Here are some tips on how to assemble a baseball net:
-Measure the area you want to cover and calculate the number of poles needed.
-Purchase lumber and attach the poles using galvanized screws or nails.
-Stain or paint the poles as desired.
- The baseball net is made up of a series of panels that are connected together using screws and brackets.
- The first step in assembling the net is to attach the top panel to the base with the screws. Make sure that you tighten the screws evenly so that the net will stay in place.
- Next, attach the middle panel to the top and bottom panels using the same screws. Be sure to tighten these screws evenly as well.
- Finally, attach the side panels to the middle panel using the screws that were used to attach the top and bottom panels. You should now have a completed baseball net.
To Recap
There are lots of ways to build a baseball net, so it’s really up to you what style you want. There are some basic guidelines, but feel free to go with whatever looks best on your property.
Measure the opening of your net and buy the appropriate size fence or netting. Then, use screws, nails, or staplers to attach the netting to the fence posts.
Also practice hard to throw the ball further.