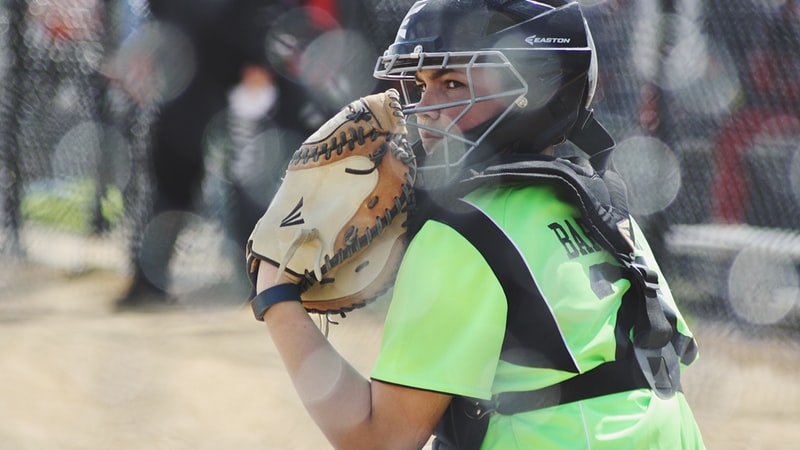
For any player behind the dish, a catcher’s mitt is more than just equipment—it is a specialized tool designed to withstand the most frequent and highest-velocity impacts on the field.
Because catcher’s mitts feature significantly more padding and stiffer leather than infield or outfield gloves, the break-in process requires a dedicated, professional approach to ensure it becomes game-ready without compromising the structural integrity of the leather.
By following the 7-step method perfected by Wilson Master Glove Craftsman Shigeaki Aso, you can transform a stiff, new mitt into a customized extension of your hand.
Understanding Your Leather: A2K vs. A2000 and the Role of SuperSkin
Before you begin the physical work, it is important to understand the material of your glove, as this dictates the duration and intensity of the break-in process.
- A2K Series: These gloves use Pro Stock Select leather, which is sorted multiple times for consistency and flawlessness. This leather is traditionally thicker and may require a more patient break-in.
- A2000 Series: Known for Pro Stock leather, these mitts are the industry standard for durability. Models like the Spring 2026 A2000 PF33SS are popular choices for catchers due to their rugged construction.
- SuperSkin Advantage: Some modern catcher’s mitts incorporate SuperSkin, a “miracle material” designed by Wilson LABS. SuperSkin is twice as strong as traditional leather but half the weight, and it is known for being easier to break in and more resistant to moisture.
Step 1: Relaxing the Fibers with Warm Water
The first step in the Aso method involves using warm water to relax the leather. While many “traditional” methods suggest soaking a glove or even using boiling water, these can be destructive.
- The Technique: Pour warm (not boiling) water specifically into the palm of the glove.
- The Caution: Always keep the finger side pointing up. This prevents water from entering the finger stalls, which can lead to the glove becoming heavy or the internal lining becoming damaged.
- The Result: The water relaxes the leather fibers, making the heavy-duty hides used in catcher’s mitts more pliable for the shaping steps that follow.
Step 2: Flexing the Thick Heel Pad
Catcher’s mitts have the densest padding in the heel to protect the hand from high-speed fastballs. To make the glove close naturally, you must soften this area.
- The Motion: Hold the glove with the back of the fingers facing your chest. Secure the mitt by the thumb and the pinkie sides.
- The Action: Squeeze and pull each side back and forth in a rhythmic motion. This repetitive flexing softens the thick internal padding of the heel, which is often the most resistant part of a new catcher’s mitt.
Step 3: Stretching the Laces and Top Edge
The laces on a new mitt are often pulled tight during manufacturing. For a catcher, a stiff top edge can cause balls to pop out of the web.
- The Technique: Grab the top of the pinkie and the top of the thumb.
- The Action: Pull them in opposite directions with firm pressure. This stretches the laces and the leather along the top of the mitt. Don’t worry about “over-stretching”; as the leather dries, the laces will return to a firm but more flexible state.
Step 4: Sculpting Your Pocket with a Mallet
This is the most critical stage for a catcher. You must decide if you want a deep pocket (best for securing high-velocity pitches and blocking balls in the dirt) or a shallow pocket (best for quick transfers on steal attempts).
- The Setup: Open the glove and place it palm-up on a clean, sturdy surface.
- The Tool: Use a professional glove mallet.
- The Execution: Pound and roll the mallet in the specific area where you want the ball to sit. For catchers, this is typically right in the “web” or the “palm-web” junction. Rolling the mallet helps smooth out any wrinkles in the leather, ensuring a clean surface for the ball to impact.
Step 5: Establishing Strategic Break Points
A glove that doesn’t “break” in the right place will be difficult to close and can cause hand fatigue during a long game.
- The Outer Pound: Take your mallet and pound the outside of the glove on the thumb side, specifically just above the wrist opening.
- The Pinkie Side: Flip the glove over and repeat the process on the pinkie side, again targeting the area above the wrist.
- The Benefit: By pounding these specific “break points,” you create hinges in the leather that allow the catcher’s mitt to snap shut and pop open with minimal effort.
Step 6: Loosening the Web Bridge
The “bridge” is the top portion of the web that connects the thumb to the rest of the mitt. If this is too stiff, the glove will feel like a wooden board.
- The ‘S’ Shape: Take the top of the web and fold it into an ‘S’ shape.
- The Compression: Squeeze and hold this ‘S’ fold for five to ten seconds.
- The Result: This simple movement loosens the web laces and allows the top of the mitt to be more responsive when you are reaching for a pitch outside the zone.
Step 7: The Final Game-Ready Test
No amount of pounding or water can replace the final step: playing catch.
- The Process: Once the glove is dry and shaped, find a partner and start receiving pitches. This helps the glove mold to the specific contours of your hand and your catching style.
- The Adjustment: If you notice any areas that still feel “tight” or “dead,” go back and repeat the mallet or flexing steps on those specific spots.
Common Mistakes to Avoid
Breaking in a professional-grade mitt like the Wilson A2000 or A2K requires patience. Avoid these common pitfalls:
- Boiling Water: While warm water relaxes leather, boiling water can “cook” it, making the leather brittle and prone to cracking.
- Using an Oven or Microwave: High heat dries out the natural oils in the leather, leading to permanent damage.
- Over-Oiling: While glove conditioners are useful, too much oil will make a catcher’s mitt heavy and soft, causing it to lose the structural stiffness required to catch fastballs.
Conclusion: Preparing for the Season
Whether you are using a classic A2000 or a specialized model from the Spring 2026 Lineup, a proper break-in is the difference between a dropped ball and a “strike three” call.
By using Shigeaki Aso’s 7-step method, you ensure that your catcher’s mitt is not just soft, but functionally shaped for the demands of your position.
Once your mitt feels like an extension of your arm, you are ready to take command of the game from behind the plate.