In the modern era of baseball, the quest for increased pitching velocity has led to the widespread adoption of specialized training tools.
While the standard 5 oz baseball remains the center of the game, elite development programs now rely on a diverse set of implements, including weighted baseballs, to push the boundaries of human performance.
This guide explores the science behind underload and overload training, the essential safety protocols every pitcher must follow, and—to satisfy your specific query—general methods for constructing these tools at home.
The Science of Velocity: Underload and Overload Training
The primary reason pitchers use weighted baseballs is to challenge the body’s neuromuscular system through underload and overload training.
The Research Foundation Traditional coaching once suggested that any implement used for training should stay within 20% of the standard 5 oz weight. However, research specific to baseball has debunked this “one-size-fits-all” approach.
Dr. Coop Derenne, a leading expert in the field, has published several papers indicating that weighted baseball training creates a significant increase in velocity.
His research concludes that training with both underweighted (4 oz) and overweighted (6 oz) balls leads to better speed gains than throwing standard baseballs alone.
The Goal of Weighted Implements
- Overload (6-7+ oz): These balls help build functional strength and stability in the shoulder and elbow by forcing the arm to move a heavier mass through the pitching motion.
- Underload (3-4 oz): These balls train the nervous system for “overspeed,” teaching the arm to move faster than it is accustomed to with a regulation ball.
How To Make A Weighted Baseball (DIY Instructions)
If you are looking to build your own weighted balls rather than purchasing professional sets, there are several common methods. Note: DIY balls can sometimes be unbalanced or prone to breaking, so always use caution.
A. The “Loaded Ball” Method (Adding Weight to the Core)
- Gather Materials: You will need an old leather baseball, a sharp utility knife, an electronic scale (to measure in ounces), and a weighting material (such as lead pellets, steel shot, or sand).
- Open the Seam: Carefully cut the stitches along a small section of the ball. Pull the leather back to expose the cork and wool core.
- Hollow the Center: Use a small drill or pick to remove a portion of the core.
- Add Weight: Use your scale to add the exact amount of pellets or sand needed to reach your target weight (e.g., 6 oz or 7 oz).
- Seal and Resew: Fill the remaining space with a strong adhesive or epoxy to ensure the weight doesn’t shift. Use a heavy-duty needle and waxed thread to resew the leather cover.
B. The “Weighted Tape” Method (External Weighting)
- Select a Base: Start with a standard 5 oz baseball.
- Layer Heavy Tape: Use weighted lead tape (commonly used for golf clubs) or heavy industrial electrical tape. Wrap the tape evenly around the ball to distribute mass across the entire surface.
- Check Weight Frequently: Weigh the ball repeatedly as you add layers. This method is best for small increments, such as moving a 5 oz ball to 6 oz.
Essential Safety Protocols: Screening and Readiness
Weighted baseballs are powerful tools, but they can be dangerous if used improperly. You should never jump into an aggressive program without a foundation of strength.
Movement and Performance Screens
Before you begin throwing weighted implements, it is crucial to undergo an evaluation. This includes movement screens to identify shoulder or hip imbalances and an assessment of pitching mechanical efficiency. If an athlete has physical limitations, adding the torque of a weighted ball could lead to injury.
The “Cold Start” Danger
Pitchers should never throw weighted balls when they are “cold” or in a period of low activity. A solid throwing program must already be in place, and athletes should be throwing at roughly 80-85% of their max velocity before introducing these tools.
Additionally, building a reasonable amount of strength in the gym and ensuring shoulder stability is vital before increasing torque and maximum external rotation (MER).
Implementing a Structured Throwing Progression
Success with weighted balls comes from consistency and progression, not maxing out on day one.
Standard Progression (Sample for 18-Year-Old Athlete) A typical starter program involves two sessions per week, focusing on a range of weights from 3 oz to 7 oz.
- Weeks 1-2 (39 pitches per session):
- Throws with 5 oz (standard), 6 oz (overweight), and 7 oz (overweight) balls.
- Return to 5 oz, then move to 4 oz (underweight) and 3 oz (underweight).
- Weeks 3-4 (52 pitches per session):
- Increase the number of repetitions for each weight while maintaining the same 2-session-per-week frequency.
Truncated Motions and Drills. Many programs utilize “truncated motions” to isolate specific parts of the delivery. The “Pivot Pickoff” drill, often performed with a 3 lb medicine ball, is used to focus specifically on the out-front portion of the pitch and shoulder rotation. This allows the athlete to feel the mechanical adaptations without the full stress of a mound delivery.
Addressing the Stress Myth: Mound vs. Flat Ground
One of the most controversial topics in weighted ball training is whether they increase the risk of injury.
The ASMI Research Findings
Initially, many coaches feared that heavier balls would automatically equal more stress on the arm. However, research by the American Sports Medicine Institute (ASMI) found that throwing 6 oz and 7 oz balls actually resulted in less elbow torque than throwing a standard 5 oz ball. Interestingly, 4 oz balls resulted in similar torque to the standard ball.
The Mound Precaution
Despite these findings, caution is required when throwing off a mound. Arm-related stress naturally increases when throwing from an elevated surface.
Combining the high torque of a game-speed mound delivery with weighted implements is a serious undertaking that should be approached with extreme care and proper recovery.
Professional Standards: Pace of Play and Game Management
Training for elite velocity is a waste if a pitcher cannot manage the game effectively. Professional baseball has recently implemented strict pace-of-play rules to eradicate stalling tactics.
Avoiding Stalling Penalties If you are a high-velocity pitcher, you must be aware of rules that can lead to ejections, fines, or suspensions:
- The 2-Second Rule: A pitcher may be flagged for a balk or stalling if they hold for more than 2 seconds between the windup and delivery.
- Excessive Warmups: Throwing too many warmup pitches at inappropriate times can lead to penalties.
- Mound Conferences: Umpires are cracking down on defensive players joining mound visits or extending conferences after a warning.
Even defensive fielders must stay alert; doing “throw-arounds” for too long—such as an extra three minutes while a batter is approaching the plate—is considered stalling and can lead to ejections.
Conclusion: Integrating Strength, Science, and Strategy
Making and using a weighted baseball is about more than just adding mass; it is about purposeful adaptation.
By following the research of experts like Dr. Coop Derenne and adhering to the safety guidelines of modern performance labs, pitchers can safely build the velocity needed for higher levels of play.
Key Takeaways:
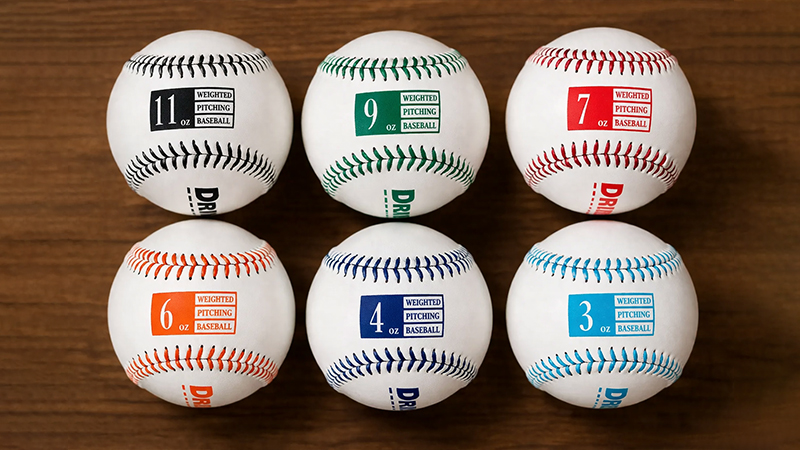
- Balance Your Weights: Use a mix of 3 oz to 7 oz balls to challenge your arm speed and strength.
- Screen Yourself: Never start a program without checking for physical imbalances.
- Respect the Clock: Elite performance includes following the rules of the game and avoiding stalling penalties.


