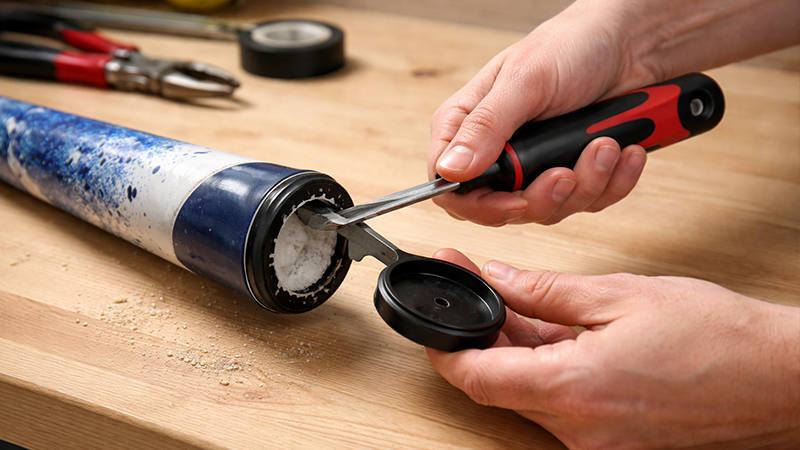
Whether you are looking to repair a rattling sound, replace a damaged component, or inspect the internal integrity of your equipment, knowing how to remove a softball bat end cap is a vital skill for many players and coaches.
However, this is not a one-size-fits-all process. The success of your DIY project depends heavily on identifying the specific construction of your bat and using the correct tools to avoid permanent structural damage.
Before picking up a tool, it is essential to prioritize your environment and personal protection. Always work in a well-ventilated area and wear safety glasses and gloves to protect against flying debris or chemical fumes from adhesives. Furthermore, you must check your bat’s warranty status; in almost every case, tampering with or removing the end cap will immediately void the manufacturer’s warranty.
Step 1: Identify Your End Cap Type
The method you choose is dictated entirely by how the manufacturer secured the cap to the barrel. There are three primary types of end caps found on modern softball bats:
Press-Fit Caps
These are most common on recreational aluminum or alloy bats. They feature a seamless appearance and may wiggle slightly if you attempt to twist them with significant force. There are no visible threads or heavy adhesive seals.
Threaded Caps
These are mechanical systems where the cap is screwed into the barrel. You can often identify these by looking for visible bayonet or screw threads inside the cap or on the end of the tube.
Glued or Epoxied Caps
Common on high-end aluminum/composite hybrids, these caps sit perfectly flush with the barrel and resist all attempts at twisting or pulling. These require chemical softening or mechanical cutting for removal.
Step 2: Removing Press-Fit End Caps
Press-fit caps rely on friction and a tight tolerance to stay in place. Because they are common on alloy bats, the “internal tap” method is the most effective way to remove them without marring the exterior finish.
Required Tools
- A rubber mallet (or a hammer used with a wooden block).
- A sturdy wooden dowel that can fit inside the barrel.
- A soft cloth or towel.
- Optional: A flat plastic pry tool or wide putty knife.
The Internal Tap Process
- Protect the Finish: Wrap the end of the bat with a thick cloth to prevent scratches or dents during the process.
- Positioning: Place the bat on a sturdy workbench with the handle facing down and the end cap facing up.
- The Internal Push: Insert a sturdy wooden dowel into the barrel until it rests firmly against the underside of the end cap.
- Tapping: Use your rubber mallet to tap the dowel upward. This pushes the cap out from the inside. It is crucial to work evenly around the circumference of the cap so that it moves straight out rather than tilting and jamming.
The External Pry Method
If you cannot access the cap from the inside, you must use a flat pry tool. Carefully slide a thin plastic prybar or putty knife between the cap and the barrel lip.
Work incrementally around the rim, prying just a little bit at a time. To protect the metal, consider using a thin plastic shim material between your tool and the barrel to avoid gouging the material. Once the cap is sufficiently loosened, you should be able to pull it off by hand.
Step 3: Removing Threaded End Caps
Threaded caps are simpler in theory but can be difficult if the threads have become seized due to dirt, moisture, or light factory adhesives.
Required Tools
- A strap wrench or a pair of adjustable pliers.
- A thick cloth for padding.
- Penetrating oil (e.g., WD-40 or similar).
Removal Steps
- Grip and Torque: Wrap a cloth around the end cap to prevent the tool from marring the surface. Use a strap wrench—which provides excellent grip without damaging the cap—to rotate the cap counterclockwise.
- Applying Leverage: If the cap is stubborn, pliers with padded jaws can provide extra leverage.
- Loosening Seized Threads: If the cap refuses to turn, apply a few drops of penetrating oil to the joint where the cap meets the barrel. Allow the oil to sit for 10–15 minutes to seep into the threads before attempting to twist again.
Step 4: Removing Glued or Epoxied Caps
When dealing with bonded systems, the removal process becomes more invasive. You generally have two choices: softening the bond with heat or physically cutting the cap away.
Option A: Heat Softening
This method is preferred if you wish to reuse the end cap, though it only works on weaker factory adhesives.
- Tools: A hairdryer or a heat gun (set to low), gloves, and a pry tool.
- The Process: Apply heat evenly around the junction where the cap meets the barrel. Important: Keep the heat gun moving constantly. If you hold it in one spot, especially on a composite bat, you risk warping the material or damaging the resin.
- Extraction: After several minutes of heating, use pliers or a pry tool to see if the cap will twist. If it begins to move, continue applying gentle heat and pulling slowly until it is free.
Option B: Mechanical Removal
If the adhesive is a high-strength epoxy, the cap will likely need to be destroyed to be removed.
- Tools: A Dremel with a cutting wheel, a hacksaw blade, safety glasses, and a dust mask.
- The Process: Begin by scoring a shallow ring around the seam where the cap meets the bat to break the adhesive seal.
- The Cut: Carefully cut through the plastic of the cap. You must work slowly and avoid penetrating too deeply, as you do not want to nick or cut into the bat’s wall.
- Extraction: Once the cap’s structure is weakened by the cuts, use a pry tool to break it into pieces and remove it from the barrel.
Special Considerations for Composite Bats
Composite bats require much more caution than traditional aluminum ones. Many high-end composite models use proprietary bonded end systems that require manufacturer-specific removal or replacement kits.
If you own an expensive composite game bat, DIY removal is highly discouraged. Using a Dremel or hacksaw on these bats carries a high risk of compromising the structural integrity of the barrel.
For these high-value items, it is always safer to ship the bat to the manufacturer or take it to a professional sports shop that specializes in bat repair.
Cleaning and Reinstallation
Once the cap is off, the work isn’t finished. You must prepare the surface before a new cap can be seated properly.
- Cleaning Residue: Use isopropyl alcohol or a dedicated adhesive remover to clean off old epoxy or glue. Warning: Avoid using aggressive solvents (like acetone) on composite bats, as they can degrade the resin.
- Surface Prep: For press-fit replacements, if the fit is too tight, you can gently sand the inner lip of the barrel to ensure a snug, even fit.
- Re-Gluing: When installing a new glued cap, use a structural-grade epoxy specifically recommended for sporting equipment. Apply a thin, even bead of epoxy, seat the cap quickly to ensure it is level, and immediately wipe away any excess that squeezes out.
When to Stop and Seek Professional Help
DIY bat repair is a cost-effective solution for recreational equipment, but it has its limits. You should stop and consult a professional if:
- The bat shows visible structural damage, such as cracks or delamination; removing the cap in these instances may worsen the damage.
- The removal feels “unusually difficult.” Forcing a cap off can result in a cracked barrel wall.
- The bat is a high-value composite model still under warranty.
By working slowly and prioritizing the preservation of the barrel wall, you can successfully maintain your equipment and extend its life on the field.