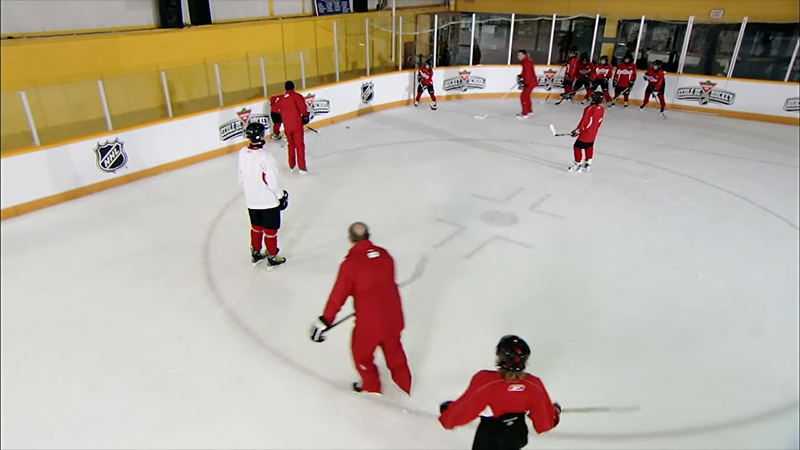
In ice hockey, a forecheck is a structured defensive strategy executed in the offensive zone or neutral zone to pressure the opposition after losing possession or dumping the puck deep. Formal definitions, such as Merriam-Webster’s description, define forechecking as checking an opponent in their defensive zone.
Functionally, the forecheck is an offensive-zone pressure scheme engineered to disrupt the opposing team’s breakout play, force errors, and regain puck control before the opponent can initiate a transition attack.
A forecheck typically initiates under three specific game triggers:
- A deep dump-in, where an attacking player shoots the puck past the offensive blue line toward the goal line.
- A sudden loss of possession near the opponent’s net or along the perimeter during offensive play.
- An immediate forced turnover in the neutral zone that pushes the puck deep into the opponent’s end.
Once initiated, the forechecking unit operates as a synchronized web. Attacking forwards divide positional responsibilities to isolate the puck carrier, take away passing lanes, and force split-second decisions under physical and spatial pressure.
| Stage | Player / Unit | Role and Responsibilities |
|---|---|---|
| Forecheck Initiation | Team | Begins after a dump-in, loss of possession, or neutral-zone turnover. |
| Three-Man Forecheck | F1 — Initiator | Uses angled pursuit to pressure the puck carrier and force play wide. |
| Three-Man Forecheck | F2 — Support | Takes away the closest passing outlet and seals the half-wall. |
| Three-Man Forecheck | F3 — Safety | Covers the high slot and helps prevent odd-man rushes. |
| Blue Line Containment | Defensemen | Hold the offensive blue line and pinch along the boards when supported. |
Why Forechecking Dictates Game Momentum and Tempo
Control of game tempo in modern hockey depends directly on a team’s ability to execute an organized forecheck. A relentless forecheck limits an opponent’s time and space, forcing defensemen and goaltenders into panicked choices.
An effective forecheck delivers four major competitive advantages:
- Forcing Critical Turnovers: Rushing opposing defensemen into hurried plays creates miscommunication and errant passes inside their own defensive zone.
- Constricting Time and Space: Depriving skilled puck-handlers of open ice neutralizes fast-paced transition teams before they can establish momentum.
- Building Energy and Dominance: Applying physical and structural pressure energizes the forechecking team while physically exhausting and demoralizing opposing defenders.
- Creating High-Danger Scoring Chances: Regaining puck possession deep in the offensive zone generates immediate scoring opportunities from the high slot before the opposing goaltender or defensive structure can set up.
Forechecking vs. Backchecking: Key Structural Differences
While both concepts represent critical defensive responsibilities carried out by forwards, they occur in distinct zones and target different phases of play:
- Forechecking is an offensive-zone defensive scheme applied while the opponent is attempting to initiate a breakout from behind or near their own goal line. The goal is proactive: prevent the breakout from occurring and turn defensive pressure directly into offensive possession.
- Backchecking is a defensive transition effort required when the opponent successfully bypasses the forecheck and carries or passes the puck through the neutral zone. Backchecking requires forwards to skate at maximum speed back toward their own defensive end, tracking trailing attackers, clogging central passing lanes, and breaking up odd-man rushes.
Positional Breakdown: Player Roles & Systematic Responsibilities
                                OFFENSIVE ZONE
                    ┌──────────────────────────────────┐
                    │            [GOAL LINE]           │
                    │   (Puck)                         │
                    │     ●                            │
                    │    F1 (Inside-Out Angle)         │
                    │                                  │
                    │        F2 (Wall Support)         │
                    │                                  │
                    │    [FACE-OFF DOTS]               │
                    │             F3 (High Slot Lock)  │
                    │                                  │
                    │ D1                            D2 │
                    └──────────────────────────────────┘
                                 BLUE LINE
F1: The Pressure Initiator and Angle Dictator
The first forward into the offensive zone is designated as F1. F1’s primary objective is not merely to hit the puck carrier, but to establish direct pursuit pressure that forces the opponent to make an immediate, predictable movement with the puck.
Crucially, F1 is a fluid designation based on proximity to the puck, not a fixed position like Center or Left Wing. Whichever forward is closest to the puck as the play transitions into the offensive end automatically assumes the F1 mandate.
F1 must use precise angling rather than straight-line pursuit to cut off the middle of the ice and force the defender toward the boards.
F2: The Support Forward and Board Outlet Disruptor
The second forward into the zone, F2, acts as the primary support reader. As F1 pressures the puck carrier, F2 anticipates the opponent’s panicked outlet path.
Key responsibilities for F2 include:
- Reading F1’s Pursuit Angle: Positioning along the half-wall or board perimeter to cut off the primary rim or pass up the boards.
- Disrupting Secondary Puck Battles: Arriving as the secondary layer of pressure to strip loose pucks created by F1’s physical contact.
- Maintaining Positional Discipline: Avoiding the temptation to dive into the same corner as F1, which would leave half of the offensive zone completely uncovered.
F3: High Slot Safety and Zone Communication Lock
The third forward into the zone, F3, holds the most defensively sensitive responsibility in the forecheck. F3 positions near the top of the faceoff circles in the high slot, acting as a structural safety valve.
F3 must stay “above the puck”—meaning physically positioned closer to their own defensive blue line than the opponent’s highest transitioning forward.
Beyond defensive coverage against counter-attacks and breakaways, F3 serves as the primary verbal director for the forecheck. Because F3 sits high with a full view of all five opponents, F3 must communicate passing threats and direct F1 and F2 to shift assignments.
Defensemen: Blue Line Control and Calculated Pinching
Both defensemen maintain positions just inside the offensive blue line to keep the puck trapped deep in the zone.
Their roles require split-second decision-making:
- The Strong-Side Defenseman: Must read the board play and make calculated decisions to pinch down the wall to seal rimmed pucks when F2 or F1 has established physical leverage.
- The Weak-Side Defenseman: Shifts toward the center line to guard against long breakout passes, ready to retreat instantly if the opponent breaks the first two layers of the forecheck.
Common Forechecking Systems & Tactical Models
The 1-2-2 Forecheck: Balanced Zones and Middle Containment
The 1-2-2 forecheck is one of the most widely implemented systems in competitive hockey due to its balance between offensive zone pressure and neutral zone defense.
                                OFFENSIVE ZONE
                    ┌──────────────────────────────────┐
                    │            [GOAL LINE]           │
                    │                ●                 │
                    │               F1                 │
                    │                                  │
                    │       F2              F3         │
                    │                                  │
                    │ D1                            D2 │
                    └──────────────────────────────────┘
                                 BLUE LINE
- System Alignment: F1 attacks deep as the single pressure point. F2 and F3 align laterally across the high offensive zone or neutral zone, locking down lateral passing lanes along the boards and middle ice. Both defensemen hold the blue line.
- Tactical Advantage: Prevents odd-man rushes by cluttering transition corridors while still applying pressure on the initial dump-in.
- Professional Model: The Tampa Bay Lightning effectively utilized a disciplined 1-2-2 forecheck to lock down transition lanes during their 2020 and 2021 Stanley Cup championship runs.
The 2-1-2 Forecheck: Aggressive Heavy Puck Hunting
The 2-1-2 forecheck (often referred to as the “Spread” or “Heavy Hunt”) prioritizes maximum pressure to force immediate, high-danger turnovers behind the opponent’s net.
                                OFFENSIVE ZONE
                    ┌──────────────────────────────────┐
                    │            [GOAL LINE]           │
                    │           ●                      │
                    │       F1     F2                  │
                    │                                  │
                    │               F3                 │
                    │                                  │
                    │ D1                            D2 │
                    └──────────────────────────────────┘
                                 BLUE LINE
- System Alignment: Both F1 and F2 drive deep into the offensive corners to aggressively hunt the puck carrier and force a secondary turnover. F3 locks down the high slot as a single safety valve, while defensemen hold aggressive blue-line gaps.
- Tactical Advantage: Overwhelms opponents who have weaker puck-moving defensemen or tend to panic under physical pressure.
- Professional Model: Coach Rod Brind’Amour’s Carolina Hurricanes are known for deploying an aggressive 2-1-2 forecheck, using relentless two-man corner pursuits to dominate zone time.
Neutral Zone Traps & Conservative Systems (1-4 / Left Wing Lock)
When protecting a lead, managing player fatigue, or facing an opponent with superior transition speed, teams deploy conservative neutral zone forechecks such as the 1-4 system or the Left Wing Lock.
- System Alignment: Only F1 enters the offensive zone to provide mild, angled pursuit. The remaining four players (F2, F3, D1, D2) form a wall across the neutral zone or blue line.
- Tactical Advantage: Completely denies clean zone entries and forces the opposition to dump the puck into a waiting wall of defenders.
- Professional Model: The mid-1990s New Jersey Devils famously perfected the neutral zone trap to neutralize high-powered offensive teams, capturing multiple Stanley Cup titles.
The 2-3 Forecheck and Modern Tactical Variations
Modern tactical coaches adjust forechecking structures based on real-time game flows:
| Modern Forecheck Variation | Description |
|---|---|
| 2-3 Forecheck | F1 and F2 attack deep; F3 locks the half-wall while a defenseman pinches hard to force pucks inward. |
| Wide Forecheck | F1 pressures the puck carrier while F2 and F3 cover the boards to eliminate rimmed breakout attempts. |
| Strong-Side Overlap | All three forwards overload the strong side to isolate a trapped puck carrier. |
Spatial Mechanics & Tactical Execution (The Science of Pressure)
Inside-Out Angling vs. Eliminating “Banana Routes”
The single most critical individual skill in forechecking is pursuit angling. When F1 enters the offensive zone to pressure a defenseman, F1 must skate in an inside-out arced route starting from the central blue line toward the perimeter.
  CORRECT: Inside-Out Angle             INCORRECT: The "Banana Route"
   (Cuts off middle ice)                   (Leaves middle ice wide open)

      OFFENSIVE ZONE                          OFFENSIVE ZONE
  ┌──────────────────────┐                ┌──────────────────────┐
  │      [GOAL LINE]     │                │      [GOAL LINE]     │
  │          ● (D)       │                │          ● (D)       │
  │         /            │                │           \          │
  │        /             │                │            \         │
  │       (              │                │             )        │
  │      /               │                │            /         │
  │     F1               │                │           F1         │
  └──────────────────────┘                └──────────────────────┘
        BLUE LINE                                BLUE LINE
By taking an inside-out angle, F1 physically blocks access to the middle of the ice—the most dangerous breakout vector in hockey—forcing the defender to move straight up the nearest boards.
Conversely, young or undisciplined players frequently take “banana routes”—sweeping in from the outside perimeter toward the puck carrier.
A banana route leaves the entire central ice lane open, allowing the defenseman to make an easy pass or skate directly through the high-danger middle lane.
Geometry of Board Play: Restricting Passing Options from 360° to 180°
The effectiveness of forechecking relies on mathematical spatial containment:
- A puck carrier in open middle ice possesses 360 degrees of passing and skating options, making containment nearly impossible.
- By using inside-out angling to drive the puck carrier against the boards, the forechecking unit instantly reduces the carrier’s field of play to 180 degrees.
The boards themselves act as an extra defender, effectively eliminating half of the ice surface and making passing plays highly predictable for waiting F2 and F3 defenders.
Dump-In Mechanics: Placement in “Soft Corners” vs. Soft Flips
An effective forecheck depends on high-quality dump-in execution.
- The Soft Dump-In Mistake: Lazily flipping or sliding the puck directly at the opposing goaltender’s stick or chest. This allows skilled goaltenders to stop the puck behind the net and distribute a clean breakout pass before forecheckers can arrive.
- The “Soft Corner” Technique: Shooting the puck hard into the deep corners, away from the goaltender’s reach. This forces the opposing defenseman to turn their back completely to the play while accelerating under physical pressure from F1.
  INCORRECT: Direct Goalie Flip           CORRECT: Hard "Soft Corner" Placement
   (Goalie easily sets up breakout)       (Forces defender to turn back under pressure)

      OFFENSIVE ZONE                          OFFENSIVE ZONE
  ┌──────────────────────┐                ┌──────────────────────┐
  │      [GOAL LINE]     │                │      [GOAL LINE]     │
  │         [G]          │                │   ●     [G]          │
  │          ↑           │                │  (Corner)            │
  │          │ (Puck)    │                │    \                 │
  │          │           │                │     \ (Hard Dump)    │
  │         F1           │                │      F1              │
  └──────────────────────┘                └──────────────────────┘
        BLUE LINE                                BLUE LINE
Tactical Timing: When NOT to Forecheck
Aggressive forechecking can be counterproductive under specific game situations:
┌────────────────────────────────────────────────────────────────────────┐
│                   TACTICAL EXCEPTIONS TO FORECHECKING                  │
├───────────────────┬────────────────────────────────────────────────────┤
│ The Penalty Kill  │ Pressuring deep down a man exposes the remaining   │
│                   │ defenders, yielding immediate odd-man rushes. │
├───────────────────┼────────────────────────────────────────────────────┤
│ During Line       │ Aggressive pressure while line-mates are changing   │
│ Changes           │ leaves massive defensive gaps across the ice. │
└───────────────────┴────────────────────────────────────────────────────┘
On the penalty kill or during line changes, forwards should execute conservative dump-ins and fall back into structured defensive shapes.
Correcting Common Player Errors
Eliminating “The Fly-By”
- The Problem: A forward sprints toward the puck carrier in the corner but glides past in a wide circle without making physical contact or stopping on the puck. This takes the skater out of the play for 3 to 4 critical seconds.
- The Solution: Skaters must perform a hard, two-foot hockey stop directly on top of the loose puck or defender. Stopping on the puck keeps the player balanced, maintains physical leverage, and allows immediate acceleration if the puck pops free.
Preventing “Three Men Deep”
- The Problem: Driven by puck-focus, F1, F2, and F3 all rush below the goal line to fight for a single loose puck. One successful breakout pass completely bypasses the entire attacking unit, creating a dangerous 3-on-2 counter-attack.
- The Solution: Coaches must enforce a strict “one man high” discipline. F3 must remain positioned above the faceoff dots in the high slot regardless of how tempting a loose puck appears.
Fixing Puck-Watching on D-to-D Passes
- The Problem: When the opposing defenseman passes the puck laterally behind the net to their defense partner (a D-to-D pass), F1 turns and chases the puck laterally across the entire width of the ice. This exhausts F1 and breaks the team’s defensive shape.
- The Solution: Pass off the assignment. When the puck moves D-to-D, F2 or F3 dynamically steps up to become the new F1 on the weak side, while the original F1 drops back into a high support role.
Top 5 On-Ice Tactical Drills for Forecheck Mastery
Drill 1: The F1 Inside-Out Angle Drill
- Execution: A coach dumps a puck into the corner for a retreating defenseman. F1 starts at the blue line and pursues the defender. F1 must arc their path from the inside dot out toward the boards, actively taking away the center lane and pinning the defenseman to the wall.
- Key Coaching Cue: “Stick on puck, body on body.” F1’s stick must block the central pass before physical contact is initiated.
Drill 2: F2 Wall Sealing Drill
- Execution: Set up an F1 pursuit forcing a defenseman up the boards. F2 starts at the high circle and reads the play, accelerating down the half-wall to seal the board perimeter with their stick and body just as the breakout pass is attempted.
- Key Coaching Cue: Patience over impulse. F2 must avoid pinching too early (which allows a chip-pass over the stick) or diving into the corner with F1.
Drill 3: F3 High Slot Safety (The Lock)
- Execution: Run a 3-on-2 scenario in the offensive zone. As F1 and F2 battle for control in the deep corner, F3 must adjust their position along the high slot line, keeping their body positioned closer to the defensive zone than any transitioning opponent.
- Key Coaching Cue: F3 must keep their head up and verbally direct F1 and F2 on passing options.
Drill 4: “Stop on the Puck” Deceleration Drill
- Execution: A player sprints at full speed from the blue line to a loose puck placed in the deep corner. Instead of skating past in an arc, the skater must execute an explosive two-foot stop directly over the puck, face the play, and immediately accelerate two strides in the opposite direction.
- Key Coaching Cue: Engage core muscles during deceleration to win the body-position battle.
Drill 5: Half-Ice 3v3 Breakout vs. Forecheck
- Execution: Three offensive players attempt to break out against three forecheckers in a half-ice environment initiated by a coach’s dump-in. Forecheckers must execute their designated system (1-2-2 or 2-1-2) at full game speed, communicating assignments dynamically.
- Key Coaching Cue: Force active communication—F3 must call out switching assignments when the puck moves D-to-D.
Strategic Player Development, Video Analysis, and Conclusion
Essential Skill Sets for Elite Forecheckers
Executing a systematic forecheck requires a specialized blend of physical and cognitive skills:
- Explosive Skating Acceleration: Closing down gaps quickly before a defender can settle the puck.
- Spatial Puck Anticipation: Reading the opponent’s hips and stick angles to predict breakout directions.
- Disciplined Physical Contact: Using body contact to separate the player from the puck rather than taking unnecessary penalties.
- Constant Communication: Continuously shouting tactical assignments to maintain zone structure.
Conclusion
A disciplined, connected three-man forecheck is the foundation of team possession and tempo control in modern hockey.
By mastering the spatial geometry of inside-out angling, enforcing F3 high-slot safety, and replacing sweeping “fly-bys” with hard stops on the puck, teams can turn routine dump-ins into sustained offensive pressure and high-danger scoring opportunities.
Tactical discipline, spatial awareness, and non-stop communication elevate a group of individual skaters into an inescapable offensive zone trap.