In the world of elite player development, the difference between a starter and a bench player often comes down to one metric: quality repetitions.
However, the logistical and financial barriers to these repetitions are significant. With commercial facility rentals often exceeding $45 per hour, the “convenience tax” on a player’s development can reach thousands of dollars annually.
For the dedicated parent, coach, or athlete, the solution is a professional-grade home training environment.
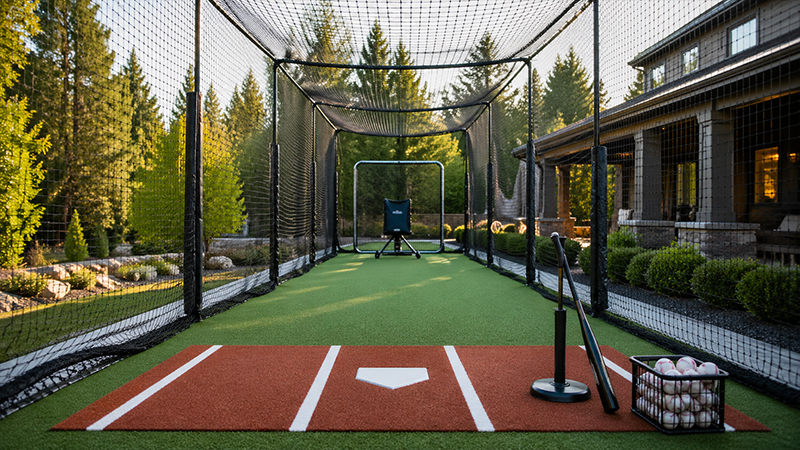
Building a DIY backyard batting cage is a high-ROI project that not only enhances hitting, pitching, and catching skills but also protects your property and maintains neighborly harmony.
This comprehensive guide provides the Fortune 500-level strategy, technical specifications, and construction workflows required to build a facility that rivals professional training centers.
Strategic Planning: Dimensions and Site Selection
The foundation of a successful build is not the concrete you pour, but the data you collect during the planning phase. You must balance available spatial constraints with the physiological requirements of the game.
1. The Physics of the “Pro” Cage
While you can customize a cage to any footprint, specific dimensions are required to simulate game-like ball flight and reaction times:
- Length: While 20 feet allows for basic soft-toss, 70 feet is the gold standard. This length provides sufficient space for a pitcher or pitching machine to operate at a realistic distance from the batter. For specific age groups, benchmarks include 38’–44′ for T-ball, 48’–55′ for Little League, and 60’+ for High School.
- Width: Standard tunnels range between 12 and 14 feet. A 12-foot width is sufficient for youth development, but a 14-foot width is recommended for advanced players to ensure a full, unrestricted swing path.
- Height: A 12-foot ceiling is the professional recommendation. This height allows players to accurately track ball velocity and launch angles. If your space is limited, an 8-foot minimum is functional but will restrict the ability to track high-exit-velocity fly balls.
2. Site Intelligence and Environmental Factors
Before breaking ground, perform a site audit to avoid “hidden” costs:
- Ground Slope: Use a level to check for evenness; sloped yards require grading or filling to prevent uneven wear on the netting and ensure a stable hitting platform.
- Electrical Infrastructure: If integrating an electric pitching machine, proximity to an outlet is vital. For remote areas of the yard, consider battery-powered units or high-gauge extension cords.
- Hazard Assessment: Ensure the area is clear of overhead power lines, low-hanging tree branches, and proximity to fragile structures like windows or cars.
Material Science: Engineering Your Frame
The frame is the skeleton of your facility. Your choice of material dictates the structure’s lifespan, safety rating, and wind resistance.
1. The Steel Standard
For a permanent installation, full steel construction is the premier choice. Steel offers the highest level of durability against high-velocity ball impacts and extreme weather conditions.
While it requires a higher upfront investment and more intensive assembly, it is resistant to warping and bending over time.
2. The “Reddit Hack”: EMT Conduit
A popular community-vetted alternative is using EMT (Electrical Metallic Tubing) conduit. Using 3/4″ or 1″ diameter stainless steel conduit provides a robust frame at a fraction of the cost of professional kits.
- Connectors: Utilize 3-way connectors for end caps and 4-way connectors for center support pieces.
- Structural Math: For every 10 feet of cage length, you generally require 8 poles to maintain structural integrity.
3. Lightweight Alternatives: PVC and Fiberglass
- Fiberglass: Highly portable and budget-friendly, making it ideal for temporary or youth setups. However, the impact of professional-level exit velocities can shatter fiberglass rods.
- PVC/Wood: These materials represent the lowest entry cost and easiest assembly. However, they have the shortest lifespan and are prone to degradation from UV exposure and environmental corrosion.
The Netting: Your Critical Barrier
The netting is the most important safety component of the cage. It is a “barrier and containment” system that protects the surrounding environment from damage.
1. Material Specs: Nylon vs. Polyethylene
- High-Density Polyethylene (HDPE): Often the preferred choice for backyard setups due to its natural UV resistance and lower moisture absorption.
- Nylon: Offers higher tensile strength but can be more expensive. Ensure any nylon netting is specifically treated for UV resistance if it will be exposed to the sun year-round.
2. The “Sag” Requirement
A common mistake in DIY builds is over-tensioning the net. For safety, you must include 1 to 2 feet of extra netting that “sags” on the ground around the perimeter. This slack absorbs the kinetic energy of the ball, preventing dangerous “ricochets” that could strike the batter.
Step-by-Step Construction Workflow
Follow this professional sequence to ensure a square, stable, and safe construction.
1: Site Preparation and Layout
- Marking: Use stakes and string to outline the exact footprint based on your length and width measurements.
- Digging: For permanent structures, dig holes roughly 2 feet deep at each corner marker. If you are building a 12-foot-high cage, you will need 14-foot posts to account for the depth in the ground.
- Clearing: Remove all rocks, debris, and vegetation from the interior to create a level foundation for the hitting surface.
2: Frame Assembly and Anchoring
- Cutting: Use a hacksaw for PVC/conduit or a circular saw for wood components, ensuring all cuts are perfectly square.
- Structural Assembly: Connect side poles to crossbars using eye bolts or specialized connectors. Ensure every joint is tightened to maximum specifications to prevent “frame sway” during high winds.
- Foundation Setting: Place posts in the pre-dug holes and pour concrete. Wait for the cement to be completely hardened before attempting to hang the net. For portable setups, utilize auger anchors or heavy-duty ground stakes.
3: Hanging the Netting
- Draping: Pull the netting over the frame, ensuring even distribution across all four walls and the ceiling.
- Clipping: Use carabiners to attach the net to eye bolts on the frame.
- The Safety Check: Inspect for any gaps, especially at the ground level or entrance, where balls could escape.
Advanced Optimization: Accessories and Maintenance
A frame and a net make a cage, but a professional training center requires integrated technology and safety features.
1. Professional Accessories
- L-Screens: Non-negotiable for safety if a live pitcher is throwing. These screens protect the pitcher from “come-backers”.
- Hitting Mats and Turf: Installing artificial turf or specialized batting mats prevents the ground from becoming a muddy pit and provides a consistent surface for footwork.
- Pitching Machines: From manual gravity-fed units to 3-wheel programmable machines (like the Junior Hack Attack), select a machine that matches the player’s skill level.
2. Neighbor Etiquette and Noise Reduction
Batting cages can be disruptive. To maintain professional standards:
- Strategic Placement: Locate the cage away from shared fences or bedroom windows.
- Acoustic Dampening: Use thicker, double-layered netting or install padding on the frame poles to absorb the “ping” of the ball hitting the structure.
3. Maintenance Protocol
- Monthly Inspections: Check metal frames for rust and PVC for stress cracks.
- Net Integrity: Sunlight and impact eventually degrade fibers. Inspect for “fraying” or small holes that could expand into dangerous gaps.
- Winterization: If you live in a climate with heavy snow, it is recommended to take the netting down during winter to prevent “snow-load” from collapsing the frame.
Enhanced FAQ: Expert Insights
Q: Can I build a functional cage in a sloped yard?
A: Yes, but it requires leveling. You can use ground-rated sleepers to frame the space, fill the low spots with dirt, and compact the soil before laying landscape fabric and turf.
Q: Is PVC truly viable for a high school-level player?
A: While affordable, PVC is generally not recommended for high-velocity training. The kinetic energy from an 80+ mph exit velocity can crack standard PVC over time. Steel or EMT conduit is the better investment for longevity.
Q: What is the most common mistake in DIY builds?
A: Stretching the net too tight. A tight net acts like a trampoline, causing balls to ricochet back at the batter. Always ensure at least a foot of netting “puddles” on the ground to safely deaden the ball.
Conclusion: The Competitive Advantage
Investing in a backyard batting cage is a commitment to the “long game” of athletic development.
By following this professional blueprint, you eliminate the friction of travel and the expense of facility rentals, replacing them with a custom, high-performance environment.
Whether you choose the rugged durability of steel or the clever engineering of EMT conduit, your DIY facility will provide the foundation for years of elite-level training.
Ready to transform your backyard? Start by measuring your designated space and choosing the frame material that aligns with your long-term goals.