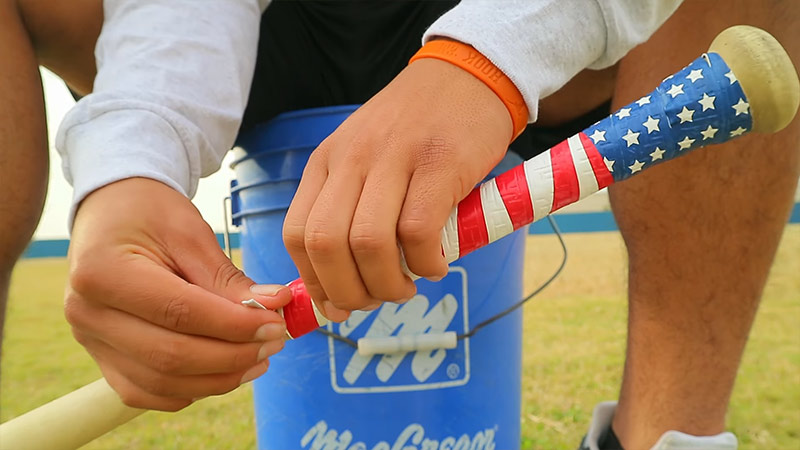
A player’s connection to the baseball bat begins and ends at the handle. Whether stepping into the batter’s box under Friday night lights, competing in a high-stakes tournament, or taking routine swings in the batting cage, a secure and comfortable grip is essential for maximum swing mechanics.
A properly taped bat handle prevents unwanted slippage during high-velocity swings, dampens jarring hand vibrations on off-center hits, and provides the tactile feedback necessary for precise barrel control.
While many players rely on factory grips or messy pine tar, learning how to wrap a handle with athletic tape or specialized grip material is a fundamental skill that grants total control over equipment.
Customizing handle thickness, texture, and ridge profile boosts confidence at the plate while ensuring a bat performs reliably in all weather conditions.
This comprehensive guide details everything required to master bat handle preparation, surface cleaning, taper customization, and three classic wrapping techniques used by elite athletes across the nation.
Traditional Insights vs. Modern Grip Solutions
For decades, baseball tradition dictated a heavy reliance on pine tar sticks to maintain hand traction on bare wood handles. However, traditional pine tar carries significant operational drawbacks.
In extreme summer heat, pine tar breaks down, becoming overly wet, runny, and excessively messy. Conversely, in cold weather, pine tar hardens into a slick, rock-like glaze that fails to provide functional friction.
| Feature | Traditional Pine Tar | Modern Athletic Tape / Grip Wrap |
|---|---|---|
| Weather Resistance | Poor — may soften in heat and become hard in cold weather | High — provides consistent grip and friction in various conditions |
| Tactile Customization | Limited — mainly provides a sticky surface | High — allows customization of ridges, thickness, and texture |
| Maintenance Requirements | Requires frequent reapplication during games | Long-lasting — typically needs re-wrapping only seasonally or as needed |
| Cleanliness | Messy — can leave residue on gloves and jerseys | Clean — provides a residue-free grip with minimal transfer |
To eliminate the unpredictable nature of pine tar, legendary Major League power hitters—including Prince Fielder and David Ortiz—adopted customized athletic tape wrapping patterns.
Applying quality athletic tape or specialized polymer grips removes the necessity for pine tar entirely, establishing a durable, clean, weather-resistant interface that remains sticky and soft swing after swing.
Essential Equipment & Preparation Work
Achieving a seamless, professional wrap requires proper tools and thorough surface preparation. Applying fresh tape over dirt, oil, or degraded adhesive prevents proper bonding, leading to early peeling or slipping during play.
Required Materials Checklist
- Baseball Bat: Wood, aluminum, or composite material.
- Athletic Tape or Specialized Bat Grip Tape: Standard 1-inch cotton athletic tape or specialized tacky polymer grip tape.
- Scissors or Utility Knife: For clean, precise angle cuts.
- Rubbing Alcohol (Isopropyl Alcohol): Essential solvent to dissolve lingering adhesive residue.
- Clean Lint-Free Cloth or Towel: For wiping down and drying the handle surface.
- Optional Base Enhancers: Rubber/foam taper builders or extra athletic tape to craft a custom lower knob flare.
- Finishing Tape or Electrical Tape: For locking the top wrap edge securely.
Step 1: Complete Removal of Old Material
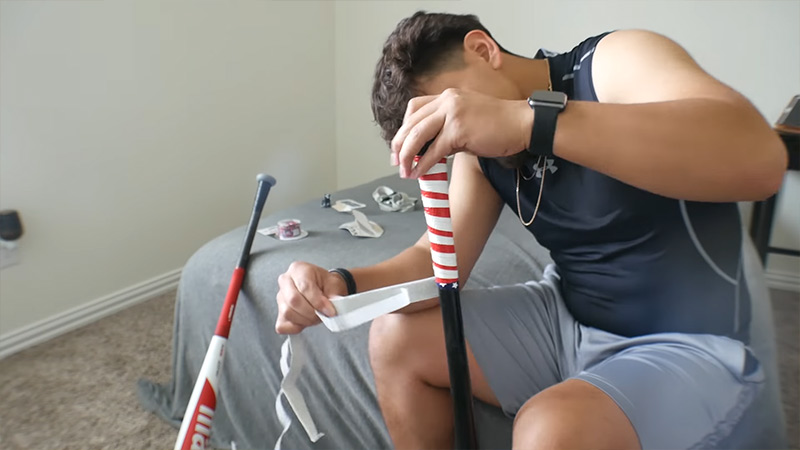
Begin peeling away the worn grip material from the top of the handle working down toward the knob. Use fingers carefully, or utilize a utility knife or scissors for stubborn factory glue.
Exercise extreme caution when using sharp blades against wood or composite surfaces to prevent scoring the bat.
Step 2: Deep Residue Cleaning & Chemical Stripping
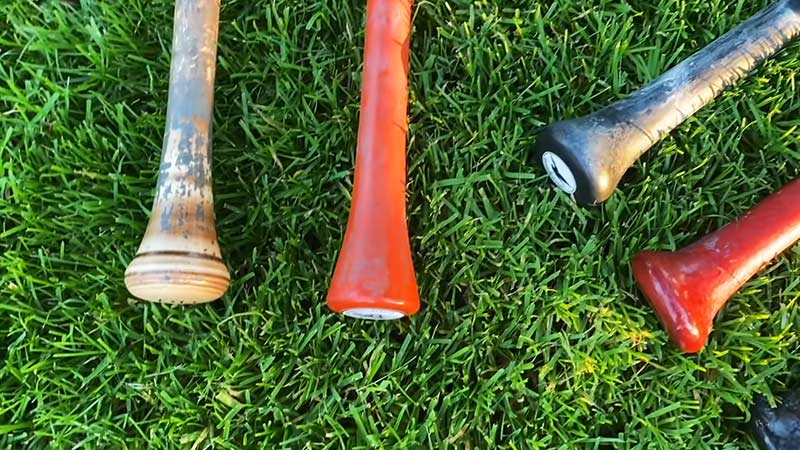
Once the old material is removed, leftover adhesive and sticky glue remain stuck to the barrel base.
Apply rubbing alcohol generously onto a clean, lint-free cloth and scrub the entire handle thoroughly. Rubbing alcohol strips away oils, dirt, and sticky residue without damaging the underlying wood or composite finish.
Step 3: Thorough Drying & Structural Inspection
Wipe the handle completely dry with a fresh towel. Any remaining solvent moisture or water will prevent the adhesive backing of the new tape from sticking securely.
Before applying new tape, conduct a thorough structural inspection. Check bare handles for deep hairline cracks, splintering, or structural weakness. Addressing or identifying structural issues prior to wrapping ensures safety during competitive play.
Step 4: Building a Custom Taper (Optional)
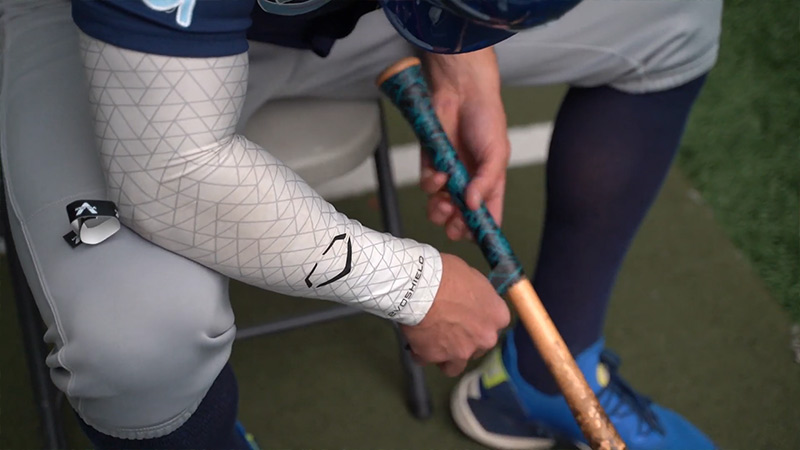
Players who prefer an ergonomic transition from the knob to the handle can build a custom taper before applying the main wrap.
- Pre-Made Rubber/Foam Tapers: Slide a pre-shaped rubber or foam taper builder over the handle until it sits snugly against the top of the knob.
- Custom Athletic Tape Taper: Build a personalized taper by wrapping multiple layered strips of athletic tape directly above the knob, gradually building up thickness until achieving a smooth, angled transition.
Step-by-Step Execution: 3 Classic Wrapping Methods
Different hitters require different tactile feedback. Below are three classic, battle-tested taping methods used by amateur and professional players alike.
| Wrap Method | Estimated Time | Primary Advantage | Ergonomic / Grip Level |
|---|---|---|---|
| 1. Straight Wrap | 15–20 Minutes | Uniform & Reliable | Standard / Balanced |
| 2. Crosshatch Style | 10 Minutes | Fast Emergency Fix | Textured Diamond Grip |
| 3. High Ridge Wrap | 20–30 Minutes | Maximum Custom Contour | High Tactile Finger Lock |
Method 1: The Straight Wrap (The Standard Overlap)
The Straight Wrap is the timeless foundation of handle taping. Celebrated for its sleek aesthetic and uniform thickness, it provides consistent cushioning across the entire hand-contact area.
                     METHOD 1: STRAIGHT WRAP SCHEMATIC

    Knob Base          1/8" to 1/4" Overlap Spiral          Top Finish
    +-------+=====/======/======/======/======/======/=====+------------+
    | KNOB  |====/======/======/======/======/======/======| FINISH TAPE|
    +-------+=====/======/======/======/======/======/=====+------------+
            ^ Anchor Ring                                  ^ Angled Cut
Step-by-Step Instructions:
- Anchor the Initial Ring: Start at the butt of the bat. Place the end of the tape completely horizontal and flush against the bottom knob ring. Wrap once around the circumference to establish a secure, flat anchor base.
- Begin Downward Angled Spiral: As you complete the first horizontal revolution, angle the tape downward toward the barrel. Pull the material firmly to maintain steady tension.
- Maintain Precise Overlap: Spiral down the handle, ensuring each new turn overlaps the previous layer by approximately 1/8 to 1/4 inch (about a 50% overlap). Overlapping prevents bare handle exposure when the tape flexes during a swing.
- Smooth Wrinkles in Real-Time: If using tape with protective backing paper, peel the backing away slowly in small 2-to-3-inch sections as you rotate the bat. Use your thumb to smooth out air bubbles or wrinkles immediately before continuing up or down the handle.
- Coverage Length: Continue spiraling down the handle for at least 2 1/2 hand widths (typically 8 to 11 inches). Do not extend tape onto the hit zone of the barrel.
- Clean Termination: Cut the tape at an angle so the end lies flat against the handle. Wrap a final horizontal ring of finishing tape or electrical tape around the top edge to seal the wrap permanently.
Method 2: The Crosshatch Style (The Fast Diamond Pattern)
The Crosshatch Style is a lightweight, high-friction method designed for rapid application. It creates an open diamond pattern that leaves small sections of underlying handle exposed, offering a unique tactile feel.
                    METHOD 2: CROSSHATCH PATTERN SCHEMATIC

    Knob Anchor            Open Diamond Lattice             Top Anchor
    +-------+===\=====/=====\=====/=====\=====/=====\======+------------+
    | KNOB  |====\===/=======\===/=======\===/=======\=====| FINISH TAPE|
    +-------+=====/===\======/===\======/===\======/======+------------+
Step-by-Step Instructions:
- Prepare 4 Precise Strips: This design relies strictly on four uninterrupted strips of athletic tape. Maintaining strip integrity is vital because torn pieces peel quickly under friction.
- First Downward Spiral: Anchor the first strip at the knob and spiral downward at a steep angle, leaving roughly 1/2 inch of bare handle exposed between each wrap turn.
- The Reverse Spiral: Anchor the second strip at the knob and wrap downward in the opposite rotational direction. As the tape crosses over the first layer, it forms a lattice of diamond shapes across the wood.
- Locking Support Rings: Apply the third and fourth strips as horizontal locking rings—one flush against the knob and one at the top termination point. These anchor rings clamp down the exposed tape ends, protecting them from hand friction during aggressive swings.
Player Advantage: The Crosshatch style can be applied in under 10 minutes on a dugout bench between innings, making it the premier emergency wrap method if a bat grip fails mid-game.
Method 3: The High Ridge Wrap (Maximum Ergonomic Grip)
The High Ridge Wrap is an advanced technique that adds raised spiral grooves beneath the outer tape layer. These ridges fit directly into the crevices of a player’s fingers, delivering maximum leverage and reducing grip fatigue.
                     METHOD 3: HIGH RIDGE WRAP CROSS-SECTION

    Coiled Rope Core   (Underneath Outer Wrap)
    +-------+--(o)----(o)----(o)----(o)----(o)----(o)-----+------------+
    | KNOB  |=============================================| FINISH TAPE|
    +-------+---------------------------------------------+------------+
             ^ Outer Straight Wrap Laid Over Twisted Coil
Step-by-Step Instructions:
- Form the Coil: Measure and cut a strip of athletic tape roughly equal to the length of the bat. Twist the tape tightly between your palms along its entire length until it forms a uniform, cord-like coil.
- Anchor & Wrap the Ridge: Secure the top end of the twisted coil at the knob using a horizontal anchor band. Spiral the tight coil down the handle for roughly 2 1/2 hand lengths, spacing the coils to match comfortable finger alignment.
- Secure the Coil Base: Fasten the bottom end of the coil with another horizontal tape strip and trim any excess coiled material.
- Apply the Overwrap: Take a fresh, flat roll of athletic tape and perform a standard Straight Wrap (Method 1) directly over the top of the raised ridge. Press the outer tape down around the contours of the underlying coil to accentuate the finger grooves.
- Final Seal: Terminate the top with an angle cut and seal securely with finishing tape.
Finishing, Weather Protection, and Long-Term Maintenance
Properly finishing the top edge and establishing a regular maintenance routine extends the lifespan of any handle wrap.
| Step | Recommended Practice |
|---|---|
| Trim the Top Edge | Cut the finishing edge at a slight angle for a cleaner finish. |
| Secure the Wrap | Add 2–3 layers of electrical tape to keep the wrap firmly in place. |
| Protect from Moisture | Wipe the wrapped area dry after exposure to rain or moisture. |
Securing the Top Edge
The most common point of grip failure occurs at the top termination edge, where hand slide during swings can catch loose tape corners.
- Angle Trimming: Always trim the final tail of tape at a 45-degree angle using sharp scissors. A straight perpendicular cut leaves thick corners that peel upward easily.
- Electrical or Finishing Tape Lock: Apply two to three tight wraps of vinyl electrical tape or specialized rubber finishing tape directly over the angled edge. Press down firmly around the circumference to create a moisture-proof seal.
Weather Impact & Performance Care
Environmental factors significantly influence tape adhesion and tactile traction:
- High Humidity & Rain: Wet conditions can cause lower-grade cotton tape to absorb water, becoming heavy and slippery. Keeping a dry microfiber towel in the dugout to wipe down the handle between innings preserves grip tackiness.
- Extreme Heat: Leaving bats in hot car trunks causes adhesive backing to melt, leading to tape slippage and messy glue seepage. Store equipment in temperature-controlled environments whenever possible.
- Cold Temperatures: Freezing weather hardens tape adhesives, reducing initial tackiness. Store bats indoors prior to game time to maintain optimal rubber and glue elasticity.
Replacement Indicators
Replace handle tape promptly upon noticing any of the following warning signs:
- Fraying or Shredding: Visible cotton fibers fraying along high-friction contact zones.
- Adhesive Breakdown: Tape shifting or bunching up under hand pressure during a swing.
- Loss of Cushioning: Compression of inner layers resulting in harsh, unmitigated vibration sting.
- Seasonal Refresh: Re-wrapping at the start of every spring season guarantees fresh, peak-performing equipment.
Master Your Grip Today
Customizing your bat handle is one of the easiest, most impactful equipment adjustments you can make to elevate performance at the plate.
By stripping away old residue, prepping the bare surface with rubbing alcohol, and selecting a wrapping style tailored to your hands, you ensure maximum comfort, reduced sting, and complete swing control every time you step into the box.
Gather your athletic tape, rubbing alcohol, and scissors, and transform your bat handle into a personalized performance tool today!