If you are looking to improve your putting skills, then a practice mat is essential. However, not all practice mats are created equal. In this guide, we will discuss the different types of putting mats and how to flatten them so that they become perfect for your needs.
Source: drivingrangeheroes
How To Flatten Perfect Practice Putting Mat
If you are looking for a perfect practice putting mat, then you should definitely try to flatten one yourself. Here is a step-by-step guide on how to do it: Purchase a flat, pre-poured practice putting mat.
Remove the molding around the edges of the mat. Apply a thin layer of Elmer’s Glue to the bottom and top coats of the mat. Allow the glue to dry completely. Sand away any excess glue.
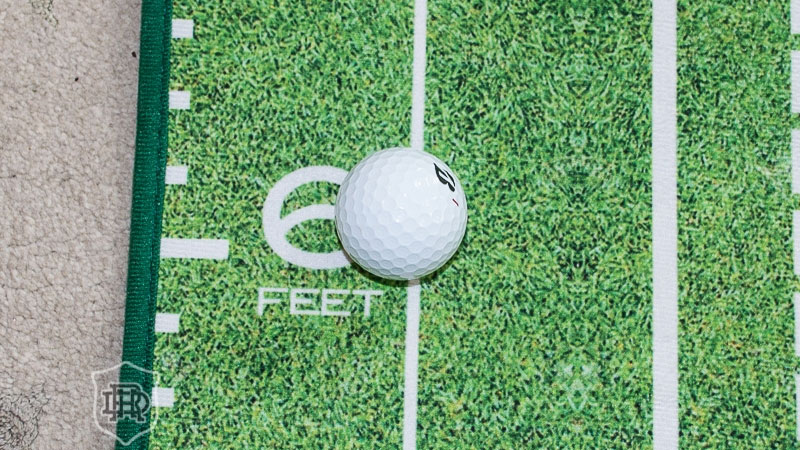
Purchase A Flat, Pre-Poured Practice Putting Mat
Practice putting can be a hassle, but with the help of a flat, pre-poured practice putting mat, the process will go much smoother. Choose your practice putting mat wisely by considering its size, shape, and thickness.
When purchasing your mat, keep in mind that you’ll want to use it for years to come. If you purchase a used or secondhand putting mat, be sure to check for any damages or flaws before using it. When flattening your practice putting mat, do not overdo it; too much pressure can cause damage.
Make sure your putter is properly fitted onto the mat before beginning your practice session; this will ensure an accurate stroke. Once you’ve achieved a good stroke on your new flat practice putting mat, congratulate yourself!
Remove The Molding Around The Edges Of The Mat
If you have ever attempted to practice your putting skills on a mat that has been rolled up or folded for storage, then you know the frustration of trying to flatten the edges.
The best way to remove the molding around the edges of the mat is by using a clothes iron. Make sure that you place the iron on a low setting and place the mat on top of it. When pressing down with the iron, do not move it from side to side; only press down in one direction.
Allow the meat to cool before attempting to unfold it again because heat will cause wrinkles in the fabric. If you don’t have access to a clothes iron, then you can use an old towel or piece of paper instead. Be gentle when unfolding the mat because it may be delicate and could tear easily if mishandled.
Once you have removed all of the moldings around the edges, your practice mat is ready for use!
Apply A Thin Layer Of Elmer’S Glue To The Bottom And Top Coats Of The Mat
Apply a thin layer of Elmer’s Glue to the bottom and top coats of your practice putting mat before using it for the first time. This will help the mat stay in place and flatten out during use.
If you experience any problems with the mat over time, you can remove the glued layers easily. Always clean your practice putting mat after use to keep it in good condition. For best results, apply a thin layer of Elmer’s Glue before each use to help keep your mat in place and flat.
Allow The Glue To Dry Completely
When you are putting the practice mat together, make sure to allow the glue to dry completely before moving on to the next step. The less movement there is when the glue is drying, the more stable your practice mat will be.
If you rush the drying process, you may have trouble with the adhesive bonding properly and your mat may not last as long. Allow enough time for the adhesive to fully dry before moving on to the next step so that your mat will be durable and lasting.
Handle your practice mat gently while it is still wet; otherwise, you could damage it further during steps five through eight of assembly. Once all of the pieces adhere together, use a hairdryer or heat gun to quickly cool and harden the adhesive.
Be careful not to overheat your mat; doing so can cause it to crack or warp. When it is time to take down your practice mat, slowly peel off each piece layer by layer until it is completely detached from the base.
Sand Away Any Excess Glue
When you are trying to flatten a practice putting mat, be sure to sand away any excess glue. This will help your mat stay in place and look its best.
Materials Needed
When it comes to perfect practice putting mats, there are a few materials you will need. The first is a thick piece of paper or cardboard that can be used as a backing for the mat.
You will also need some heavy-duty tape, which can be used to attach the mat to the paper or cardboard backing. Once you have everything prepared, simply place your putter on top of the mat and press down firmly with your hand.
Be sure to make even pressure all around the circumference of the putter so that it flattens out evenly. If desired, you can then remove the tape and fold over the edges of the mat to create a finished product.
How To Flatten A Practice Putting Mat
The first step to flattening your practice putting mat is to remove the wrinkles. To do this, take the mat and loosely unfold it. Next, use your hands to smooth out any bumps or folds in the fabric.
Once you have eliminated all of the wrinkles, place the mat on a flat surface and press down firmly with your palms. Make sure that you evenly apply pressure throughout the entire mat. Finally, allow the mat to air-dry completely before using it again.
If needed, you can repeat steps as needed to achieve a more flattened product. When flattening your practice putting mat, be gentle and patient; overzealous pressing could cause damage to the fabric.
Tips For Flattening A Practice Putting Mat Quickly And Easily
Practice putting mats are designed to help you perfect your stroke on the course, but sometimes they can be a little too fluffy for some golfers. To get the most out of your practice putting mat, it is important to flatten it before using it.
There are a few tips that will help you quickly and easily flatten your practice putting mat. You can use a rolling pin or an iron to press down on the center of the mat to make it flat. If you have a lot of mats, you can also stack them together and do this step on top of them.
Another method is to place the meat in a large garbage bag and weigh it down with something heavy, like cans or bricks. Finally, if all else fails and you still need to flatten your practice putting mat, you can try using a hairdryer on low heat.
Be sure not to overheat or damage your mat! Once your practice putting mat is flattened, it will be easier to use and more conducive to improving your golfing skills.
The Final Result
Whether you are a beginner or an experienced putter, having a good practice mat is essential for better results. When choosing the perfect practice putting mat, it is important to consider your needs and preferences.
There are many different types of practice mats available, so be sure to find one that will work best for you or you can make one for yourself. Make sure the mat is firm enough so that it does not move and gives you a consistent surface to hit the ball on.
Be sure the surface is smooth so that your ball does not slide around and makes it easier to control your putts. Choose a mat that is lightweight and easy to transport, especially if you plan on using it outdoors or in a location with rough surfaces.
Finally, make sure to store your practice putting mat properly so that it remains in good condition and provides years of use.
Conclusion
Practice putting mats can be flattened using a variety of methods, but the most effective is to use a steamroller. Care should be taken to avoid damaging the mat’s surface or edges.