In the world of high-performance golf, the difference between a record-breaking drive and a lost ball in the rough often comes down to millimeters of adjustment.
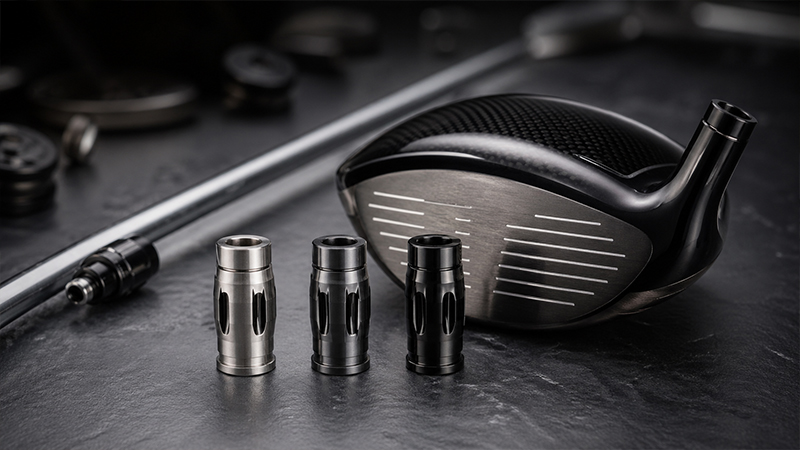
Krank Golf, a brand synonymous with Long Drive Championships, has engineered the Tri-Sleeve adapter system to give every golfer the same precision tuning available to the world’s longest hitters.
This comprehensive guide serves as your professional manual for mastering the mechanics of your Krank driver, ensuring that your equipment is an exact extension of your swing.
Understanding the Engineering: The Tri-Sleeve Advantage
The cornerstone of Krank’s adjustability is the Tri-Sleeve adapter. This sophisticated hosel system allows for a three-dimensional approach to tuning: loft, lie, and face angle.
Unlike standard fixed-head drivers, the Tri-Sleeve enables you to modify the aerodynamic and mechanical properties of the clubhead without needing a professional builder.
The Power of On-Course Adjustments
One of the most significant advantages of the Krank engineering philosophy is the ability to perform on-the-fly adjustments.
Whether you are facing a day with high winds or a course that demands a specific shot shape, the Tri-Sleeve allows for quick modifications without the necessity of removing the head completely from the shaft. This efficiency ensures you spend less time tinkering and more time executing.
Decoding the Adapter: A Technical Map of Performance
To the uninitiated, the markings on a driver adapter can seem like a complex code. However, understanding these symbols is crucial to achieving your desired trajectory.
The Krank system uses specific alphanumeric cogs to indicate the mechanical shift in the head’s position.
1. Loft Calibration: Controlling the Launch
Loft is the primary lever for controlling your launch angle and spin rate. Most Krank models, including the Formula X, 2X, and 6.5, provide a range of adjustments typically spanning 1 to 2 degrees in either direction.
- The Markings: Look for ‘+1’, ‘+2’, ‘-1’, or ‘-2’ on the adapter sleeve.
- The Effect: Increasing loft (+1, +2) will generally increase the launch angle and spin, which can help carry the ball further for those with slower swing speeds. Decreasing loft (-1, –2) lowers the trajectory and reduces spin, ideal for high-speed players looking to pierce through the wind.
2. Bias and Face Angle: The ‘D’ and ‘N/S’ Settings
Your horizontal accuracy—whether the ball goes straight, left, or right—is heavily influenced by the bias setting.
- Draw Bias (‘D’): If you struggle with a slice (the ball curving unintentionally to the right for a right-handed golfer), rotating the adapter to the ‘D’ marking is your solution. This setting encourages a “draw” flight path by slightly closing the face or shifting the internal weight bias.
- Neutral/Standard (‘N’ or ‘S’): The ‘S’ or ‘N’ setting returns the club to its stock specifications. This keeps the club at its original loft, lie angle, and a square face angle. For golfers who hit the ball consistently straight, maintaining this neutral setting is recommended to ensure maximum performance consistency.
3. The Lie Angle: “Lie Plus” Innovation
The lie angle affects how the club sits at impact. Some Krank models feature a “Lie Plus” option. This setting increases the lie angle, making the club more “upright”.
This is particularly beneficial for taller golfers or those whose swing plane requires a more upright posture to ensure the center of the face makes contact with the ball.
The Professional Protocol: Step-by-Step Adjustment
Precision adjustments require a precise process. To ensure the longevity of your equipment and the accuracy of your settings, follow this professional protocol using the Krank torque wrench.
Step 1: The Release (Loosen)
Insert the Krank wrench into the screw located on the sole of the clubhead. Turn the screw counterclockwise until the shaft can be separated from the head.
Note that with the Tri-Sleeve, you do not always need to remove the head entirely to rotate the cogs.
Step 2: The Calibration (Adjust)
Rotate the adapter cog to your desired setting based on the ball flight issues you wish to correct.
Step 3: The Alignment
This is the most critical step for accuracy. You must ensure your chosen setting (for example, the ‘+1’ or ‘D’) is perfectly lined up with the white line located on the rear of the hosel or clubhead. If the markings are not aligned with this white indicator, the internal cogs may not seat properly.
Step 4: The Integration (Secure)
Re-insert the shaft into the head, ensuring the cogs lock together firmly. Turn the screw clockwise.
Step 5: The Verification (The “Click”)
Continue tightening the screw until the wrench produces an audible “click”. This click is a safety and performance feature indicating that the screw has reached the optimal torque.
Do not stop tightening until you hear this click, as a loose head can lead to inconsistent shots or damage to the adapter.
Strategic Troubleshooting: Solving Real-World Flight Issues
A golfer must analyze their “performance gap.” Use the following data-driven adjustments to solve common flight problems.
| If your ball flight is… | Your Goal is to… | Suggested Krank Setting |
|---|---|---|
| Slicing to the right | Reduce side spin/Close face | Rotate to ‘D’ (Draw) |
| Ballooning (Too high) | Lower trajectory/spin | Rotate to ‘-1’ or ‘-2’ |
| Dying (Too low) | Increase carry/launch | Rotate to ‘+1’ or ‘+2’ |
| Consistently Straight | Maintain predictability | Keep at ‘S’ or ‘N’ (Neutral) |
Professional Insight on Consistency
Experts recommend that if you do not struggle with a chronic slice, you should prioritize a neutral face angle.
While the draw bias is a powerful tool, a neutral setting often provides the most reliable feedback for swing improvements and long-term performance stability.
Enhanced FAQ: Expert Answers to Common Queries
Q: Can I use any golf wrench to adjust my Krank driver?
A: It is highly recommended to use the provided Krank torque wrench. These wrenches are calibrated to the specific torque requirements of the Tri-Sleeve system. Using an uncalibrated tool could lead to under-tightening or over-tightening.
Q: Does changing the loft affect the face angle?
A: In most adjustable sleeve systems, increasing loft slightly closes the face, while decreasing loft slightly opens it. This is why aligning the markings correctly with the white line is essential to ensure you are getting the specific mechanical change you intended.
Q: How often should I check the tightness of my driver head?
A: While the Tri-Sleeve is secure once it “clicks,” it is a best practice to check the tightness periodically, especially if you play frequently or experience extreme temperature changes. Always tighten until the wrench clicks to ensure safety.
Q: What if my adapter doesn’t have a ‘+2’ setting?
A: Adjustment ranges can vary slightly between models like the Formula X and the 6.5. Always refer to the specific markings on your adapter sleeve to see the available range for your club.
Conclusion: Mastering Your Gear
The Krank Tri-Sleeve system is more than just a mechanical feature; it is a strategic asset. By understanding how to manipulate loft, lie, and draw bias, you transition from a golfer who “hits” to a golfer who “engineers” their game.
Whether you are dialing in a ‘+1’ loft increase for more carry or utilizing the ‘D’ setting to eliminate a pesky slice, the precision of Krank’s adjustment guide ensures you have the tools to dominate the fairway. Remember: loosen, rotate, align with the white line, and always wait for the click.